AIR CONDITIONING PANEL REMOVAL
-
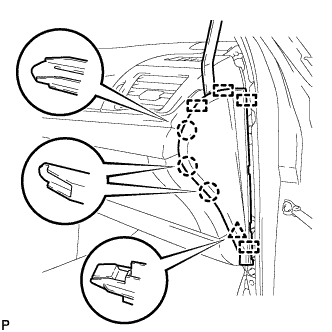
DISCONNECT FRONT DOOR OPENING TRIM WEATHERSTRIP
Tech Tips
Use the same procedure for the RH and LH side Click here.
-
REMOVE INSTRUMENT SIDE PANEL
-
Using a moulding remover, disengage the 3 claws, clip and 4 guides, and remove the instrument side panel RH.
-
Disconnect the connector.
-
-
REMOVE NO. 3 INSTRUMENT CLUSTER FINISH PANEL GARNISH (for Metal Finish Panel and Urethane Panel)
-
Disengage the 5 clips and remove the No. 3 instrument cluster finish panel garnish.
-
-
REMOVE NO. 3 INSTRUMENT CLUSTER FINISH PANEL GARNISH (for Wood Panel and Bamboo Panel)
-
Disengage the 4 clips and remove the No. 3 instrument cluster finish panel garnish.
-
-
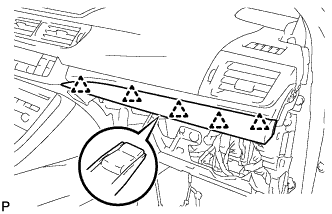
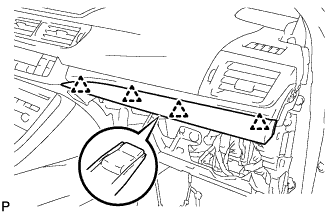
REMOVE LOWER CENTER INSTRUMENT PANEL FINISH PANEL
-
Open the glove compartment door.
-
Using a moulding remover, disengage the 7 claws and 4 guides, and remove the lower center instrument panel finish panel as shown in the illustration.
-
-
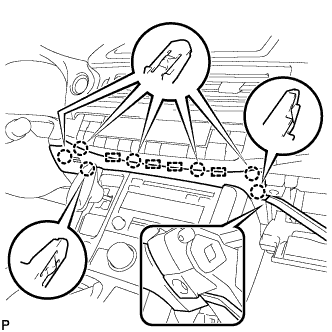
REMOVE AIR CONDITIONING CONTROL ASSEMBLY
-
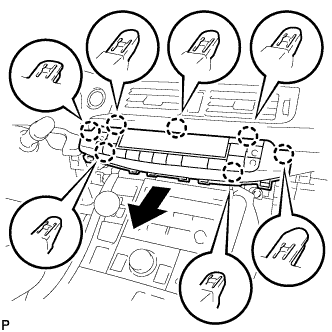
Disengage the 7 claws and remove the air conditioning control assembly as shown in the illustration.
-
Disconnect the connector.
-
-
REMOVE LOWER HEATER CONTROL BASE
-
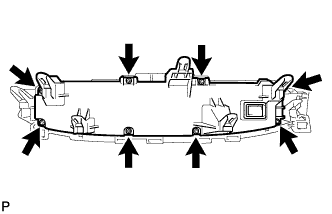
Remove the 8 screws and remove the lower heater control base.
-
-
REMOVE CENTER CLUSTER MODULE CIRCUIT
Note
When disassembling the center cluster module circuit, eliminate static electricity by touching the vehicle body to prevent electrical components from being damaged.
-
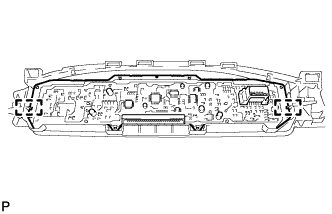
Disengage the 2 guides and remove the center cluster module circuit.
-