RADIO ANTENNA CORD REMOVAL
-
REMOVE UPPER INSTRUMENT PANEL ASSEMBLY (for LHD)
-
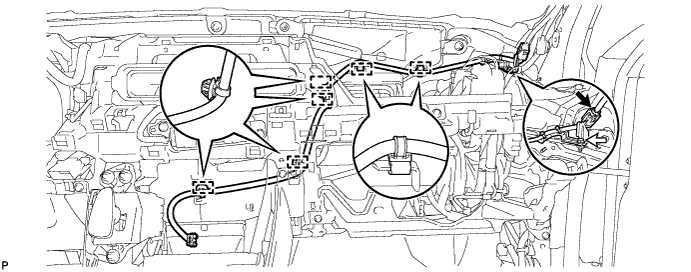
REMOVE ANTENNA CORD SUB-ASSEMBLY (for LHD)
-
Disconnect the connector.
-
Remove the bolt.
-
Disengage the 6 clamps and remove the antenna cord sub-assembly.
-
-
REMOVE LOWER INSTRUMENT PANEL SUB-ASSEMBLY (for RHD)
-
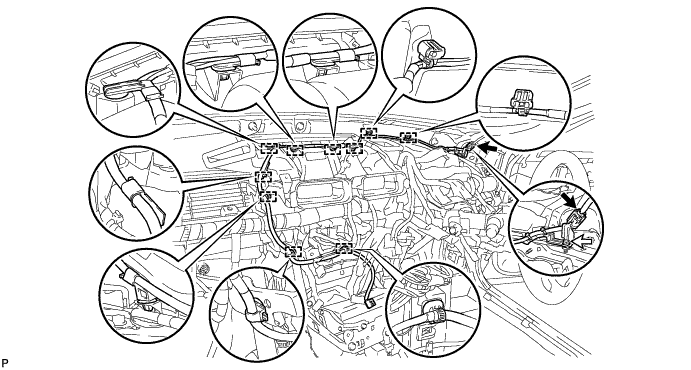
REMOVE ANTENNA CORD SUB-ASSEMBLY (for RHD)
-
Disconnect the connector.
-
Remove the bolt.
-
Disengage the 10 clamps and remove the antenna cord sub-assembly.
-
-
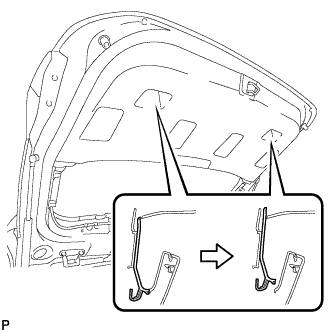
REMOVE ROOF HEADLINING ASSEMBLY
-
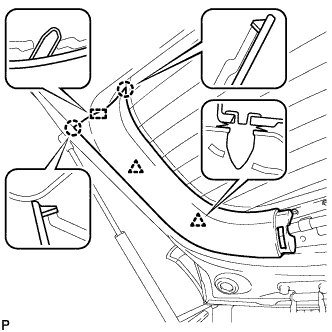
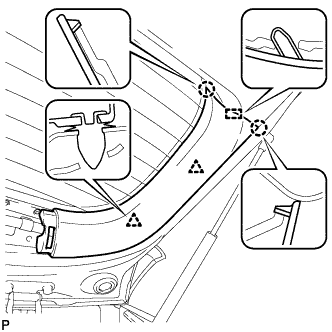
REMOVE NO. 2 ANTENNA CORD SUB-ASSEMBLY
-
Peel back the tape used to secure the antenna cord only to the extent that allows removal of the No. 2 antenna cord sub-assembly.
Tech Tips
Tape is not available as a supply part. Try to leave as much tape as possible on the roof headlining so that the tape can be reused.
-
Remove the No. 2 antenna cord sub-assembly from the roof headlining.

Text in Illustration *1 Tape - - *a Front Side - -
-
-
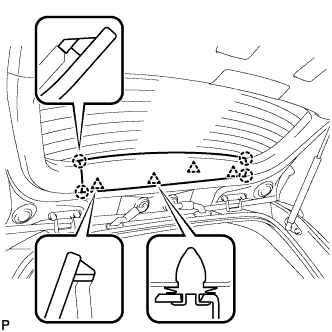
REMOVE NO. 3 ANTENNA CORD SUB-ASSEMBLY
-
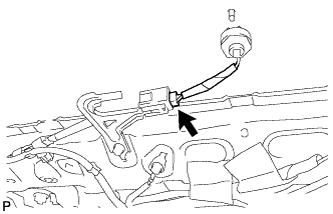
Disconnect the connector.
-
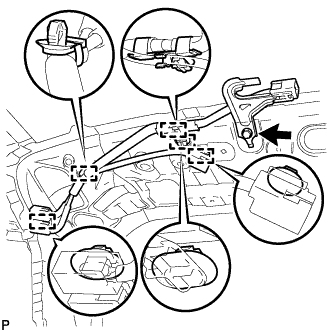
Remove the bolt.
-
Disengage the 5 clamps and remove the No. 3 antenna cord sub-assembly.
-
-
REMOVE UPPER BACK DOOR TRIM PANEL ASSEMBLY
-
Using a moulding remover, disengage the 4 clips and 4 claws, and remove the upper back door trim panel assembly.
-
-
REMOVE BACK DOOR SIDE GARNISH LH
-
Disengage the 2 clips, 2 claws and guide, and remove the back door side garnish LH.
-
-
REMOVE BACK DOOR SIDE GARNISH RH
-
Disengage the 2 clips, 2 claws and guide, and remove the back door side garnish RH.
-
-
REMOVE BACK DOOR TRIM BOARD ASSEMBLY
-
Using a screwdriver with its tip wrapped in protective tape, slide the handle plate of the back door trim board to disengage it.
-
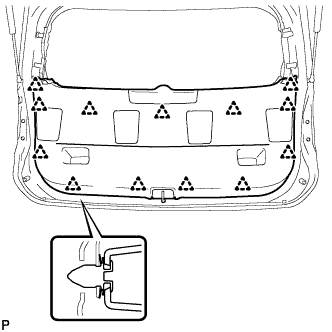
Disengage the 13 clips and remove the back door trim board assembly.
-
-
REMOVE NO. 4 ANTENNA CORD SUB-ASSEMBLY
-
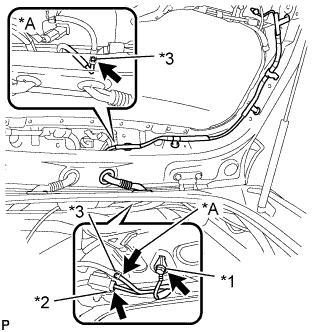
Text in Illustration *A w/ Rear Wiper *1 Bolt *2 Connector *3 Washer hose Remove the bolt.
-
Disconnect the connector.
-
w/ Rear Wiper:
-
Disconnect the washer hose.
-
-
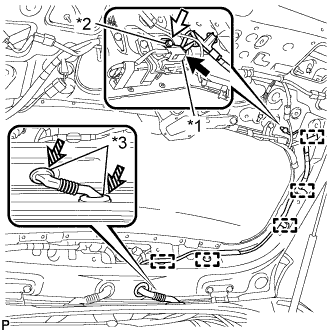
Text in Illustration *1 Connector *2 Bolt *3 Grommet Disconnect the connector.
-
Remove the bolt.
-
Disengage the 5clamps.
-
Disengage the 2 grommets and remove the No. 4 antenna cord sub-assembly.
-