YAW RATE AND ACCELERATION SENSOR REMOVAL
Note
While the auxiliary battery is connected, even if the power switch is off, the brake control system activates when the brake pedal is depressed or any door courtesy switch is turned on. Therefore, when servicing brake system components, do not depress the brake pedal or open/close the doors while the auxiliary battery is connected.
-
PRECAUTION
Note
After turning the power switch off, waiting time may be required before disconnecting the cable from the negative (-) auxiliary battery terminal, Therefore, make sure to read the disconnecting the cable from the negative (-) auxiliary battery terminal notices before proceeding with work Click here.
-
DISCONNECT CABLE FROM NEGATIVE AUXILIARY BATTERY TERMINAL
-
for 2ZR-FXE: Click here
-
for 5ZR-FXE: Click here
-
-
REMOVE REAR CONSOLE BOX ASSEMBLY
-
REMOVE SHIFT LEVER KNOB SUB-ASSEMBLY
-
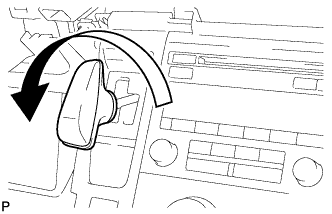
Turn the shift lever knob counterclockwise and remove the shift lever knob sub-assembly.
-
-
REMOVE INTEGRATION CONTROL AND PANEL ASSEMBLY
-
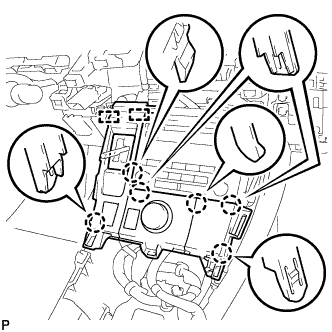
Disengage the 6 claws and 2 guides.
-
Disengage the clamp.
-
Disconnect each connector and remove the integration control and panel assembly.
-
-
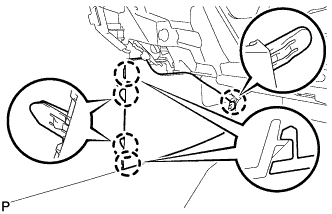
REMOVE CONSOLE BOX INSERT
-

Disengage the 2 clips and 2 claws, and remove the console box insert.
-
-
REMOVE CONSOLE BOX LH
-

Remove the bolt <A>.
-
Using a clip remover, remove the clip.
-
Using a clip remover, disengage the 3 clips.
-
Disengage the 2 claws and guide, and remove the console box LH.
-
-
REMOVE FRONT NO. 2 CONSOLE BOX INSERT (w/ Navigation System for DVD)
-
Disengage the 5 claws and remove the front No. 2 console box insert.
-
-
REMOVE CONSOLE BOX RH (w/ Navigation System for DVD)
-

Remove the bolt <A>.
-
Using a clip remover, remove the clip.
-
Using a clip remover, disengage the 3 clips.
-
Disengage the 2 claws and guide, and remove the console box RH.
-
-
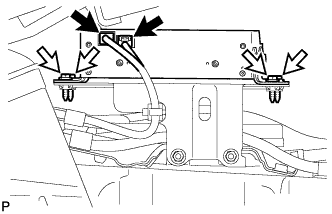
REMOVE NO. 3 CONSOLE BOX MOUNTING BRACKET (w/ Navigation System for DVD)
-
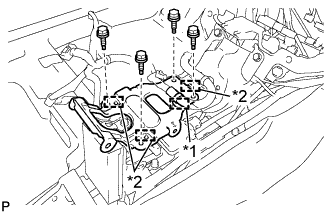
Text in Illustration *1 Clamp *2 Guide Disengage the clamp.
-
Remove the 4 bolts <A>.
-
Disengage the 3 guides and remove the No. 3 console box mounting bracket.
-
-
REMOVE MULTI-MEDIA MODULE ASSEMBLY (w/ Navigation System for DVD)
-
Disconnect the 2 connectors.
-
Remove the 4 bolts and multi-media module assembly.
-
-
REMOVE NO. 5 DISC PLAYER BRACKET (w/ Navigation System for DVD)
-
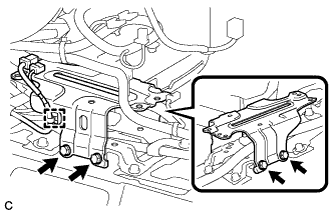
Disengage the clamp.
-
Remove the 4 bolts and No. 5 disc player bracket.
-
-
REMOVE YAW RATE AND ACCELERATION SENSOR
-
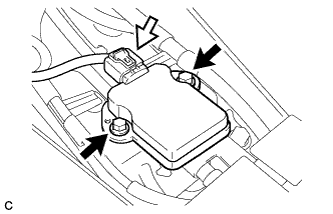
Remove the 2 bolts and yaw rate and acceleration sensor.
-
Disconnect the connector from the yaw rate and acceleration sensor.
-