BACK DOOR OUTSIDE GARNISH REMOVAL
-
REMOVE UPPER BACK DOOR TRIM PANEL ASSEMBLY
-
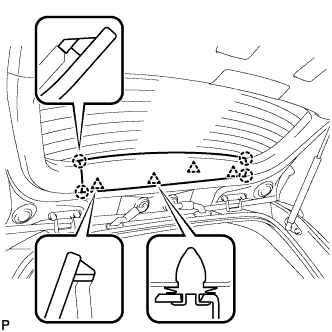
Using a moulding remover, disengage the 4 clips and 4 claws, and remove the upper back door trim panel assembly.
-
-
REMOVE BACK DOOR SIDE GARNISH LH
-
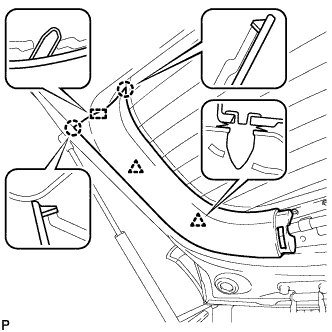
Disengage the 2 clips, 2 claws and guide, and remove the back door side garnish LH.
-
-
REMOVE BACK DOOR SIDE GARNISH RH
-
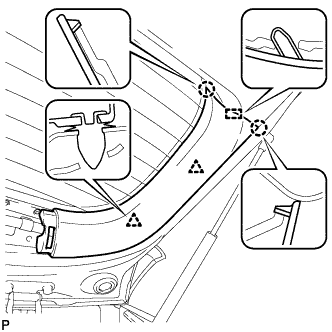
Disengage the 2 clips, 2 claws and guide, and remove the back door side garnish RH.
-
-
REMOVE BACK DOOR TRIM BOARD ASSEMBLY
-
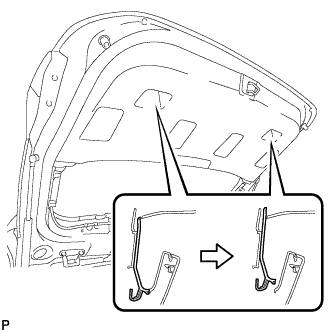
Using a screwdriver with its tip wrapped in protective tape, slide the handle plate of the back door trim board to disengage it.
-
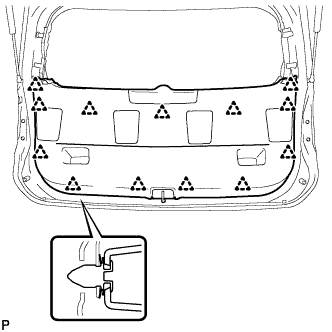
Disengage the 13 clips and remove the back door trim board assembly.
-
-
REMOVE REAR LIGHT ASSEMBLY LH
-
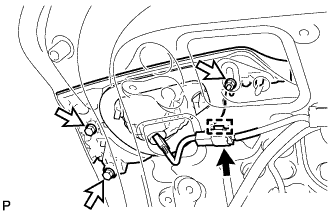
Disengage the clamp and disconnect the connector.
-
Remove the 3 nuts and rear light assembly.
-
-
REMOVE REAR LIGHT ASSEMBLY RH
Tech Tips
Use the same procedure as for the LH side.
-
REMOVE BACK DOOR OPENER SWITCH ASSEMBLY
-
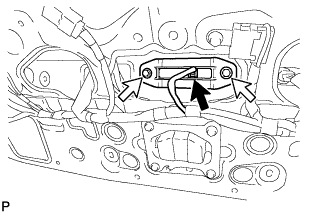
Disconnect the connector.
-
Remove the 2 bolts and back door opener switch assembly.
-
-
REMOVE BACK DOOR OUTSIDE GARNISH SUB-ASSEMBLY
-
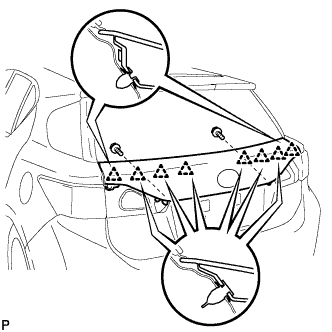
Remove the 2 screws.
-
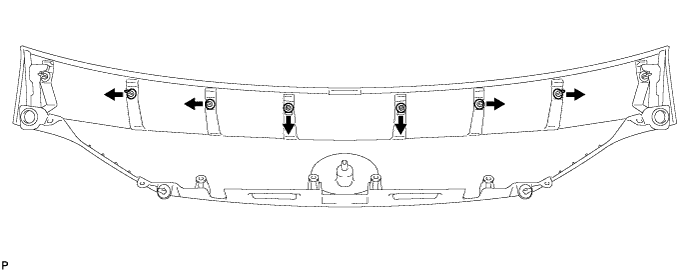
Disengage the 8 clips and remove the back door outside garnish sub-assembly.
-
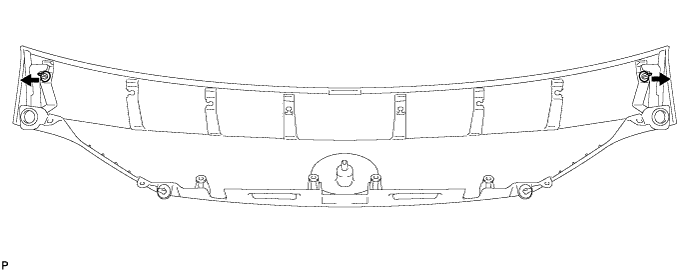
Remove the 6 clips (No. 2 back door outside garnish clips) as shown in the illustration.
-
Remove the 2 clips (back door outside garnish clips) as shown in the illustration.
-
-
REMOVE BACK DOOR UPPER OUTSIDE GARNISH LH
-

Text in Illustration *1 Double-sided Tape Remove the screw and remove the back door upper outside garnish LH.
-
-
REMOVE BACK DOOR UPPER OUTSIDE GARNISH RH
Tech Tips
Use the same procedure as for the LH side.
-
REMOVE BACK DOOR OUTSIDE GARNISH PROTECTOR
-
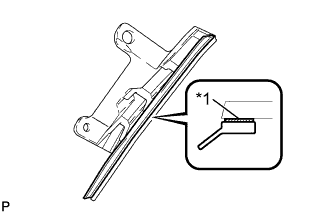
Text in Illustration *1 Double-sided Tape Remove the back door outside garnish protector.
Tech Tips
Use the same procedure for the RH side and LH side.
-
-
REMOVE SYMBOL EMBLEM
-

Text in Illustration *1 Wooden Block *2 Piano Wire *3 Protective Tape Put protective tape around the symbol emblem.
-
Insert a piano wire between the vehicle body and symbol emblem.
-
Tie objects that can serve as handles (for example, wooden blocks) to both wire ends.
-
Pull the piano wire and scrape off the double-sided tape that holds the symbol emblem to the vehicle body.
Note
-
If reusing the symbol emblem, take care not to damage the symbol emblem.
-
Be careful not to damage the vehicle body.
-
-
Remove the symbol emblem.
-