BACK DOOR OUTSIDE GARNISH INSTALLATION
-
INSTALL SYMBOL EMBLEM
-
Clean the vehicle body surface.
-
Using a heat light, heat the vehicle body surface.
-
Remove the double-sided tape from the vehicle body.
-
Wipe off any tape adhesive residue with cleaner.
-
-
Clean the symbol emblem. (If reusing the symbol emblem)
-
Using a heat light, heat the symbol emblem.
-
Remove the double-sided tape from the symbol emblem.
-
Wipe off any tape adhesive residue with cleaner.
-
Apply new double-sided tape to the symbol emblem.
-
-
Install the symbol emblem.
-
Using a heat light, heat the vehicle body and symbol emblem.
-
Remove the release paper from the symbol emblem.
Tech Tips
After removing the release paper, keep the exposed adhesive free from foreign matter.
-
Install the symbol emblem.
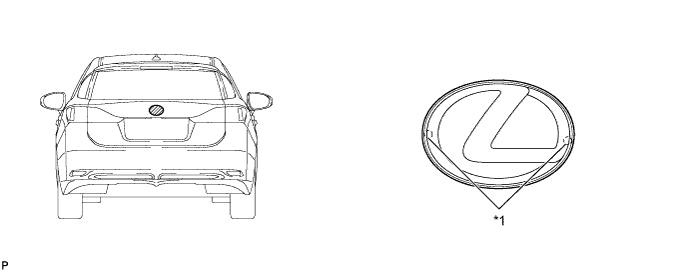
Text in Illustration *1 Location Pin - -
-
-
-
INSTALL BACK DOOR OUTSIDE GARNISH PROTECTOR
-
Wipe off any tape adhesive residue with cleaner.
-
Remove the release paper from the back door outside garnish protector.
Tech Tips
After removing the release paper, keep the exposed adhesive free from foreign matter.
-
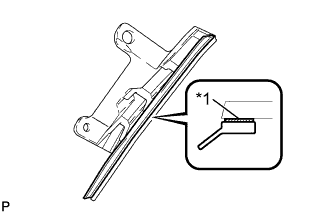
Text in Illustration *1 Double-sided Tape Install a new back door outside garnish protector as shown in the illustration.
-
-
INSTALL BACK DOOR UPPER OUTSIDE GARNISH LH
-
Clean the back door outside garnish sub-assembly surface.
-
Remove any double-sided tape from the luggage compartment door outside garnish sub-assembly.
-
Wipe off any tape adhesive residue with cleaner.
-
-
Install the back door upper outside garnish LH.
-
Remove the release paper from the back door upper outside garnish LH.
Tech Tips
After removing the release paper, keep the exposed adhesive free from foreign matter.
-
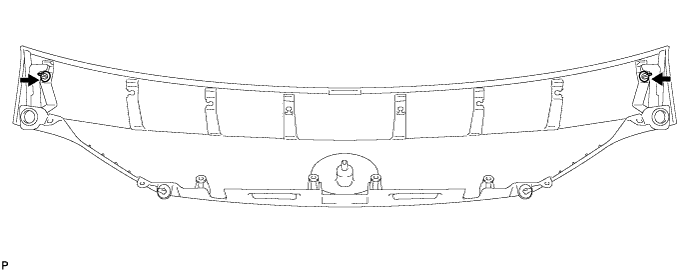
Install a new back door upper outside garnish LH as shown in the illustration.
-
Install the screw.
-
-
-
INSTALL BACK DOOR UPPER OUTSIDE GARNISH RH
Tech Tips
Use the same procedure as for the LH side.
-
INSTALL BACK DOOR OUTSIDE GARNISH SUB-ASSEMBLY
-
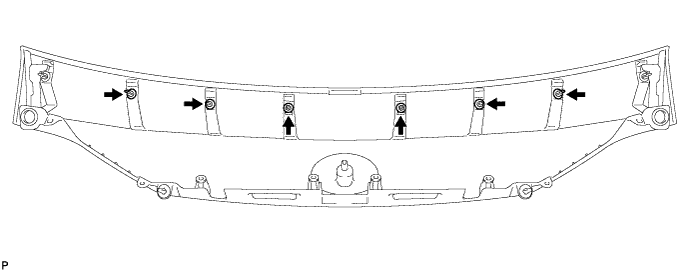
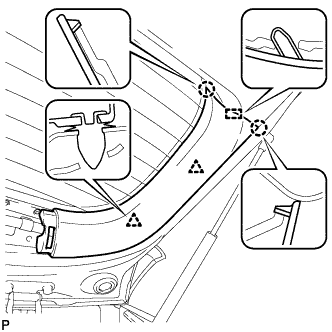
Install the new 2 clips (back door outside garnish clips) as shown in the illustration.
-
Install the new 6 clips (No. 2 back door outside garnish clips) as shown in the illustration.
-
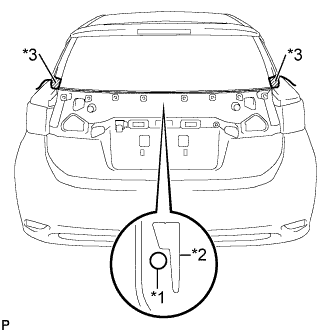
Text in Illustration *1 String *2 Back Window Lower Moulding *3 Masking Tape Pass a string behind the back window lower moulding and tape both ends with masking tape as shown in the illustration.
-
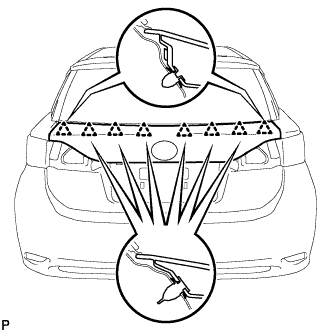
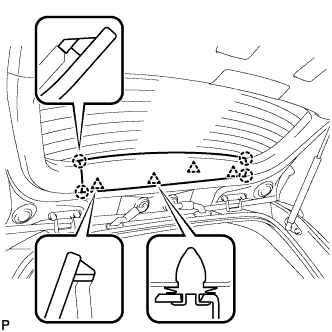
Engage the 8 clips to install the back door outside garnish sub-assembly.
Tech Tips
Make sure not to dislodge the string under the back window lower moulding.
-
Apply soapy water to the back window lower moulding.
-
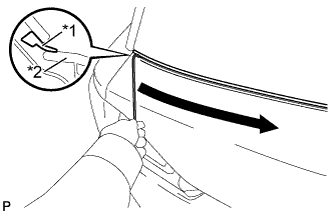
Text in Illustration *1 Back Window Lower Moulding *2 Back Door Outside Garnish Sub-assembly Pull out the string slowly, starting from one end and working to the other end, as shown in the illustration.
Note
Make sure not to damage the back window lower moulding.
-
Check that the back window lower moulding is not caught behind the back door outside garnish sub-assembly.
-
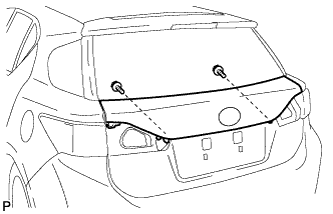
Install the 2 screws.
-
-
INSTALL BACK DOOR OPENER SWITCH ASSEMBLY
-
Install the back door opener switch assembly with the 2 bolts.
-
Connect the connector.
-
-
INSTALL REAR LIGHT ASSEMBLY LH
-
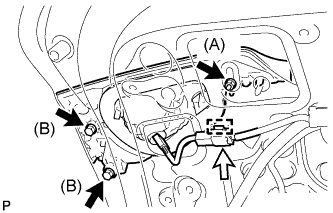
Install the rear light assembly with the 3 nuts.
- Torque:
- Nut (A)
- 5.0 N*m { 51 kgf*cm, 44 in.*lbf }
- Nut (B)
- 3.9 N*m { 40 kgf*cm, 35 in.*lbf }
-
Connect the connector and engage the clamp.
-
-
INSTALL REAR LIGHT ASSEMBLY RH
Tech Tips
Use the same procedure as for the LH side.
-
INSTALL BACK DOOR TRIM BOARD ASSEMBLY
-
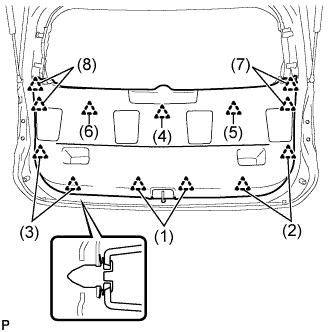
Engage the 13 clips to install the back door trim board assembly.
Tech Tips
Engage the clips in the order shown in the illustration.
-
Slide the handle plate of the back door trim board to engage it.
-
-
INSTALL BACK DOOR SIDE GARNISH LH
-
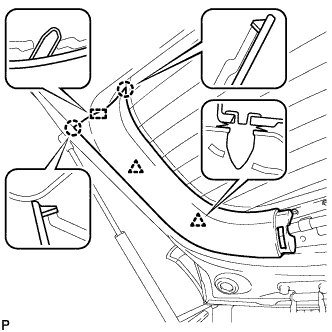
Engage the 2 clips, 2 claws and guide to install the back door side garnish LH.
-
-
INSTALL BACK DOOR SIDE GARNISH RH
-
Engage the 2 clips, 2 claws and guide to install the back door side garnish RH.
-
-
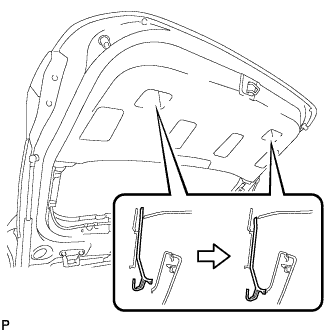
INSTALL UPPER BACK DOOR TRIM PANEL ASSEMBLY
-
Engage the 4 clips and 4 claws to install the upper back door trim panel assembly.
-