STOP LIGHT CONTROL RELAY REMOVAL
-
REMOVE NO. 1 INSTRUMENT PANEL UNDER COVER SUB-ASSEMBLY (for LHD)
-
Remove the 2 screws <E>.
-
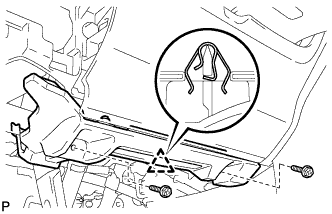
Disengage the clip.
-
Disengage the clamp.
-
Disconnect each connector and remove the No. 1 instrument panel under cover sub-assembly.
-
-
REMOVE NO. 1 INSTRUMENT PANEL UNDER COVER SUB-ASSEMBLY (for RHD)
-
Remove the screw <E>.
-
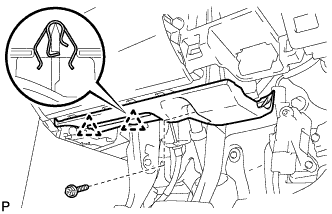
Disengage the 2 clips.
-
Disengage the clamp.
-
Disconnect each connector and remove the No. 1 instrument panel under cover sub-assembly.
-
-
DISCONNECT FRONT DOOR OPENING TRIM WEATHERSTRIP
-
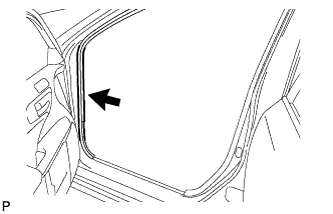
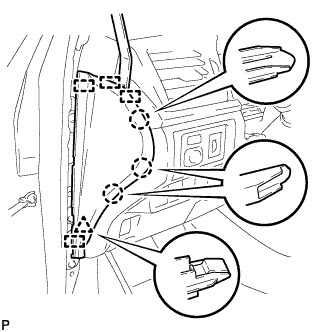
Disconnect the front door opening trim weatherstrip.
-
Remove the residual weatherstrip sealant from the body of the vehicle using cleaner.
Note
Remove the sealant completely. Any residual sealant may transfer to other areas of the vehicle when removing/installing the interior parts.
-
-
REMOVE INSTRUMENT SIDE PANEL
-
Using a moulding remover, disengage the 3 claws, clip and 4 guides, and remove the instrument side panel LH.
-
-
REMOVE LOWER INSTRUMENT PANEL FINISH PANEL SUB-ASSEMBLY
-
Using a moulding remover, disengage the 8 claws and clip.
-
Disconnect each connector and remove the lower instrument panel finish panel sub-assembly.
-
-
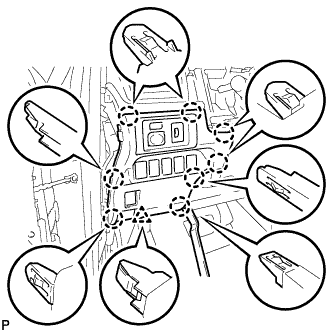
REMOVE STOP LIGHT CONTROL ECU ASSEMBLY (for LHD)
-

Using a clip remover, disengage the clamp.
-
Disconnect the connector and remove the stop light control ECU assembly.
-
-
REMOVE STOP LIGHT CONTROL ECU ASSEMBLY (for RHD)
-
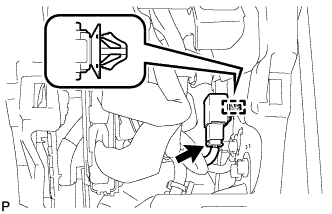
Using a clip remover, disengage the clamp.
-
Disconnect the connector and remove the stop light control ECU assembly.
-