RADIO ANTENNA CORD INSTALLATION
-
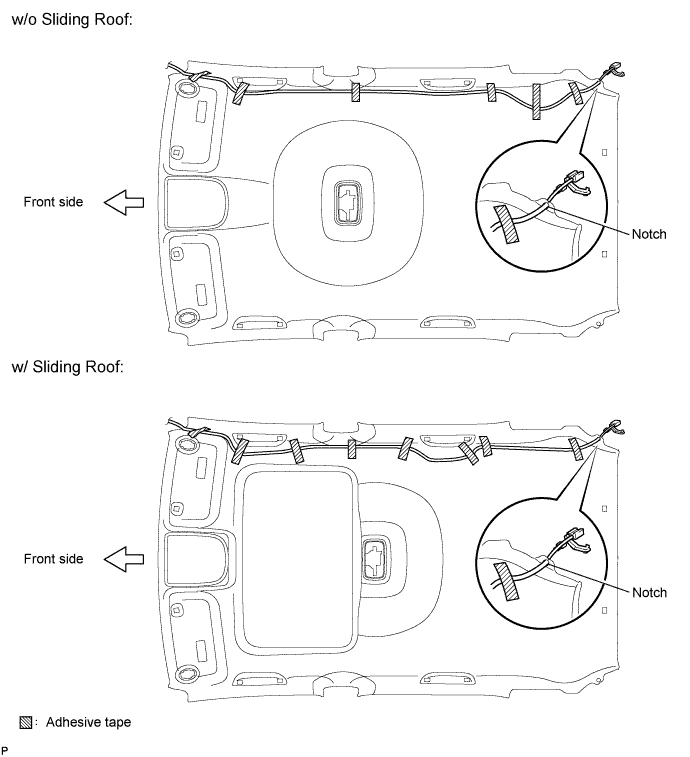
INSTALL NO. 2 ANTENNA CORD SUB-ASSEMBLY (for TMC Made)
-
Aligning the No. 2 antenna cord sub-assembly with the markings on the roof headlining assembly, temporarily install the cord.
-
Attach adhesive tape aligned with the markings on the roof headlining assembly as shown in the illustration.
-
Secure the No. 2 antenna cord sub-assembly to the notch of the roof headlining assembly. Install the No. 2 antenna cord sub-assembly to the roof headlining assembly.
-
-
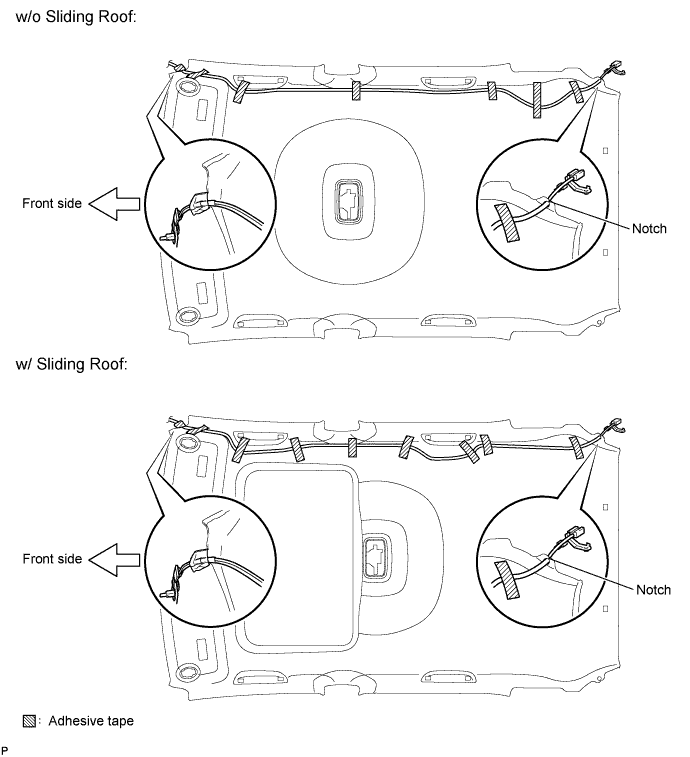
INSTALL NO. 2 ANTENNA CORD SUB-ASSEMBLY (for TMUK, TMMT Made)
-
Aligning the No. 2 antenna cord sub-assembly with the markings on the roof headlining assembly, temporarily install the cord.
-
Attach adhesive tape aligned with the markings on the roof headlining assembly as shown in the illustration.
-
Secure the No. 2 antenna cord sub-assembly to the notch of the roof headlining assembly. Install the No. 2 antenna cord sub-assembly to the roof headlining assembly.
-
-
INSTALL ROOF HEADLINING ASSEMBLY
-
INSTALL ANTENNA CORD SUB-ASSEMBLY (for LHD)
-
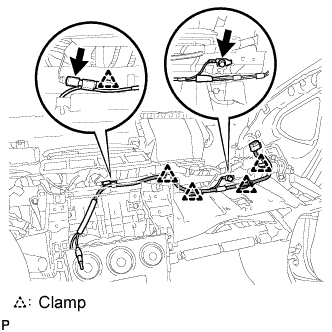
Engage the 5 clamps and install the antenna cord sub-assembly.
-
Connect the connector.
-
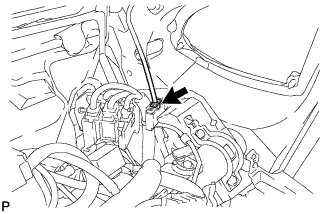
Install the bolt.
- Torque:
- 8.4 N*m { 86 kgf*cm, 74 in.*lbf }
-
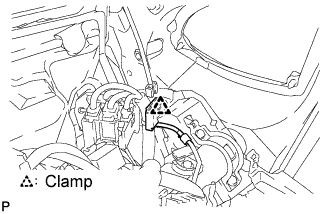
Engage the clamp.
-
Connect the connector.
-
-
INSTALL ANTENNA CORD SUB-ASSEMBLY (for RHD)
-
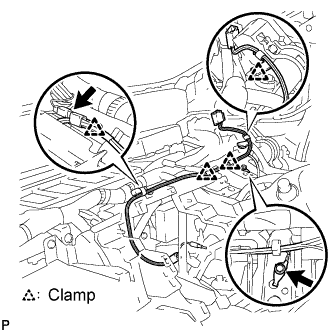
Engage the 4 clamps and install the antenna cord sub-assembly.
-
Connect the connector.
-
Install the bolt.
- Torque:
- 8.4 N*m { 86 kgf*cm, 74 in.*lbf }
-
Engage the clamp.
-
Connect the connector.
-
-
INSTALL RADIO RECEIVER WITH BRACKET (for Radio Receiver Type)
-
Connect each connector.
-
Engage the 4 clips.
-
Install the radio receiver with bracket with the 4 bolts.
-
-
INSTALL RADIO AND DISPLAY RECEIVER WITH BRACKET (for Radio and Display Type)
-
Connect each connector.
-
Install the radio and display receiver with bracket with the 4 bolts.
-
-
INSTALL RADIO RECEIVER OPENING COVER WITH BRACKET (w/o Radio Receiver)
-
Install the radio receiver opening cover with bracket with the 4 bolts <K>.
-
-
INSTALL CENTER INSTRUMENT CLUSTER FINISH PANEL SUB-ASSEMBLY (except Radio Receiver Type)
-
Engage the 4 clips and install the center instrument cluster finish panel sub-assembly.
-
-
INSTALL UPPER INSTRUMENT PANEL SUB-ASSEMBLY