RADIO RECEIVER REMOVAL
-
REMOVE INSTRUMENT PANEL FINISH PANEL END LH
-
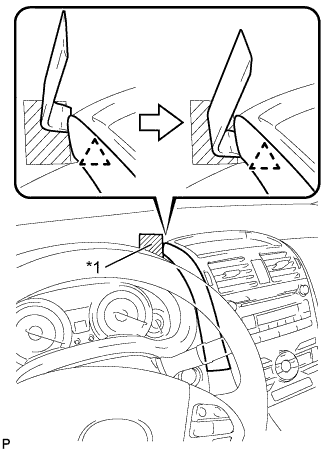
Text in Illustration *1 Protective Tape Apply protective tape to the area shown in the illustration.
-
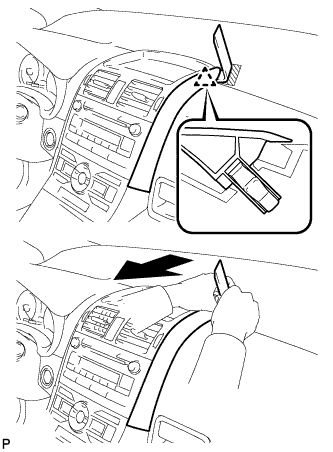
Insert a roof moulding remover and slide the remover toward the clip.
-
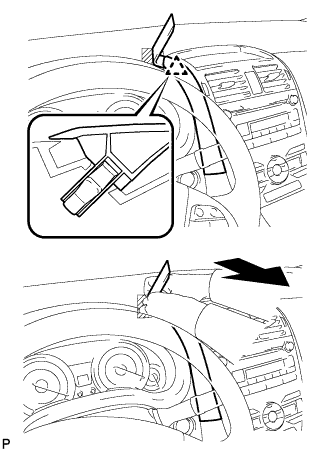
Pull the remover with both hands to disengage the clip as shown in the illustration.
-
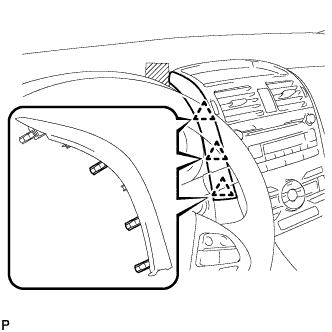
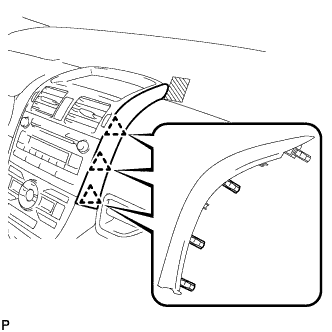
Disengage the 3 clips and remove the instrument panel finish panel end LH.
-
-
REMOVE INSTRUMENT PANEL FINISH PANEL END RH
-
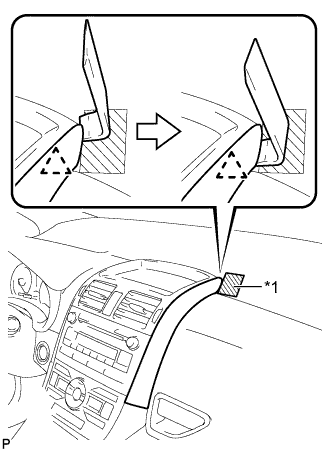
Text in Illustration *1 Protective Tape Apply protective tape to the area shown in the illustration.
-
Insert a roof moulding remover and slide the remover toward the clip.
-
Pull the remover with both hands to disengage the clip as shown in the illustration.
-
Disengage the 3 clips and remove the instrument panel finish panel end RH.
-
-
REMOVE CENTER INSTRUMENT PANEL REGISTER ASSEMBLY
-
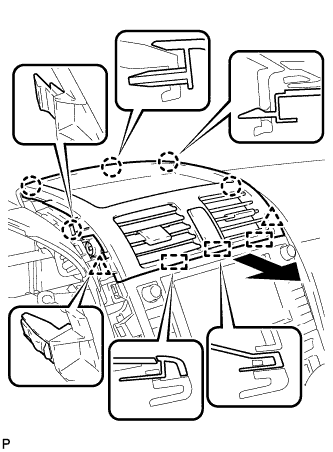
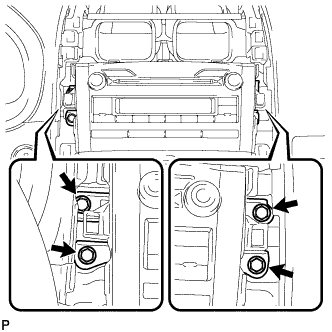
Disengage the 5 claws, 2 clips, and 3 guides.
-
Disconnect the connector and remove the center instrument panel register assembly.
-
-
REMOVE CENTER INSTRUMENT CLUSTER FINISH PANEL SUB-ASSEMBLY (for Radio and Display Type)
-
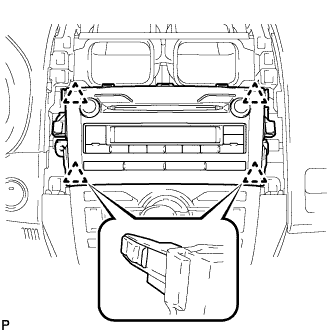
Disengage the 4 clips and remove the center instrument cluster finish panel sub-assembly.
-
-
REMOVE RADIO RECEIVER WITH BRACKET (for Radio Receiver Type)
-
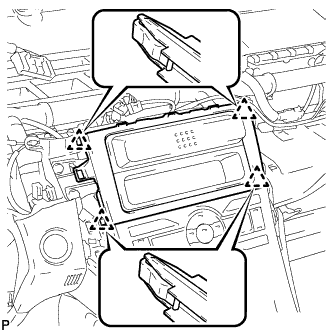
Remove the 4 bolts.
-
Pull the radio receiver with bracket toward the rear of the vehicle and disengage the 4 clips.
-
Disconnect each connector and remove the radio receiver with bracket.
-
-
REMOVE RADIO AND DISPLAY RECEIVER WITH BRACKET (for Radio and Display Type)
-
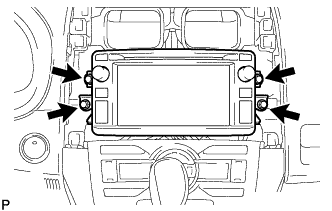
Remove the 4 bolts.
-
Disconnect each connector and remove the radio and display receiver with bracket.
-
-
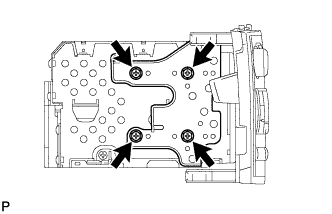
REMOVE NO. 2 RADIO BRACKET (for Radio Receiver Type)
-
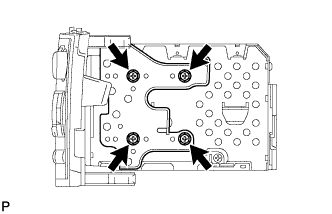
Remove the 4 screws and No. 2 radio bracket.
-
-
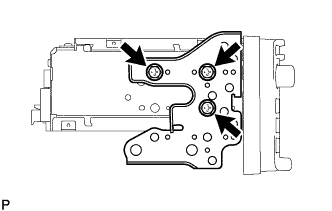
REMOVE NO. 1 RADIO BRACKET (for Radio Receiver Type)
-
Remove the 4 screws and No. 1 radio bracket.
-
-
REMOVE NO. 2 RADIO BRACKET (for Radio and Display Type)
-
w/o Navigation System:
-
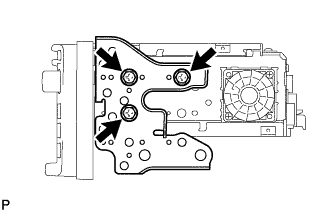
Remove the 3 screws and No. 2 radio bracket.
-
-
w/ Navigation System:
-
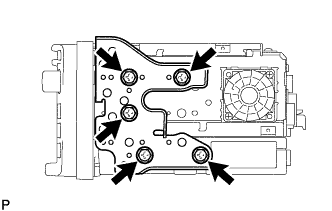
Remove the 5 screws and No. 2 radio bracket.
-
-
-
REMOVE NO. 1 RADIO BRACKET (for Radio and Display Type)
-
w/o Navigation System:
-
Remove the 3 screws and No. 1 radio bracket.
-
-
w/ Navigation System:
-

Remove the 5 screws and No. 1 radio bracket.
-
-
-
REMOVE EXTENSION MODULE (w/ Navigation System)
-
Disconnect each connector and remove the navigation wire and radio cable.
-
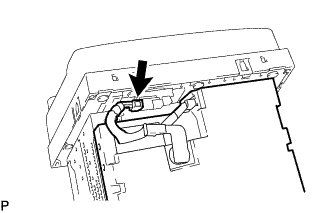
Disconnect the connector to remove the extension module.
-
-
REMOVE RADIO RECEIVER ASSEMBLY (for Radio Receiver Type)
-
REMOVE RADIO AND DISPLAY RECEIVER ASSEMBLY (for Radio and Display Type)