BLACK OUT TAPE (for Rear Door) REMOVAL
-
REMOVE REAR DOOR INSIDE HANDLE BEZEL
-
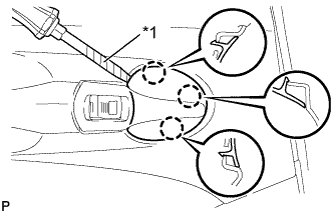
Text in Illustration *1 Protective Tape Using a screwdriver with the tip wrapped with protective tape, disengage the 3 claws and remove the rear door inside handle bezel.
-
-
REMOVE DOOR ASSIST GRIP COVER
-
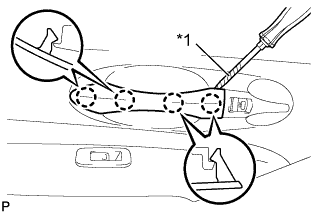
Text in Illustration *1 Protective Tape Using a screwdriver with the tip wrapped with protective tape, disengage the 4 claws and remove the door assist grip cover.
-
-
REMOVE REAR DOOR TRIM BOARD SUB-ASSEMBLY
-

Remove the 3 screws.
-
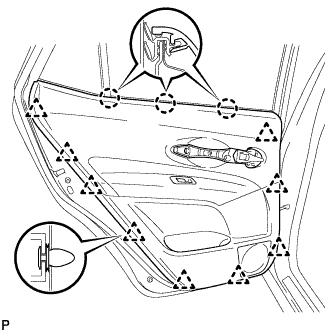
Using a clip remover, disengage the 9 clips.
-
Disengage the 3 claws and separate the rear door trim board sub-assembly from the rear door inner glass weatherstrip.
-
Disengage the 2 claws and disconnect the rear door inside handle sub-assembly.
-
Disconnect the connector.
-
-
REMOVE REAR DOOR INSIDE HANDLE SUB-ASSEMBLY
-
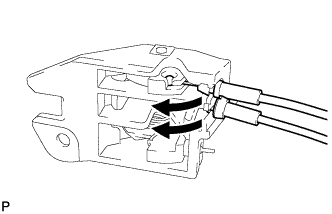
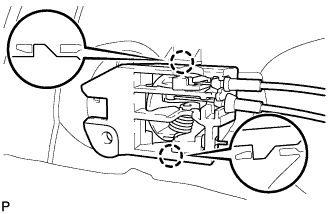
Disconnect the rear door lock remote control cable and rear door inside locking cable, and remove the rear door inside handle sub-assembly.
-
-
REMOVE REAR DOOR INNER GLASS WEATHERSTRIP
-
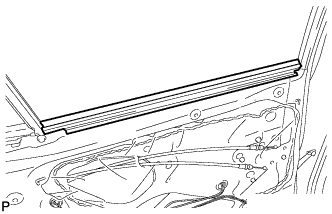
Remove the rear door inner glass weatherstrip from the rear door panel.
-
-
REMOVE REAR DOOR SERVICE HOLE COVER
-
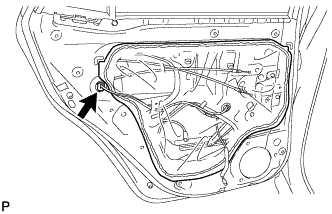
Disconnect the connector.
-
Remove the rear door service hole cover.
Tech Tips
Remove the remaining tape on the door.
-
-
REMOVE REAR DOOR GLASS RUN
-
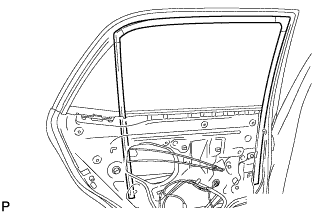
Remove the rear door glass run.
-
-
REMOVE REAR DOOR WINDOW DIVISION BAR SUB-ASSEMBLY
-
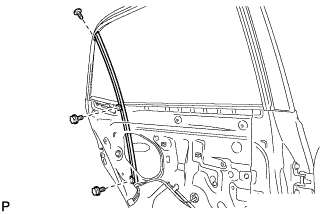
Remove the 2 bolts, screw, and rear door window division bar sub-assembly.
-
-
REMOVE REAR DOOR QUARTER WINDOW GLASS
-
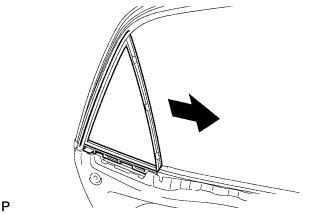
Remove the rear door quarter window glass and the rear door quarter window weatherstrip as a unit as shown in the illustration.
-
Remove the rear door quarter window glass from the rear door quarter window weatherstrip.
-
-
REMOVE REAR DOOR GLASS SUB-ASSEMBLY
-
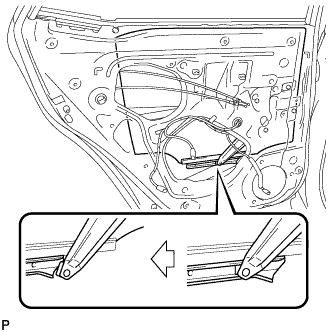
Remove the rear door glass sub-assembly from the rear door window regulator sub-assembly as shown in the illustration.
Note
Do not damage the door glass.
-
-
REMOVE REAR DOOR BELT MOULDING ASSEMBLY
-

Text in Illustration *1 Protective Tape Put protective tape around the rear door belt moulding assembly.
-
Using a screwdriver with the tip taped, disengage the 6 claws from the inside of the door.
-
Using a moulding remover, disengage the 2 clips and remove the rear door belt moulding assembly.
-
-
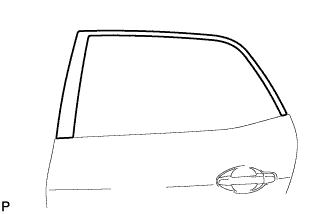
REMOVE REAR DOOR WEATHERSTRIP
-

Remove the upper part of the rear door weatherstrip to the extent that allows removal of the black out tape.
-
-
REMOVE NO. 3 BLACK OUT TAPE
-
Using a heat light, heat the No. 3 black out tape.
Heating temperature Item Temperature Vehicle Body 40 to 60°C (104 to 140°F) Note
Do not heat the vehicle body excessively.
-
Pull back an edge of the No. 3 black out tape and pull it parallel to the vehicle body to pull it off.
-