WIPER ECU REMOVAL
-
DISCONNECT CABLE FROM NEGATIVE BATTERY TERMINAL (for LHD)
Note
When disconnecting the cable, some systems need to be initialized after the cable is reconnected Click here.
-
REMOVE GLOVE COMPARTMENT DOOR ASSEMBLY (for LHD)
-
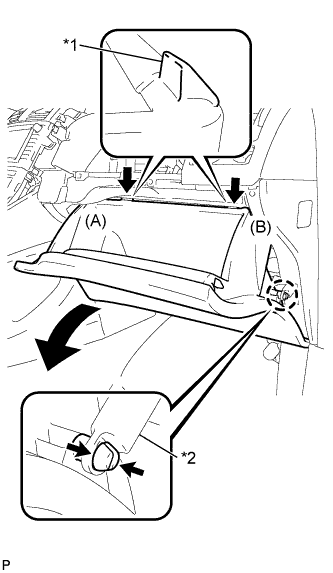
Text in Illustration *1 Stopper *2 Glove Compartment Door Stopper Disengage the claw and release the glove compartment door stopper.
-
Bend portions (A) and (B) in the direction indicated by the arrows in the illustration to release the 2 stoppers, and lower the glove compartment door assembly until the front of the door is level.
-
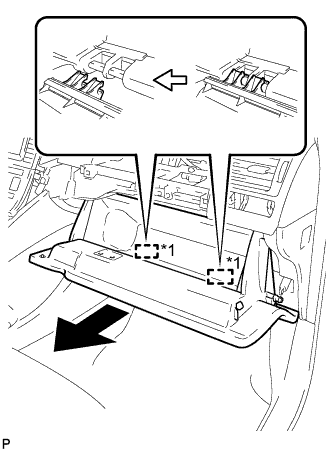
Text in Illustration *1 Hinge Pull the glove compartment door assembly horizontally toward the rear of the vehicle to release the 2 hinges, and remove the glove compartment door assembly.
Note
Pulling the glove compartment door assembly upward to remove it will cause the hinges to deform when reinstalling the door. Be sure to pull out the compartment door horizontally.
-
-
REMOVE NO. 2 INSTRUMENT PANEL UNDER COVER SUB-ASSEMBLY (for LHD)
-
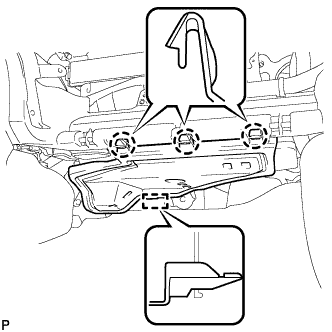
Disengage the 3 claws.
-
Disengage the guide and remove the No. 2 instrument panel under cover sub-assembly.
-
-
REMOVE FUSE BOX OPENING COVER (for RHD)
-
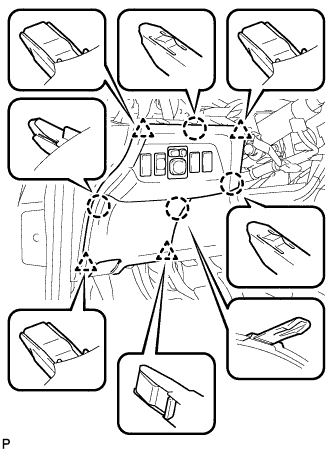
Disengage the 4 claws and 4 clips.
-
Disconnect each connector and then remove the fuse box opening cover.
-
-
REMOVE ECU INTEGRATION BOX (for LHD)
-
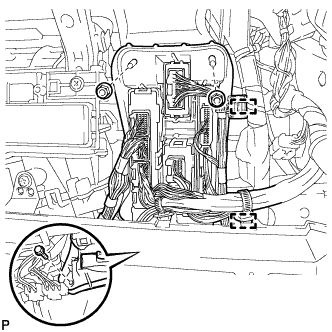
Disengage the 2 clamps.
-
Remove the bolt and 2 nuts.
-
Disconnect each connector and remove the ECU integration box.
-
-
REMOVE WINDSHIELD WIPER RELAY ASSEMBLY (for LHD)
-
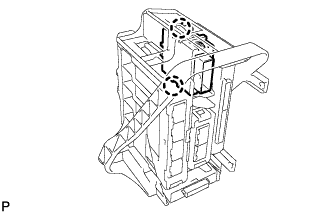
Disengage the 2 claws and remove the windshield wiper relay assembly.
-
-
REMOVE WINDSHIELD WIPER RELAY ASSEMBLY (for RHD)
-
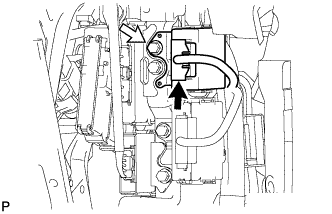
Disconnect the connector.
-
Remove the bolt and windshield wiper relay assembly.
-