FUEL LID LOCK CONTROL CABLE ASSEMBLY REMOVAL
-
REMOVE REAR FLOOR MAT
-

Remove the rear floor mat.
-
-
REMOVE REAR DECK FLOOR BOX
-
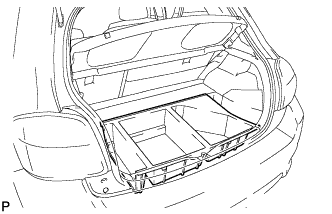
Remove the rear deck floor box.
-
-
REMOVE BATTERY BOX COVER
-
Disengage the 3 guides and remove the battery box cover.
-
-
DISCONNECT CABLE FROM NEGATIVE BATTERY TERMINAL
CAUTION:
Wait at least 90 seconds after disconnecting the cable from the negative (-) battery terminal to disable the SRS system.
Note
When disconnecting the cable, some systems need to be initialized after the cable is reconnected Click here.
-
REMOVE FRONT SEAT HEADREST ASSEMBLY
-
REMOVE OUTER SEAT TRACK COVER LH
-

Lift up the seat track adjusting handle and move the seat to the foremost position.
-
Disengage the 2 claws and remove the outer seat track cover.
-
-
REMOVE INNER SEAT TRACK COVER LH
-
Disengage the 2 claws and remove the inner seat track cover.
-
-
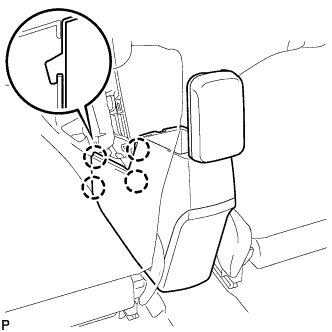
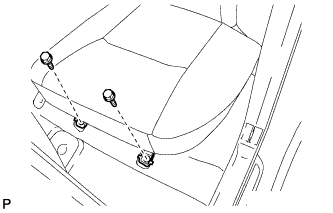
REMOVE FRONT SEAT ASSEMBLY LH
-
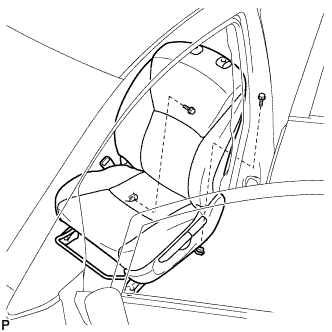
Remove the 2 bolts on the rear side of the seat.
-
Lift up the seat track adjusting handle and move the seat to the rearmost position.
-
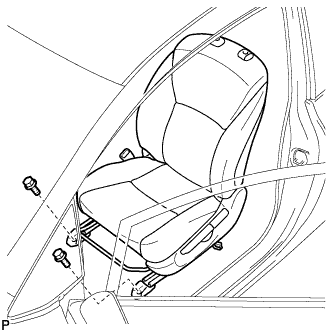
Remove the 2 bolts on the front side of the seat.
-
Lift up the seat track adjusting handle and move the seat to the center position. Also, operate the reclining adjuster release handle and move the seatback to the upright position.
-
Disconnect the connectors under the seat.
-
Remove the seat.
Note
Be careful not to damage the vehicle body.
-
-
REMOVE FRONT SEAT HEADREST ASSEMBLY (for RHD)
-
REMOVE OUTER SEAT TRACK COVER RH (for RHD)
Tech Tips
Use the same procedure as for the LH side.
-
REMOVE INNER SEAT TRACK COVER RH (for RHD)
Tech Tips
Use the same procedure as for the LH side.
-
REMOVE FRONT SEAT ASSEMBLY RH (for RHD)
Tech Tips
Use the same procedure as for the LH side.
-
REMOVE REAR CONSOLE BOX COVER (for RHD)
-
Disengage the 4 clips.
-
Disengage the 2 guides.
-
Disconnect the connector and remove the rear console box cover.
-
-
REMOVE CONSOLE BOX CARPET (for RHD)
-
Remove the console box carpet.
-
-
REMOVE REAR CONSOLE BOX ASSEMBLY (for RHD)
-
Remove the 4 bolts and 2 screws.
-
Disengage the 4 claws and remove the rear console box assembly.
-
-
REMOVE REAR SEAT HEADREST ASSEMBLY
-
REMOVE NO. 1 REAR SEAT CUSHION HINGE COVER (for LH Side)
-
Disengage the 4 claws and remove the No. 1 rear seat cushion hinge cover.
-
-
REMOVE NO. 2 REAR SEAT CUSHION HINGE COVER (for LH Side)
-
Disengage the 4 claws and remove the No. 2 rear seat cushion hinge cover.
-
-
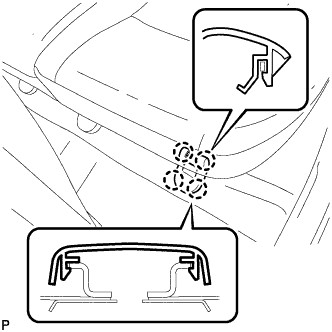
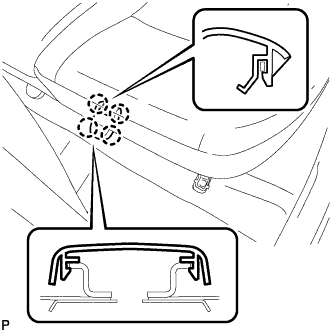
REMOVE REAR SEAT ASSEMBLY LH
-
Remove the 2 bolts on the front side of the rear seat assembly LH.
-
Recline the rear seat assembly LH forward to remove the 2 bolts and the rear seat assembly LH.
Note
Be careful not to damage the vehicle body.
-
-
REMOVE FRONT DOOR SCUFF PLATE LH
-
Disengage the 10 claws and remove the front door scuff plate LH.
-
-
REMOVE COWL SIDE TRIM BOARD LH
-

Disengage the 2 clips.
-
Disengage the guide and remove the cowl side trim board LH.
-
-
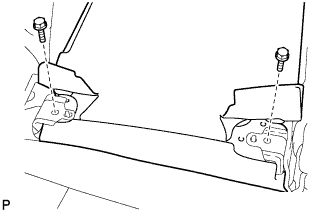
REMOVE FRONT DOOR OPENING TRIM WEATHERSTRIP LH
-
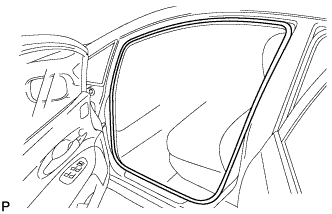
Remove the front door opening trim weatherstrip LH.
-
-
REMOVE REAR DOOR SCUFF PLATE LH
-
Disengage the 8 claws and remove the rear door scuff plate LH.
-
-
REMOVE REAR DOOR OPENING TRIM WEATHERSTRIP LH
-
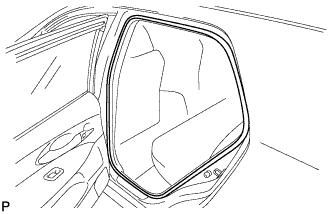
Remove the rear door opening trim weatherstrip LH.
-
-
REMOVE LAP BELT OUTER ANCHOR COVER
-
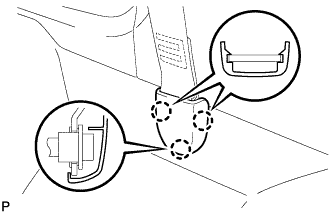
Disengage the 3 claws and remove the lap belt outer anchor cover.
-
-
DISCONNECT FRONT SEAT OUTER BELT ASSEMBLY LH
-
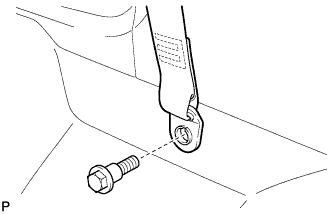
Remove the bolt and disconnect the floor end of the front seat outer belt assembly LH.
-
-
REMOVE LOWER CENTER PILLAR GARNISH LH
-
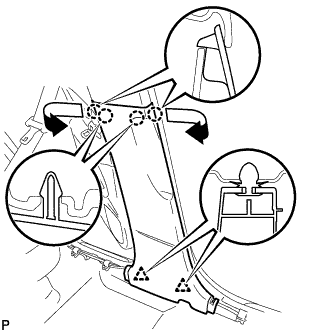
Disengage the 4 claws and 2 clips, and remove the lower center pillar garnish LH.
-
-
REMOVE FRONT DOOR SCUFF PLATE RH (for RHD)
Tech Tips
Use the same procedure as for the LH side.
-
REMOVE COWL SIDE TRIM BOARD RH (for RHD)
Tech Tips
Use the same procedure as for the LH side.
-
REMOVE FRONT DOOR OPENING TRIM WEATHERSTRIP RH (for RHD)
Tech Tips
Use the same procedure as for the LH side.
-
REMOVE REAR DOOR SCUFF PLATE RH (for RHD)
Tech Tips
Use the same procedure as for the LH side.
-
REMOVE REAR DOOR OPENING TRIM WEATHERSTRIP RH (for RHD)
Tech Tips
Use the same procedure as for the LH side.
-
REMOVE LAP BELT OUTER ANCHOR COVER (for RHD)
Tech Tips
Use the same procedure as for the LH side.
-
DISCONNECT FRONT SEAT OUTER BELT ASSEMBLY RH (for RHD)
Tech Tips
Use the same procedure as for the LH side.
-
REMOVE LOWER CENTER PILLAR GARNISH RH (for RHD)
Tech Tips
Use the same procedure as for the LH side.
-
REMOVE PACKAGE TRAY TRIM PANEL ASSEMBLY
-
Disengage the 2 suspenders.
-
Disengage the 2 pins and remove the package tray trim panel assembly.
-
-
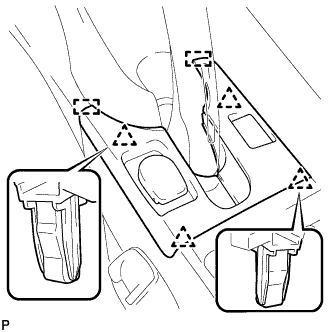
REMOVE DECK FLOOR BOX LH
-
Disengage the 3 guides and remove the deck floor box LH.
-
-
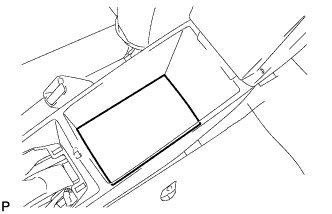
REMOVE DECK BOARD SUB-ASSEMBLY
-
Disengage the 3 claws and 3 clips, and remove the deck board sub-assembly.
-
-
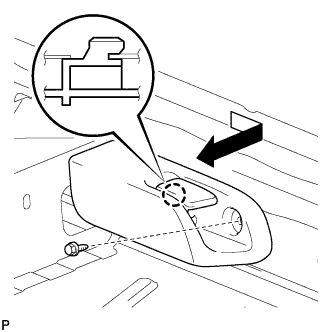
REMOVE NO. 6 BATTERY CARRIER PANEL
-
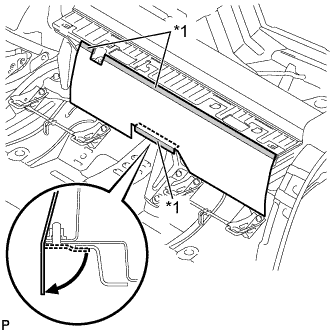
Text in Illustration *1 Double-sided Tape Remove the No. 6 battery carrier panel as shown in the illustration.
-
-
REMOVE REAR NO. 1 FLOOR BOARD
-
Remove the bolt.
-
Disengage the 2 claws, 2 clips and 3 guides, and remove the rear No. 1 floor board.
-
-
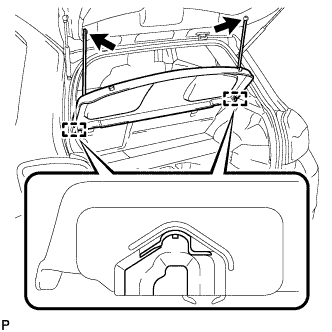
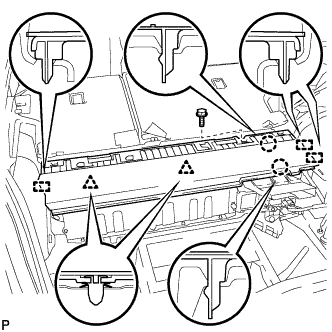
REMOVE REAR DECK TRIM COVER
-
Disengage the 10 claws and remove the rear deck trim cover.
-
-
REMOVE REAR SEATBACK HINGE SUB-ASSEMBLY (for LH Side)
-
Remove the bolt and rear seatback hinge sub-assembly.
-
-
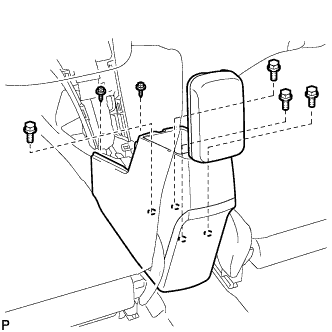
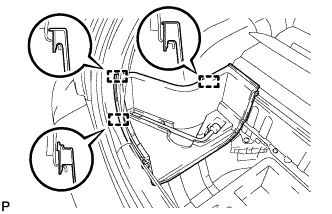
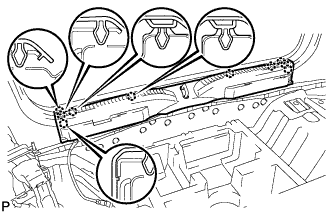
REMOVE REAR SEAT SIDE GARNISH LH
-
Disengage the 6 claws and 2 clips, and remove the rear seat side garnish LH.
-
-
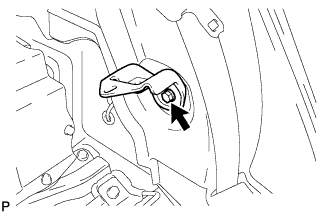
REMOVE NO. 2 ROOM LIGHT ASSEMBLY
-
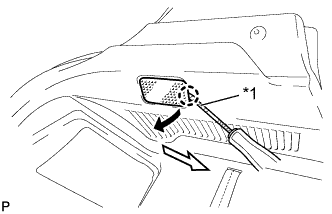
Text in Illustration *1 Protective Tape Using a screwdriver, disengage the claw.
Tech Tips
Tape the screwdriver tip before use.
-
Disconnect the connector and remove the No. 2 room light assembly.
-
-
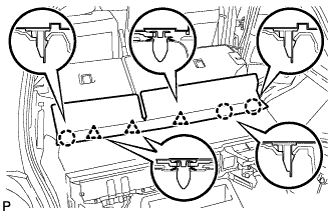
REMOVE SIDE DECK TRIM PANEL ASSEMBLY LH
-
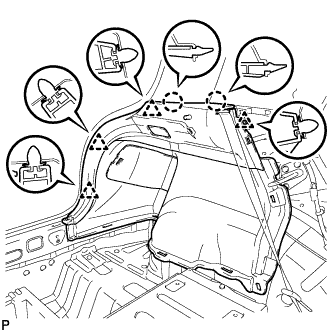
Disengage the 2 claws and 4 clips, and remove the side deck trim panel assembly LH.
-
-
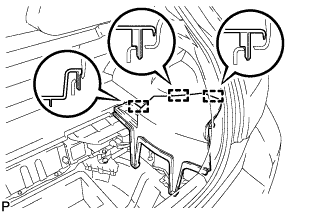
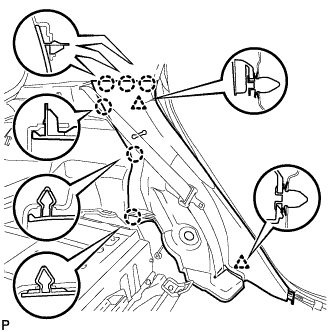
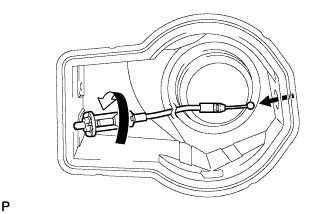
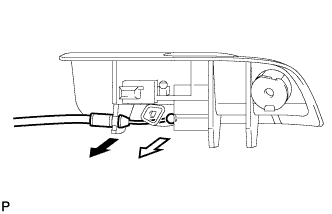
DISCONNECT FUEL LID LOCK OPEN LEVER SUB-ASSEMBLY
-
Remove the bolt.
-
Disengage the claw and disconnect the fuel lid lock open lever sub-assembly as shown in the illustration.
-
-
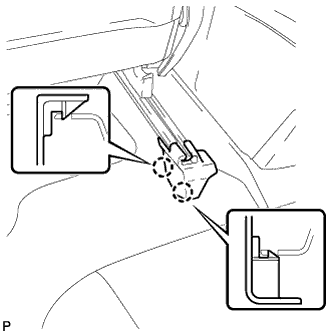
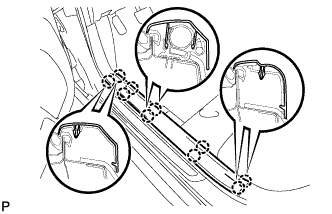
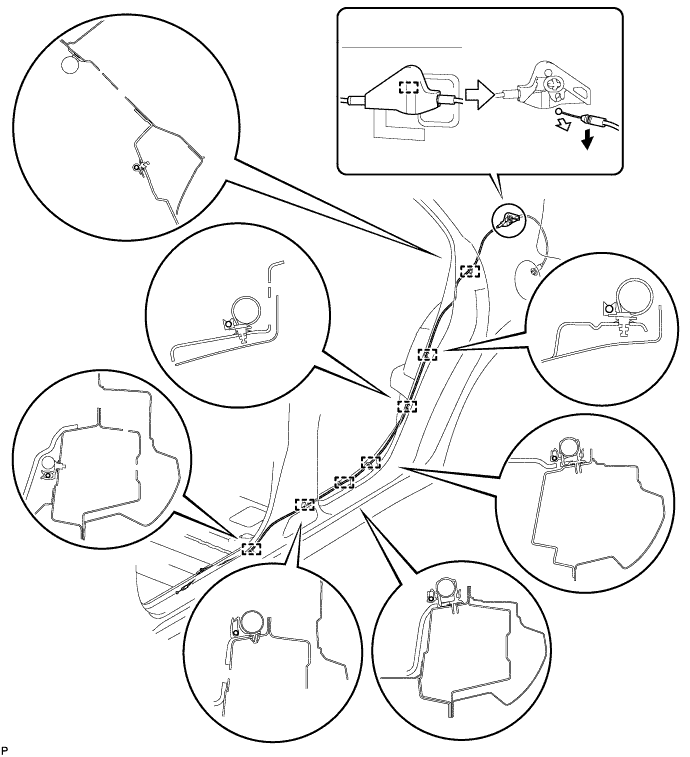
REMOVE FUEL LID LOCK CONTROL CABLE SUB-ASSEMBLY (for LHD)
-
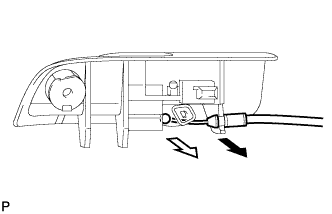
Disconnect the fuel lid lock control cable sub-assembly as shown in the illustration.
-
Disengage the clamp and disconnect the fuel lid lock control cable sub-assembly as shown in the illustration.
-
Disengage the 7 clamps and remove the fuel lid lock control cable sub-assembly.
-
Remove the fuel lid lock control cable sub-assembly as shown in the illustration.
-
-
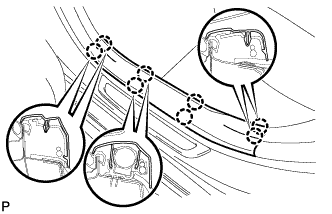
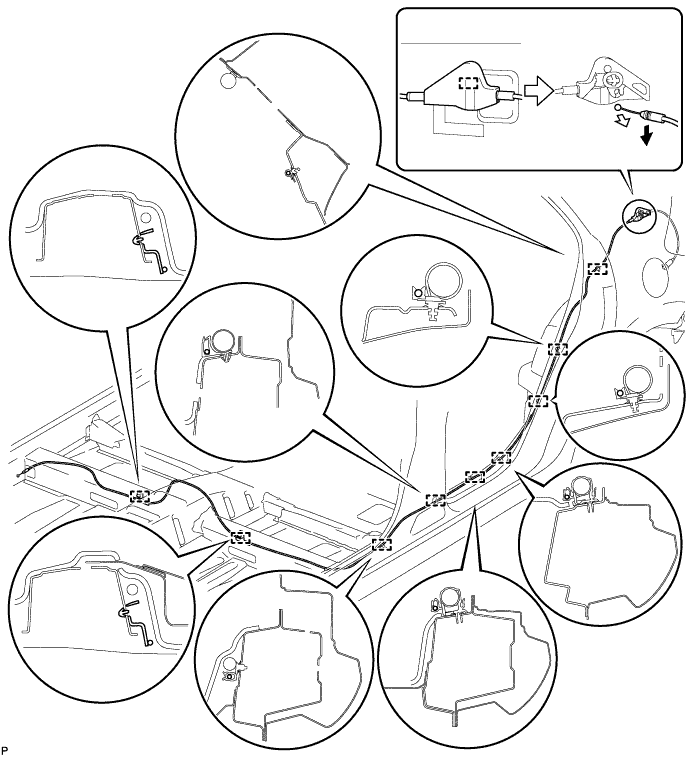
REMOVE FUEL LID LOCK CONTROL CABLE SUB-ASSEMBLY (for RHD)
-
Disconnect the fuel lid lock control cable sub-assembly as shown in the illustration.
-
Disengage the clamp and disconnect the fuel lid lock control cable sub-assembly as shown in the illustration.
-
Disengage the 9 clamps and remove the fuel lid lock control cable sub-assembly.
-
Remove the fuel lid lock control cable sub-assembly as shown in the illustration.
-