BACK DOOR ADJUSTMENT
Tech Tips
-
Use the same procedures for the RH side and LH side.
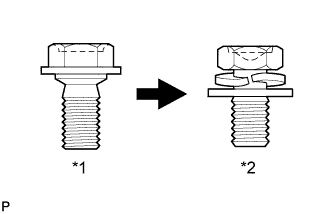
Text in Illustration *1 Centering Bolt *2 Standard Bolt -
The procedures listed below are for the LH side.
-
Centering bolts are used to mount the door hinge to the vehicle body and door. The door cannot be adjusted with the centering bolts installed. Substitute the centering bolts with standard bolts (with washers) when making adjustments.
-
A bolt without a torque specification is shown in the standard bolt chart Click here.
-
REMOVE REAR FLOOR MAT
-

Remove the rear floor mat.
-
-
REMOVE REAR DECK FLOOR BOX
-
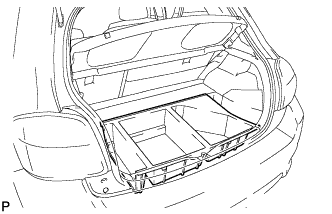
Remove the rear deck floor box.
-
-
REMOVE DECK FLOOR BOX LH
-
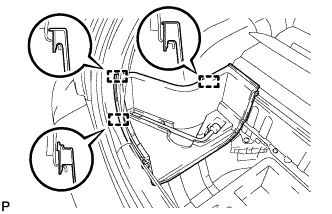
Disengage the 3 guides and remove the deck floor box LH.
-
-
REMOVE REAR DECK TRIM COVER
-
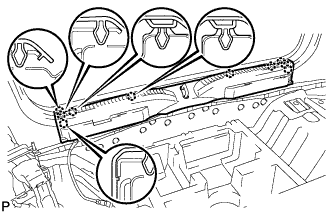
Disengage the 10 claws and remove the rear deck trim cover.
-
-
ADJUST BACK DOOR PANEL SUB-ASSEMBLY
-
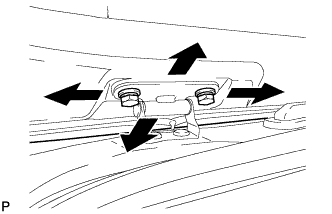
Before adjusting the upper end of the back door up and down or left and right, loosen the bolts.
-
Tighten the body side hinge after the adjustment.
- Torque:
- 20 N*m { 204 kgf*cm, 15 ft.*lbf }
-
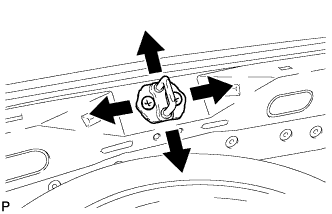
Adjust the striker position by slightly loosening the striker mounting screws and hitting the striker with a plastic hammer.
-
Tighten the striker mounting screws after the adjustment.
- Torque:
- 12 N*m { 122 kgf*cm, 8.9 ft.*lbf }
-
-
INSTALL REAR DECK TRIM COVER
-
Engage the 10 claws and install the rear deck trim cover.
Note
After installation, make sure that the back door weatherstrip does not interfere with the rear deck trim cover.
-
-
INSTALL DECK FLOOR BOX LH
-
Engage the 3 guides to install the deck floor box LH.
-
-
INSTALL REAR DECK FLOOR BOX
-
Install the rear deck floor box.
-
-
INSTALL REAR FLOOR MAT
-
Install the rear floor mat.
-