SLIDING ROOF HOUSING REMOVAL
-
REMOVE ROOF HEADLINING ASSEMBLY
-
REMOVE CURTAIN SHIELD AIRBAG ASSEMBLY LH
CAUTION:
When storing the curtain shield airbag assembly, keep the airbag deployment side facing upward.
-
Check that the power switch is off.
-
Check that the cable is disconnected from the negative (-) battery terminal.
CAUTION:
Wait at least 90 seconds after disconnecting the cable from the negative (-) battery terminal to disable the SRS system.
-
Using a screwdriver with the tip wrapped with protective tape, release the airbag connector lock and disconnect the curtain shield airbag connector.
Note
When disconnecting any airbag connector, take care not to damage the airbag wire harness.
-
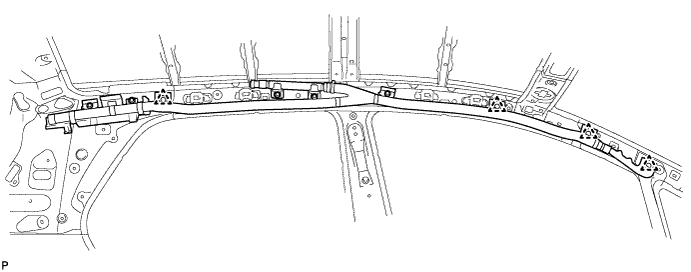
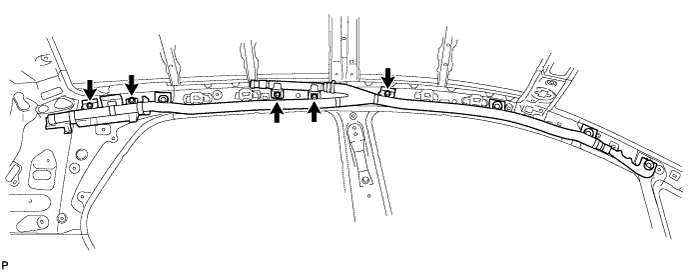
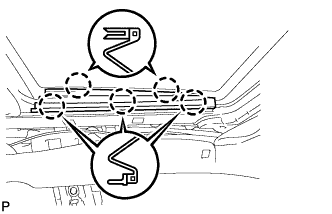
Separate the 4 clips from the body panel.
-
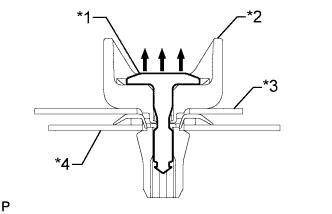
Text in Illustration *1 Pin *2 Clip *3 Airbag *4 Body Using a clip remover, remove the pin.
-
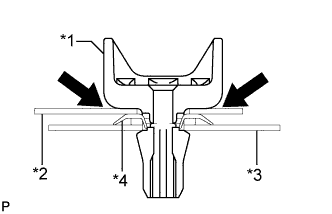
Text in Illustration *1 Clip *2 Airbag *3 Body *4 Spacer Using needle-nose pliers, remove the clip and curtain shield airbag from the body as shown in the illustration.
-
-
Remove the 5 bolts and curtain shield airbag assembly with the 4 spacers and clips.
Note
If the curtain shield airbag assembly is removed, replace it with a new one.
-
-
REMOVE CURTAIN SHIELD AIRBAG ASSEMBLY RH
Tech Tips
Use the same procedure for the RH side and LH side.
-
REMOVE SLIDING ROOF SIDE GARNISH LH
-
Disengage the 5 claws and remove the sliding roof side garnish LH.
-
-
REMOVE SLIDING ROOF SIDE GARNISH RH
Tech Tips
Use the same procedure for the RH side and LH side.
-
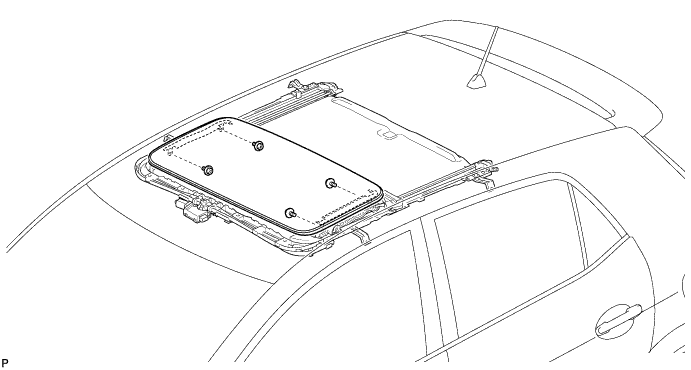
REMOVE SLIDING ROOF GLASS SUB-ASSEMBLY
-
Using a "TORX" socket wrench (T25), remove the 4 screws and sliding roof glass sub-assembly.
-
-
REMOVE SLIDING ROOF HOUSING SUB-ASSEMBLY
-
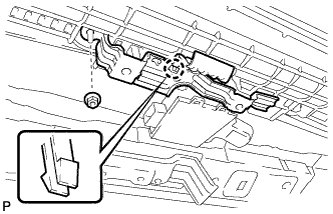
Remove the nut.
-
Disengage the claw and remove the room light bracket.
-
Disconnect the 4 sliding roof drain hoses.
-
Remove the 4 bolts, 7 nuts, and sliding roof housing sub-assembly.

-
-
REMOVE SLIDING ROOF WEATHERSTRIP
-
Remove the sliding roof weatherstrip from the sliding roof glass sub-assembly.
-