UPPER INSTRUMENT PANEL DISASSEMBLY
-
REMOVE INSTRUMENT PANEL CUP HOLDER (for Driver Side)
-
Remove the 3 screws <C> or <D> and instrument panel cup holder.
-
-
REMOVE INSTRUMENT PANEL CUP HOLDER (for Front Passenger Side)
-
Remove the 3 screws <C> or <D> and instrument panel cup holder.
-
-
REMOVE DEFROSTER NOZZLE ASSEMBLY
-
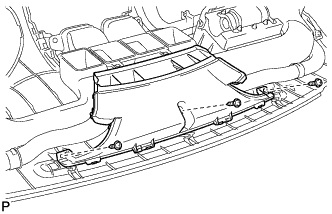
Remove the 3 screws <C> or <D> and the defroster nozzle assembly.
-
-
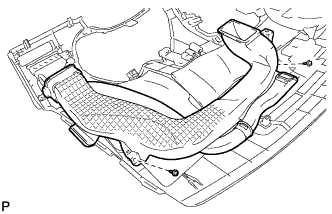
REMOVE NO. 2 HEATER TO REGISTER DUCT
-
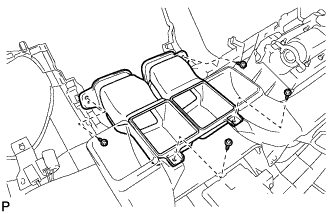
Remove the 4 screws <C> or <D> and the No. 2 heater to register duct.
-
-
REMOVE NO. 1 HEATER TO REGISTER DUCT
-
Remove the 2 screws <C> or <D> and the No. 1 heater to register duct.
-
-
REMOVE NO. 3 HEATER TO REGISTER DUCT
-
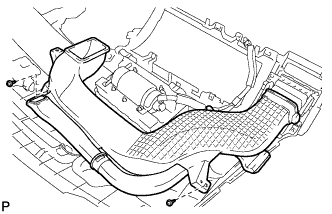
Remove the 2 screws <C> or <D> and the No. 3 heater to register duct.
-
-
REMOVE INSTRUMENT PANEL NO. 2 REGISTER ASSEMBLY
-
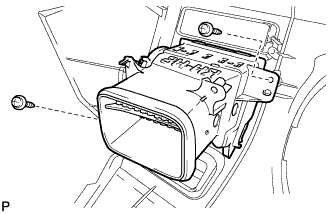
Remove the 2 screws <C> or <D> and instrument panel No. 2 register assembly.
-
-
REMOVE INSTRUMENT PANEL NO. 1 REGISTER ASSEMBLY
-
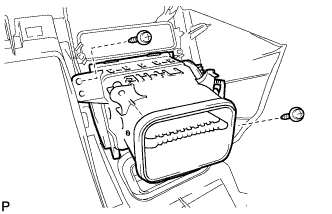
Remove the 2 screws <C> or <D> and instrument panel No. 1 register assembly.
-
-
REMOVE NO. 2 INSTRUMENT PANEL CUSHION
-
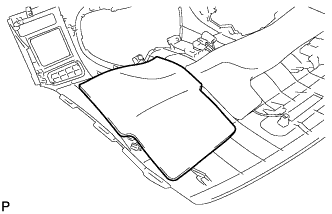
Remove the No. 2 instrument panel cushion.
Note
The No. 2 instrument panel cushion can be reused. However, if the double-sided tape does not have enough adhesion or was torn when the cushion was removed, replace the cushion with a new one.
-
-
REMOVE NO. 3 INSTRUMENT PANEL CUSHION
-
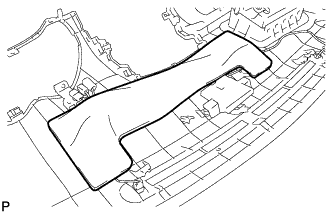
Remove the No. 3 instrument panel cushion.
Note
The No. 3 instrument panel cushion can be reused. However, if the double-sided tape does not have enough adhesion or was torn when the cushion was removed, replace the cushion with a new one.
-
-
REMOVE NO. 4 INSTRUMENT PANEL CUSHION
-
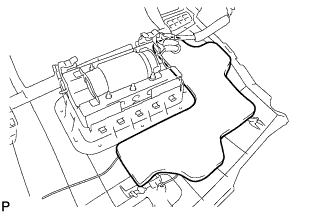
Remove the No. 4 instrument panel cushion.
Note
The No. 4 instrument panel cushion can be reused. However, if the double-sided tape does not have enough adhesion or was torn when the cushion was removed, replace the cushion with a new one.
-
-
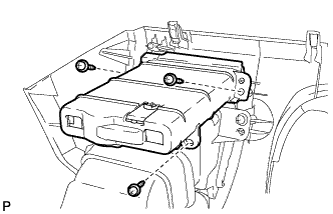
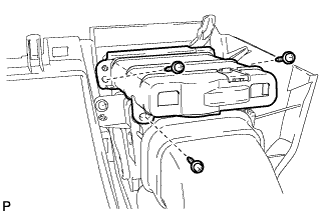
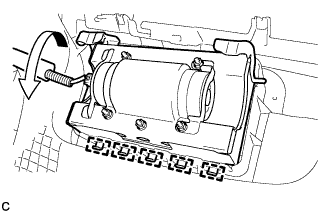
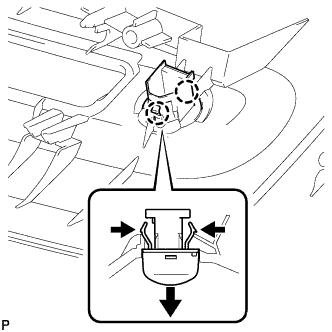
REMOVE FRONT PASSENGER AIRBAG ASSEMBLY
CAUTION:
When storing the front passenger airbag assembly, keep the airbag deployment side facing upward.
-
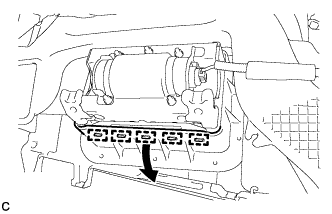
Disengage the 5 hooks as shown in the illustration.
-
Disengage the 5 hooks and remove the front passenger airbag assembly from the instrument panel as shown in the illustration.
-
-
REMOVE NAVIGATION ANTENNA ASSEMBLY (w/ Navigation System)
-
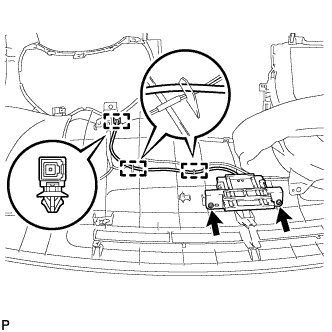
Disengage the 3 clamps.
-
Remove the 2 screws and navigation antenna assembly.
-
-
REMOVE NO. 2 INSTRUMENT PANEL WIRE (w/ Automatic Light Control or Daytime Running Light Control)
-
Disconnect each connector.
-
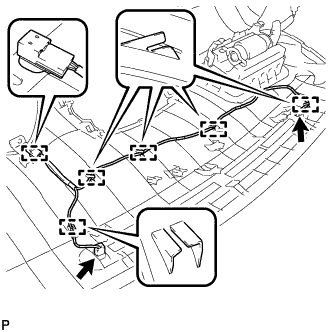
Disengage the 6 clamps and remove the No. 2 instrument panel wire.
-
-
REMOVE AUTOMATIC LIGHT CONTROL SENSOR (w/ Automatic Light Control or Daytime Running Light Control)
-
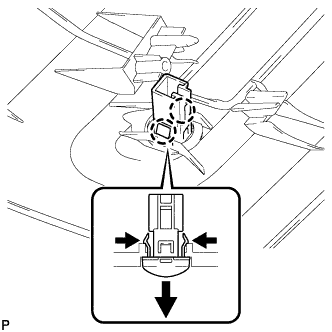
Disengage the 2 claws and remove the automatic light control sensor.
-
-
REMOVE SOLAR SENSOR
-
Disengage the 2 claws and remove the solar sensor.
-
-
REMOVE NO. 1 INSTRUMENT PANEL CUSHION
-
Remove the No. 1 instrument panel cushion.
Note
The No. 1 instrument panel cushion can be reused. However, if the double-sided tape does not have enough adhesion or was torn when the cushion was removed, replace the cushion with a new one.
-