REAR SPOILER INSTALLATION

-
INSTALL REAR SIDE SPOILER LH
-
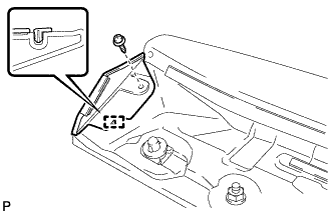
Engage the guide and install the rear side spoiler LH.
-
Install the screw.
-
-
INSTALL REAR SIDE SPOILER RH
Tech Tips
Use the same procedure for the RH side and LH side.
-
INSTALL CENTER STOP LIGHT SET
-
Secure the wire running through the rear spoiler assembly to the center stop light set wire harness.
-
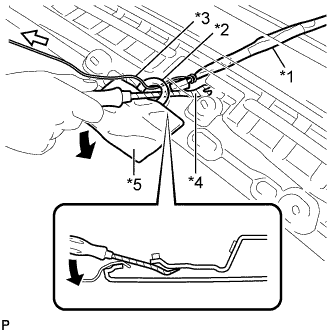
Text in Illustration *1 Wire Harness *2 Gasket *3 Wire *4 protective tape *5 Cloth Place a cloth on the rear spoiler assembly as shown in the illustration.
-
Using a clip remover wrapped with protective tape, widen the space inside the rear spoiler assembly, and pull the wire to pass the center stop light set wire harness through the spoiler.
Note
-
Do not apply excess force to the rear spoiler assembly or it may be damaged.
-
Do not damage the gasket of the rear spoiler assembly.
-
Do not apply excess force when pulling the wire harness or it may break.
-
-
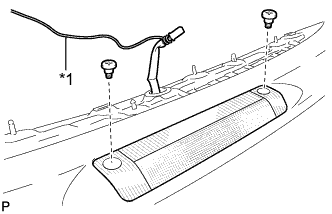
Text in Illustration *1 Wire Install the center stop light set with the 2 screws to the rear spoiler assembly.
- Torque:
- 1.2 N*m { 12 kgf*cm, 11 in.*lbf }
-
Remove the wire from the old center stop light set wire harness.
-
-
INSTALL REAR SPOILER ASSEMBLY
-
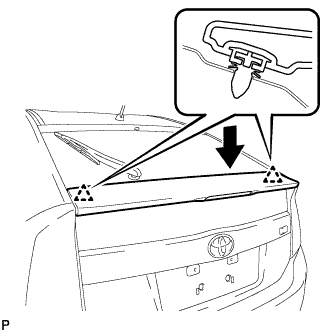
Engage the 2 clips to install the rear spoiler assembly.
-
Install the 5 nuts.
- Torque:
- 9.0 N*m { 92 kgf*cm, 80 in.*lbf }
-
Connect the connector.
-
-
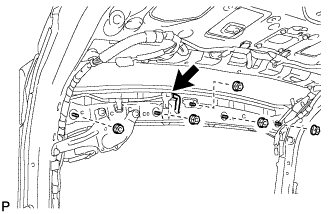
INSTALL BACK DOOR TRIM BOARD
-

Engage the 5 clips and 2 guides to install the back door trim board.
-
-
INSTALL BACK DOOR TRIM BOARD ASSEMBLY
-
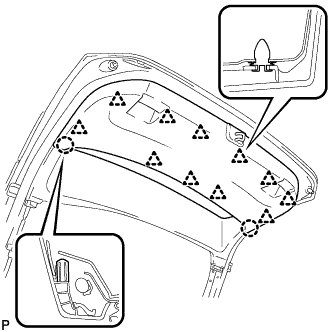
Engage the 11 clips and 2 claws to install the back door panel trim assembly.
-
-
INSTALL BACK DOOR SIDE GARNISH LH
-
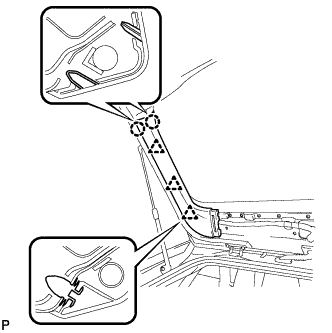
Engage the 3 clips and 2 claws to install the back door side garnish LH.
-
-
INSTALL BACK DOOR SIDE GARNISH RH
-
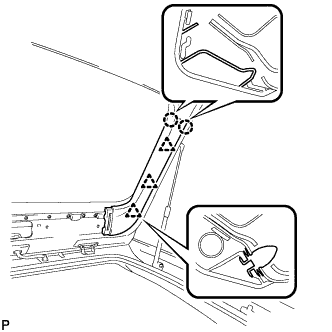
Engage the 3 clips and 2 claws to install the back door side garnish RH.
-
-
INSTALL UPPER BACK DOOR TRIM PANEL ASSEMBLY
-
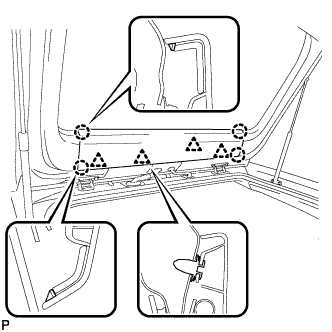
Engage the 4 clips and 4 claws to install the upper back door trim panel assembly.
-