BACK DOOR OUTSIDE GARNISH INSTALLATION

-
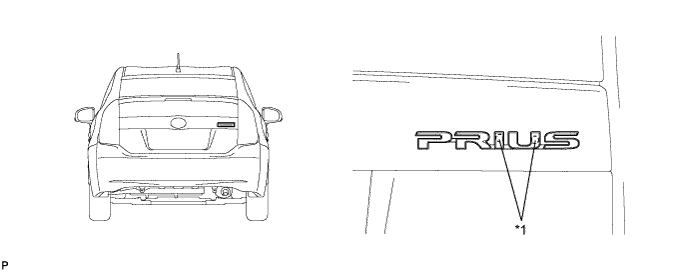
INSTALL NO. 1 LUGGAGE COMPARTMENT DOOR NAME PLATE
-
Clean the vehicle body surface.
-
Using a heat light, heat the vehicle body surface.
-
Remove any double-sided tape from the vehicle body.
-
Wipe off any tape adhesive residue with cleaner.
-
-
Install a new No. 1 luggage compartment door name plate.
-
Using a heat light, heat the vehicle body and the No. 1 luggage compartment door name plate.
-
Remove the release paper from the No. 1 luggage compartment door name plate.
Tech Tips
After removing the release paper, keep the exposed adhesive free from foreign matter.
-
Install the No. 1 luggage compartment door name plate as shown in the illustration.
Text in Illustration *1 Location Pin - -
-
-
-
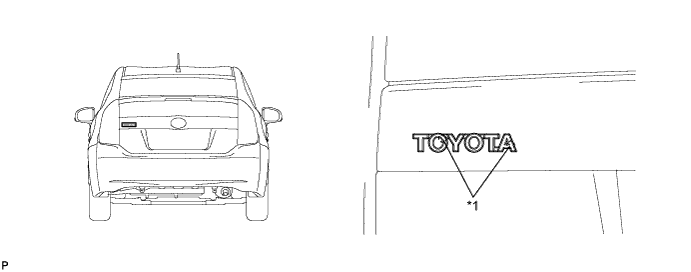
INSTALL NO. 2 BACK DOOR NAME PLATE
-
Clean the vehicle body surface.
-
Using a heat light, heat the vehicle body surface.
-
Remove any double-sided tape from the vehicle body.
-
Wipe off any tape adhesive residue with cleaner.
-
-
Install a new No. 2 back door name plate.
-
Using a heat light, heat the vehicle body and the No. 2 back door name plate.
-
Remove the release paper from the No. 2 back door name plate.
Tech Tips
After removing the release paper, keep the exposed adhesive free from foreign matter.
-
Install the No. 2 back door name plate as shown in the illustration.
Text in Illustration *1 Location Pin - -
-
-
-
INSTALL LUGGAGE COMPARTMENT DOOR EMBLEM
-
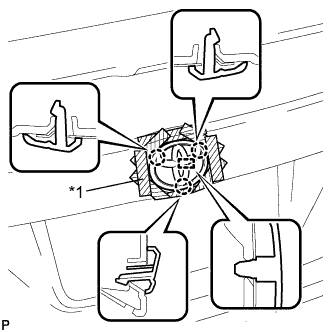
Text in Illustration *1 Protective Tape Install the luggage compartment door emblem with the pin and 3 claws.
Note
Be careful not to damage the vehicle body.
-
-
INSTALL BACK DOOR OPENER SWITCH ASSEMBLY
-
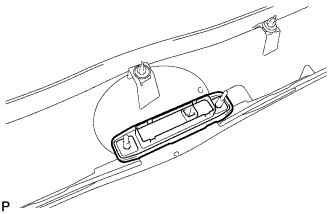
Install the back door opener switch assembly.
-
-
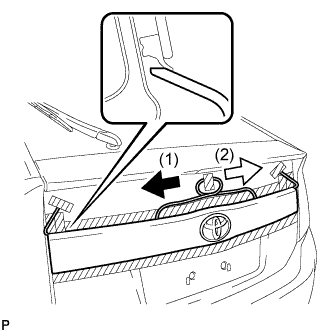
INSTALL BACK DOOR OUTSIDE GARNISH SUB-ASSEMBLY
-
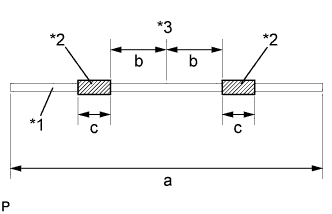
Text in Illustration *1 String *2 Double-sided Tape *3 Center line Wind double-sided tape around a string as shown in the illustration.
Tech Tips
The string is used to prevent the edge of the No. 2 back window lower moulding from being tucked under the back door outside garnish sub-assembly during installation.
Standard Dimension a 1600.0 mm (62.992 in.) b 50.0 to 75.0 mm (1.969 to 2.953 in.) c 30.0 mm (1.181 in.) -
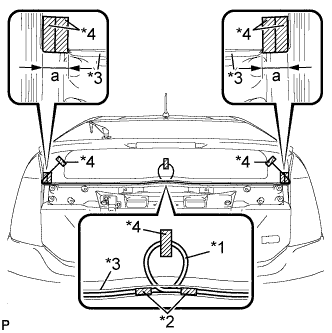
Text in Illustration *1 String *2 Double-sided Tape *3 No. 2 back window lower moulding *4 Tape Lift the ends of the No. 2 back window molding lower, and attach each end to the back door glass with tape.
Standard Dimension a 40.0 mm (1.575 in.) -
Make a loop in the center of the string, and attach it to the back of the No. 2 back window lower moulding with the double-sided tape on the string.
-
Attach the loop and ends of the string to the back door glass with tape as shown in the illustration.
-
Install the 4 new gaskets to the back door outside garnish sub-assembly.
-
Install 11 new clips (back door outside garnish clip) to the back door outside garnish sub-assembly.
-
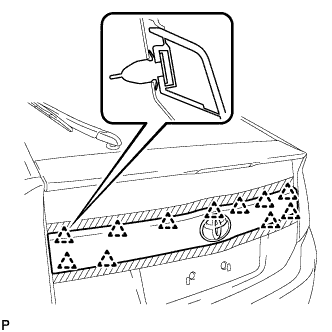
Engage the 11 clips to install the back door outside garnish sub-assembly.
Tech Tips
Make sure that the string does not get pulled out from the back of the No. 2 back window molding lower.
-
Install the 4 nuts.
-
Apply soapy water to the No. 2 back window molding lower.
-
Remove the string by slowly pulling out toward each end from the center toward the sides of the vehicle as shown in the illustration.
Note
Do not damage the No. 2 back window lower moulding.
-
Check that the No. 2 back window molding lower is not pinched between the back door and the back door outside garnish sub-assembly.
-
Remove the tape.
-
-
INSTALL BACK DOOR TRIM BOARD ASSEMBLY
-
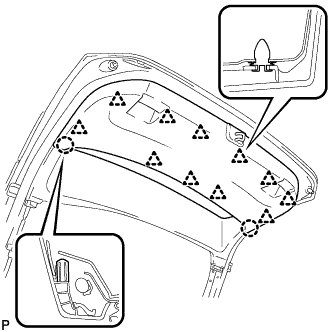
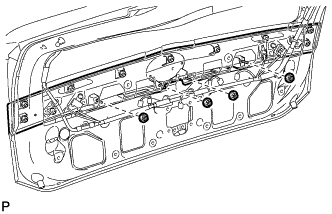
Engage the 11 clips and 2 claws to install the back door panel trim assembly.
-