HEADLIGHT CLEANER ACTUATOR REMOVAL

-
REMOVE RADIATOR SUPPORT OPENING COVER
-
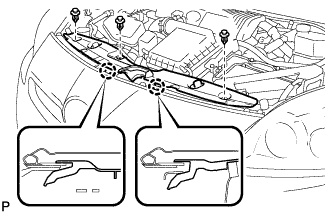
Remove the 3 clips.
-
Disengage the 2 claws and remove the radiator support opening cover.
-
-
REMOVE FRONT BUMPER ASSEMBLY
-
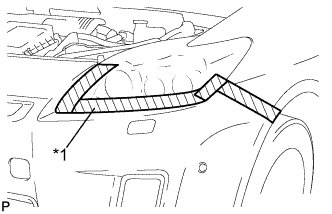
Text in Illustration *1 Protective Tape Put protective tape around the front bumper assembly.
Tech Tips
Use the same procedure for the RH side and LH side.
-
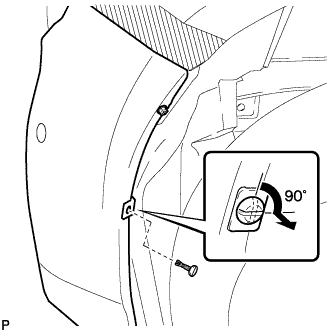
Using a screwdriver, turn the pins 90 degrees and remove the pin hold clip.
Tech Tips
Use the same procedure for the RH side and LH side.
-
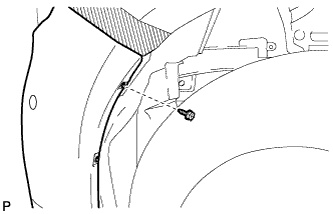
Remove the screw.
Tech Tips
Use the same procedure for the RH side and LH side.
-
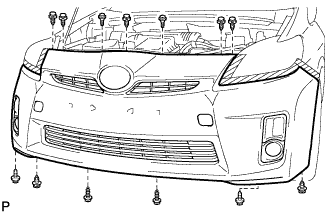
Remove the 2 bolts and 4 screws.
-
Using a clip remover, remove the 7 clips.
-

Using a clip remover, remove the 2 clips. (w/ Front Spoiler)
-
Remove the 2 screws. (w/ Front Spoiler)
-
Disengage the 2 guides and remove the front spoiler cover. (w/ Front Spoiler)
-
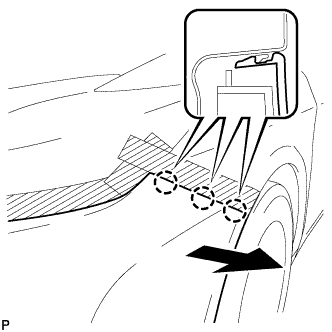
Disengage the 3 claws and remove the front bumper assembly.
Tech Tips
Use the same procedure for the RH side and LH side.
-
Disconnect each connector.
-
Disconnect the headlight cleaner hose and drain the washer fluid. (w/ Headlight Cleaner System)
Tech Tips
Use a container to collect the washer fluid.
-

Remove the front bumper assembly as shown in the illustration.
-
-
REMOVE HEADLIGHT CLEANER WASHER NOZZLE
-
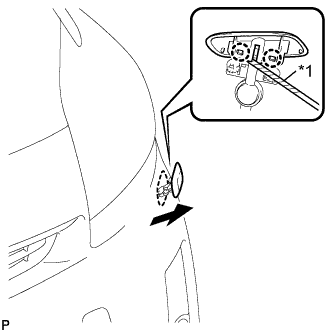
Text in Illustration *1 Protective Tape Extend the headlight cleaner washer nozzle.
-
Using a screwdriver, disengage the 2 claws and remove the headlight cleaner washer nozzle.
Tech Tips
-
Tape the screwdriver tip before use.
-
Use the same procedure for the RH side and LH side.
-
-
-
REMOVE HEADLIGHT WASHER ACTUATOR SUB-ASSEMBLY
-
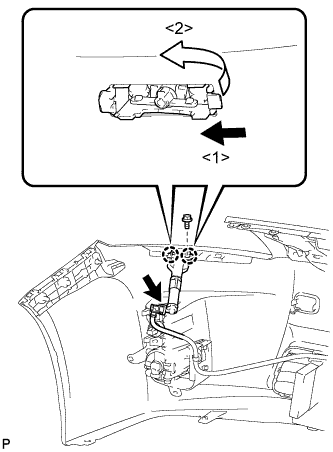
Disconnect the headlight washer hose.
-
Remove the bolt.
-
Disengage the 2 claws and remove the headlight washer actuator sub-assembly as shown in the illustration.
Tech Tips
Use the same procedure for the RH side and LH side.
-