FRONT WIPER MOTOR REMOVAL

-
REMOVE FRONT WIPER ARM HEAD CAP
-
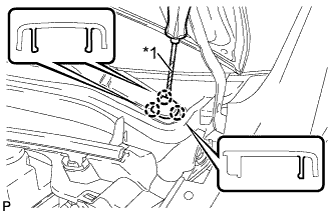
Text in Illustration *1 Protective Tape Using a screwdriver, disengage the 3 claws to remove the front wiper arm head cap.
Tech Tips
-
Tape the screwdriver tip before use.
-
Use the same procedure for the RH side and LH side.
-
-
-
REMOVE FRONT WIPER ARM AND BLADE ASSEMBLY LH
-
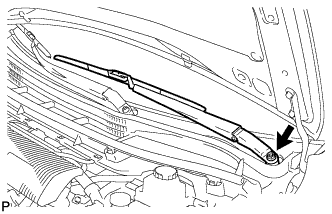
Remove the nut and the front wiper arm and blade assembly LH.
-
-
REMOVE FRONT WIPER ARM AND BLADE ASSEMBLY RH
-
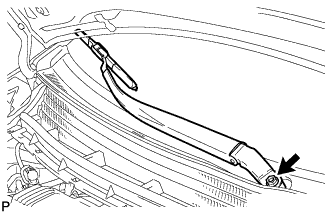
Remove the nut and the front wiper arm and blade assembly RH.
-
-
REMOVE COWL SIDE VENTILATOR SUB-ASSEMBLY LH
-
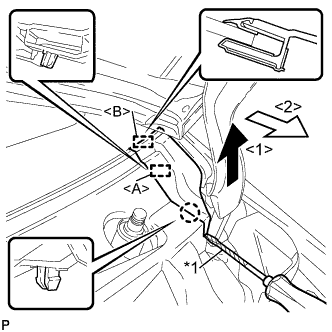
Text in Illustration *1 Protective Tape Using a screwdriver, disengage the claw and guide <A> as shown in the illustration.
Tech Tips
Tape the screwdriver tip before use.
-
Disengage the guide <B> and remove the cowl side ventilator sub-assembly LH as shown in the illustration.
-
-
REMOVE COWL SIDE VENTILATOR SUB-ASSEMBLY RH
Tech Tips
Use the same procedure as for the LH side.
-
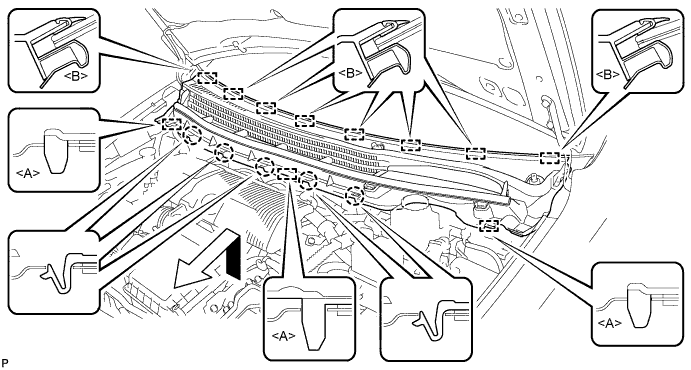
REMOVE COWL TOP VENTILATOR LOUVER SUB-ASSEMBLY (for LHD)
-
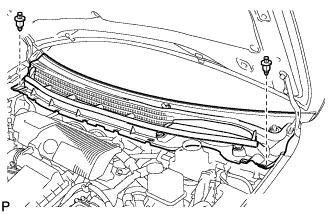
Remove the 2 clips.
-
Disengage the 5 claws and 3 guides <A>.
-
Disengage the 8 guides <B> and pull out the cowl top ventilator louver sub-assembly as shown in the illustration.
-
-
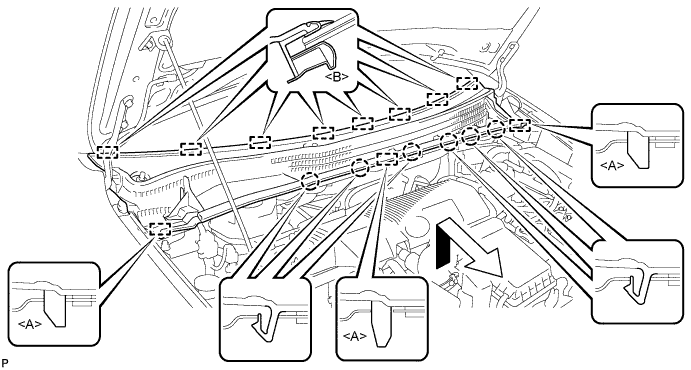
REMOVE COWL TOP VENTILATOR LOUVER SUB-ASSEMBLY (for RHD)
-
Remove the 2 clips.
-
Disengage the 6 claws and 3 guides <A>.
-
Disengage the 8 guides <B> and pull out the cowl top ventilator louver sub-assembly as shown in the illustration.
-
-
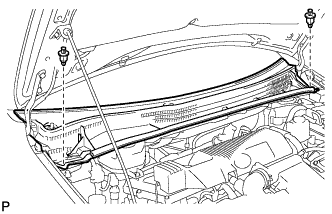
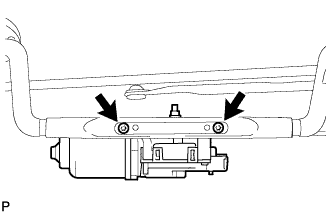
REMOVE WINDSHIELD WIPER MOTOR AND LINK ASSEMBLY
-
Disengage the 2 clamps.
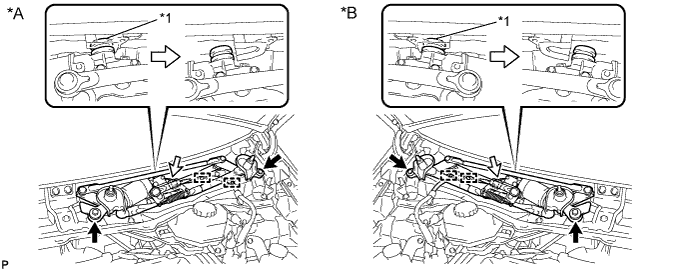
Text in Illustration *A for LHD: *B for RHD: *1 Grommet - - -
Remove the 2 bolts.
-
Disengage the grommet as shown in the illustration.
-
Disconnect the connector.
-
Remove the windshield wiper motor and link assembly.
Note
Be careful not to damage the windshield when removing the windshield wiper motor and link assembly.
-
-
REMOVE FRONT WIPER CRANK SUB-ASSEMBLY
-
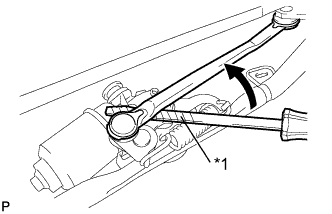
Text in Illustration *1 Protective Tape Using a screwdriver, separate the windshield wiper link rod from the crank arm pivot of the front wiper crank sub-assembly as shown in the illustration.
Tech Tips
Tape the screwdriver tip before use.
-
When reusing the windshield wiper motor assembly and front wiper crank sub-assembly:
-
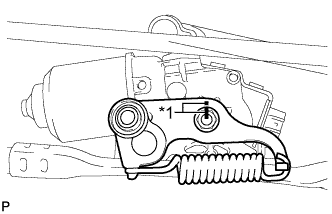
Text in Illustration *1 Matchmark Place matchmarks on the windshield wiper link assembly and front wiper crank sub-assembly.
-
-
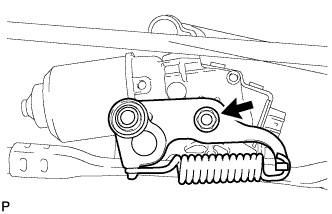
Remove the nut and the front wiper crank sub-assembly.
-
-
REMOVE WINDSHIELD WIPER MOTOR ASSEMBLY
-
Using a T30 "TORX" socket wrench, remove the 2 bolts and the windshield wiper motor assembly from the windshield wiper link assembly.
-