UPPER INSTRUMENT PANEL REASSEMBLY

-
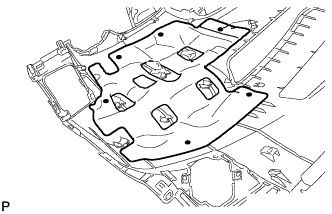
INSTALL NO. 5 INSTRUMENT PANEL CUSHION
-
Using hot-melt glue and install a new No. 5 instrument panel cushion as shown in the illustration.
-
-
INSTALL NO. 4 INSTRUMENT PANEL CUSHION
-
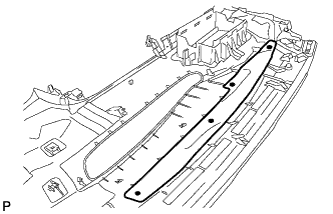
Using hot-melt glue and install a new No. 4 instrument panel cushion as shown in the illustration.
-
-
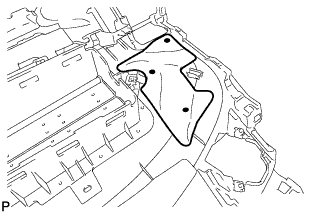
INSTALL NO. 2 INSTRUMENT PANEL CUSHION
-
Using hot-melt glue and install a new No. 2 instrument panel cushion as shown in the illustration.
-
-
INSTALL INSTRUMENT PANEL CUSHION
-
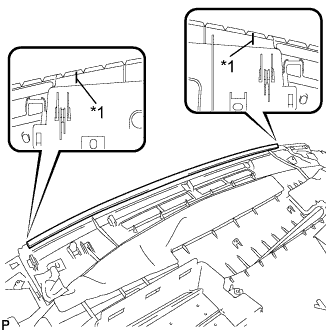
Text in Illustration *1 Marking Line Align the marking lines on the upper instrument panel with the ends of the instrument panel cushion and install a new instrument panel cushion as shown in the illustration.
-
-
INSTALL NO. 1 INSTRUMENT PANEL CUSHION
-

Text in Illustration *1 Marking Line Align the marking lines on the upper instrument panel with the ends of the No. 1 instrument panel cushion and install a new No. 1 instrument panel cushion as shown in the illustration.
-
-
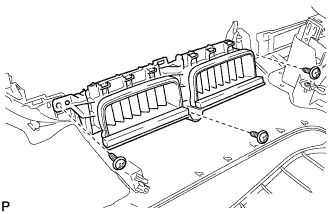
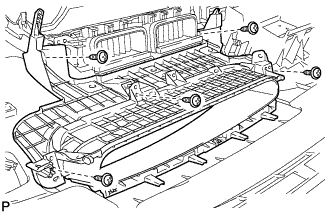
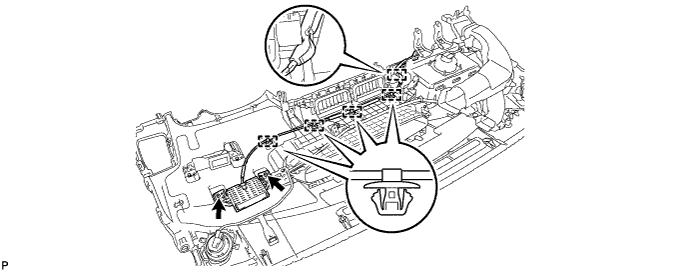
INSTALL FRONT PASSENGER AIRBAG ASSEMBLY
-
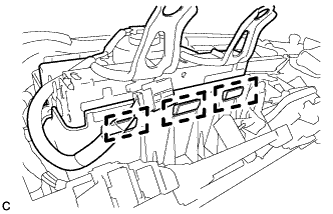
Engage the 3 hooks.
-
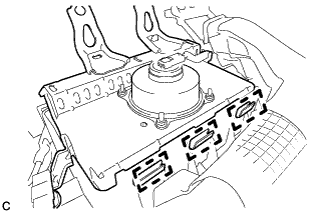
Push the front passenger airbag assembly to engage the 3 hooks.
-
Install the 2 screws to install the front passenger airbag assembly.
-
Install the 2 clamps to the front passenger airbag assembly.
-
-
INSTALL METER HOOD SPACER
-
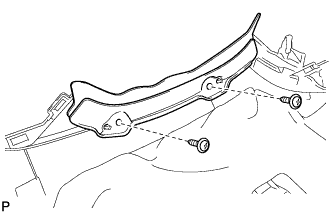
Install the meter hood spacer with the 2 screws <C>.
-
-
INSTALL CENTER INSTRUMENT PANEL REGISTER ASSEMBLY
-
Install the center instrument panel register assembly with the 3 screws <C>.
-
-
INSTALL INSTRUMENT CLUSTER FINISH PANEL ASSEMBLY
-
Install the instrument cluster finish panel assembly with the 5 screws <C>.
-
-
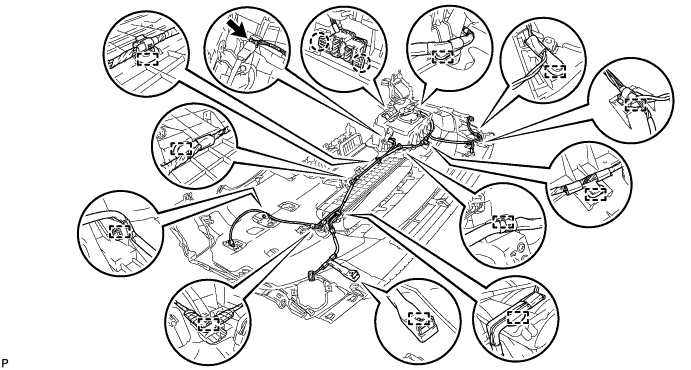
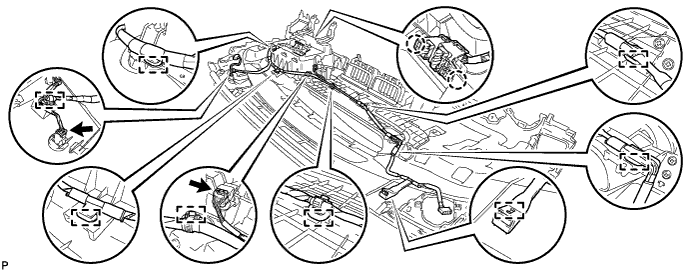
INSTALL NO. 5 INSTRUMENT PANEL WIRE
-
Engage the 2 clamps to install the No. 5 instrument panel wire.
-
-
INSTALL NO. 2 INSTRUMENT PANEL WIRE (for LHD)
-
Engage each clamp and 2 claws.
-
Connect the connector to install the No. 2 instrument panel wire.
-
-
INSTALL NO. 2 INSTRUMENT PANEL WIRE (for RHD)
-
Engage each clamp and 2 claws.
-
Connect the connector to install the No. 2 instrument panel wire.
-
-
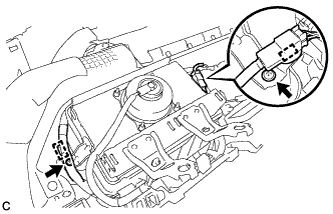
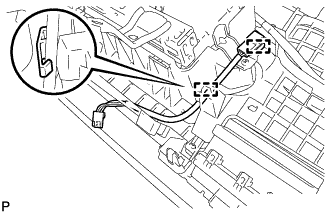
INSTALL AUTOMATIC LIGHT CONTROL SENSOR
-
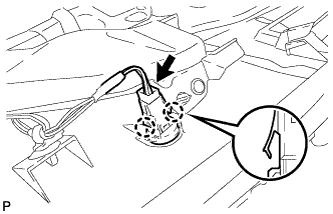
Engage the 2 claws and install the automatic light control sensor.
-
Connect the connector.
-
-
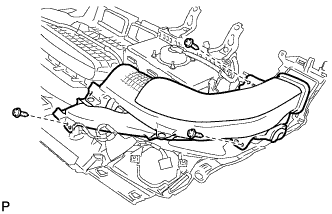
INSTALL NAVIGATION ANTENNA ASSEMBLY (w/ Navigation System)
-
Install the navigation antenna assembly with the 2 screws.
-
Engage the 5 clamps.
-
-
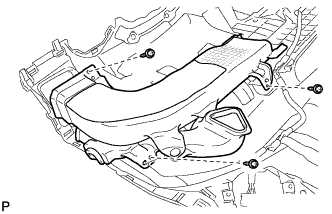
INSTALL NO. 2 HEATER TO REGISTER DUCT
-
Install the No. 2 heater to register duct with the 3 screws <C>.
-
-
INSTALL NO. 3 HEATER TO REGISTER DUCT
-
Install the No. 3 heater to register duct with the 3 screws <C>.
-