LUMBAR SWITCH (for Manual Seat) REMOVAL

-
PRECAUTION (w/ Navigation System for HDD)
Note
After turning the power switch off, waiting time may be required before disconnecting the cable from the negative (-) auxiliary battery terminal. Therefore, make sure to read the disconnecting the cable from the negative (-) auxiliary battery terminal notices before proceeding with work Click here.
-
REMOVE REAR NO. 2 FLOOR BOARD
-
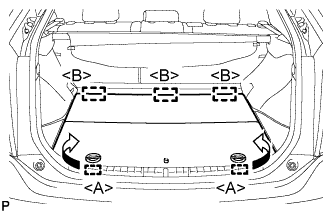
Disengage the 2 guides <A> as shown in the illustration.
-
Disengage the 3 guides <B> and remove the rear No. 2 floor board.
-
-
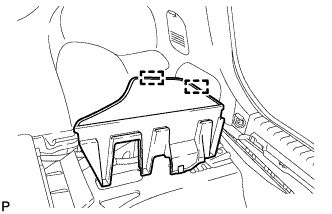
REMOVE REAR DECK FLOOR BOX
-
Remove the rear deck floor box.
-
-
REMOVE REAR NO. 3 FLOOR BOARD
-
Disengage the 2 guides and remove the rear No. 3 floor board.
-
-
DISCONNECT CABLE FROM NEGATIVE BATTERY TERMINAL
CAUTION:
Wait at least 90 seconds after disconnecting the cable from the negative (-) battery terminal to disable the SRS system.
Note
When disconnecting the cable, some systems need to be initialized after the cable is reconnected Click here.
-
REMOVE FRONT SEAT HEADREST ASSEMBLY
-
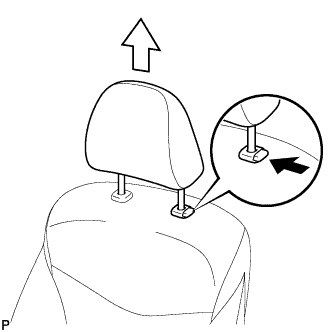
Press the headrest support button and pull up the headrest as shown in the illustration to remove it.
-
-
REMOVE OUTER SEAT TRACK COVER
-
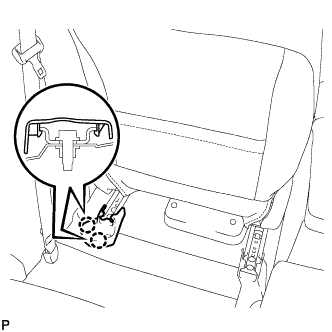
Lift up the seat track adjusting handle and move the seat to the foremost position.
-
Disengage the 2 claws and remove the outer seat track cover.
-
-
REMOVE INNER SEAT TRACK COVER
-
Disengage the claw.
-
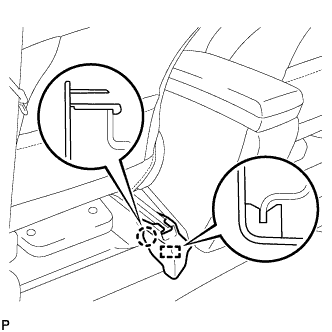
Separate the guide and remove the inner seat track cover.
-
-
REMOVE FRONT SEAT ASSEMBLY
-
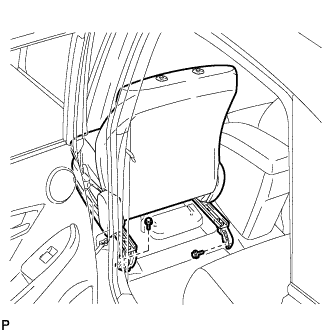
Remove the 2 bolts on the rear side of the seat.
-
Lift up the seat track adjusting handle and move the seat to the rearmost position.
-
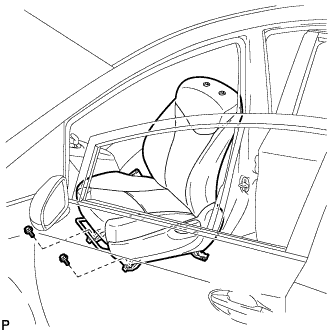
Remove the 2 bolts on the front side of the seat.
-
Lift up the seat track adjusting handle and move the seat to the center position. Also, operate the reclining adjuster release handle and move the seatback to the upright position.
-
Disconnect the connectors under the seat.
-
Remove the seat.
Note
Be careful not to damage the vehicle body.
-
-
REMOVE RECLINING ADJUSTER RELEASE HANDLE
-
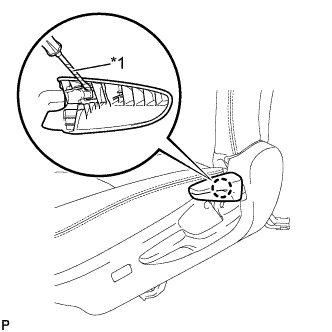
Text in Illustration *1 Protective Tape Using a screwdriver wrapped with protective tape, disengage the claw and remove the reclining adjuster release handle.
-
-
REMOVE VERTICAL ADJUSTING HANDLE (w/ Vertical Adjuster)
-
Remove the screw and vertical adjusting handle.
-
-
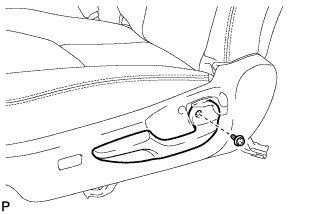
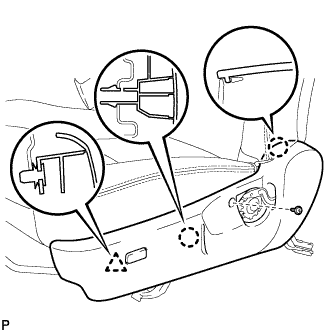
REMOVE FRONT SEAT CUSHION SHIELD ASSEMBLY
-
Remove the screw.
-
Disengage the 2 claws and clip.
-
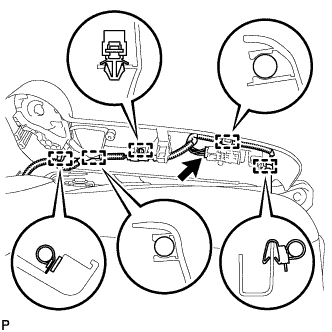
Disconnect the connector.
-
Disengage the 5 clamps and remove the front seat cushion shield assembly.
-
-
REMOVE LUMBAR SWITCH
-
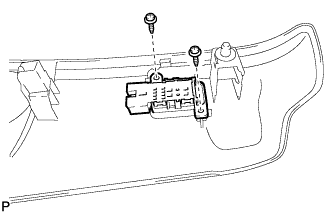
Remove the 2 screws and lumbar switch.
-