FRONT SEAT ASSEMBLY (for Power Seat) REASSEMBLY

-
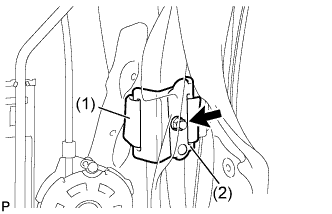
INSTALL FRONT SEAT SIDE AIRBAG ASSEMBLY
CAUTION:
-
The nuts must not be reused.
-
Make sure that the separate type front seatback spring assembly is not deformed. If it is, replace it with a new one.
-
Install the front seat side airbag assembly with 2 new nuts.
- Torque:
- 5.5 N*m { 56 kgf*cm, 49 in.*lbf }
-
Engage the 2 clamps.
-
-
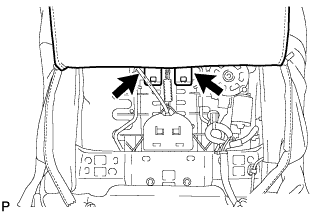
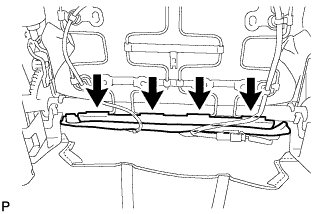
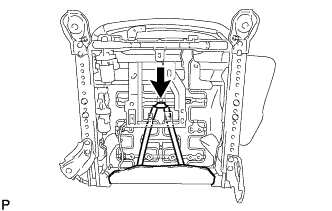
INSTALL SEPARATE TYPE FRONT SEATBACK SPRING ASSEMBLY
-
Engage the 4 guides.
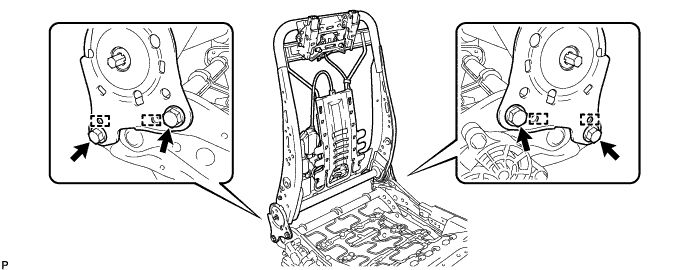
-
Install the separate type front seatback spring assembly to the separate type front seat cushion spring assembly with the 4 bolts.
- Torque:
- 42 N*m { 428 kgf*cm, 31 ft.*lbf }
-
-
INSTALL FRONT SEAT CUSHION EDGE PROTECTOR RH
-
Engage the 2 guides to install the front seat cushion edge protector RH to the separate type front seatback spring assembly.
-
Install the screw.
-
-
INSTALL FRONT SEAT CUSHION EDGE PROTECTOR LH
Tech Tips
Use the same procedure described for the LH side.
-
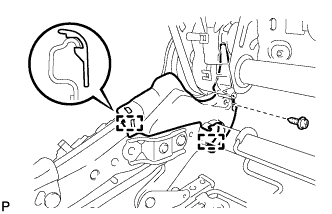
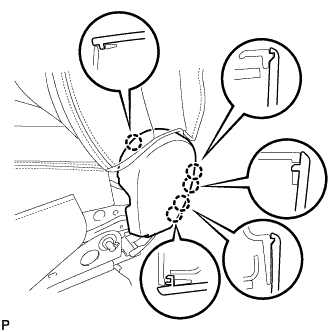
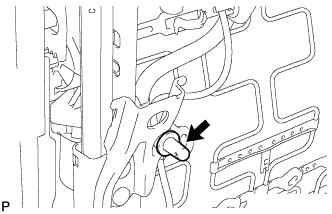
INSTALL FRONT LOWER SEAT CUSHION SHIELD RH
-
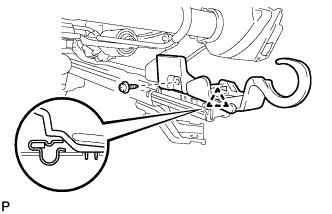
Engage the clip to install the front lower seat cushion shield RH to the separate type front seat cushion spring assembly.
-
Install the screw.
-
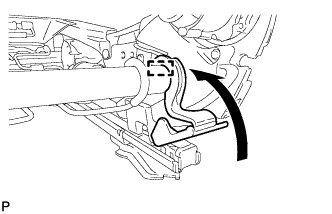
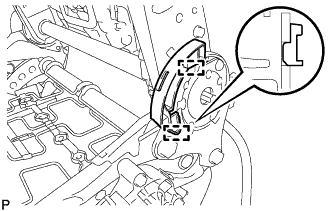
Engage the hook as shown in the illustration.
-
-
INSTALL FRONT LOWER SEAT CUSHION SHIELD LH
Tech Tips
Use the same procedure described for the LH side.
-
INSTALL RECLINING ADJUSTER INSIDE COVER LH
-
Engage the 2 guides to install the reclining adjuster inside cover LH to the separate type front seatback spring assembly.
-
-
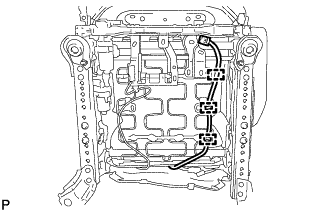
INSTALL FRONT NO. 1 SEAT WIRE
-
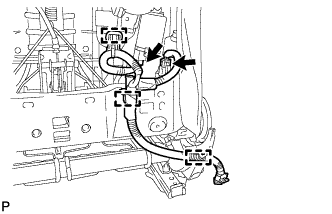
Engage the 3 clamps to install the front No. 1 seat wire to the separate type front seatback spring assembly.
-
Connect the 2 connectors.
-
-
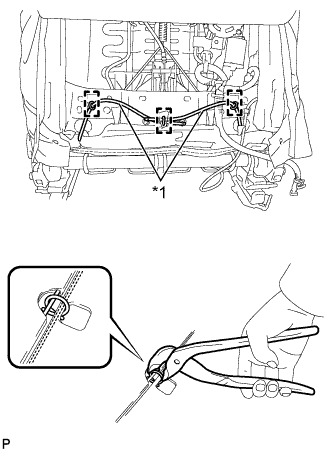
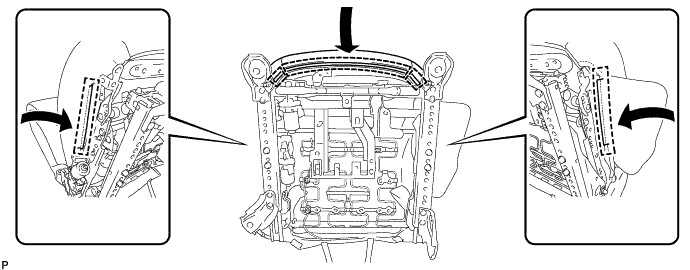
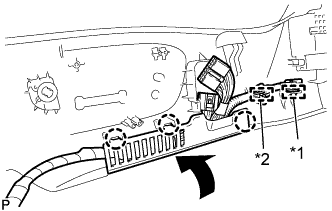
INSTALL SEPARATE TYPE FRONT SEATBACK COVER
-
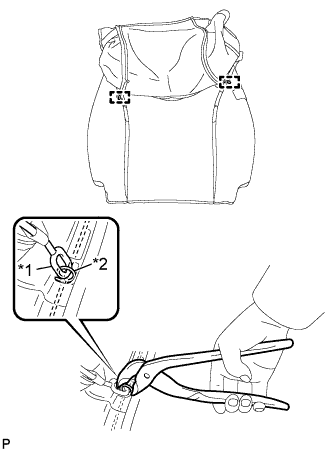
Text in Illustration *1 Fastening Rubber *2 Hog Ring Using hog ring pliers, connect the fastening rubber to the separate type front seatback pad with 2 new hog rings.
Note
-
Be careful not to damage the cover.
-
When installing the hog rings, take care to minimize wrinkles as much as possible.
-
-
Using hog ring pliers, install the separate type front seatback cover to the separate type front seatback pad with 5 new hog rings
Note
-
Be careful not to damage the cover.
-
When installing the hog rings, take care to minimize wrinkles as much as possible.
-
-
-
INSTALL SEPARATE TYPE FRONT SEATBACK COVER WITH PAD
-
Temporarily install the separate type front seatback cover with pad to the front seatback spring sub-assembly.
-

Engage the 4 claws and install the 2 front seat headrest supports.
-
Install the separate type front seatback cover bracket with the nut.
- Torque:
- 5.5 N*m { 56 kgf*cm, 49 in.*lbf }
Note
-
For vehicles with side airbags, the side airbags may not be activated normally unless the front seatback cover is securely installed.
-
Check that the strap is not twisted after installing the bracket.
-
Install the bracket securely.
-
Engage the 2 hooks.
-
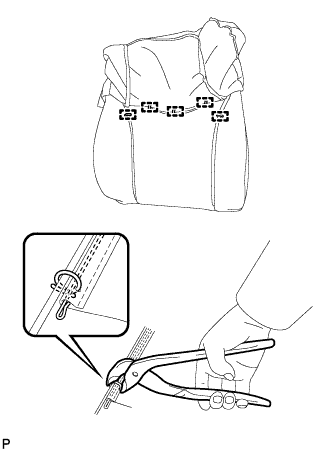
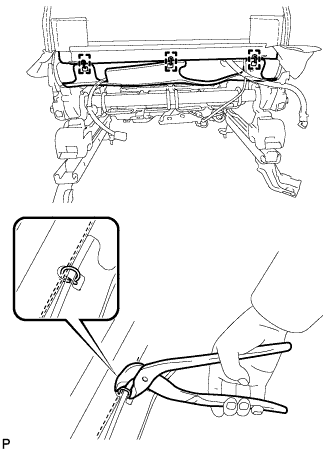
Text in Illustration *1 Fastening Rubber Using hog ring pliers, install the fastening rubber to the front seatback spring with 3 new hog rings.
Note
-
Be careful not to damage the cover.
-
When installing the hog rings, take care to minimize wrinkles as much as possible.
-
-
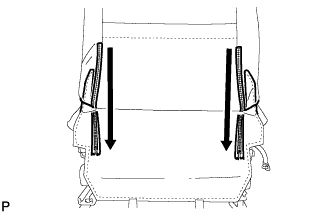
Close the 2 fasteners.
-
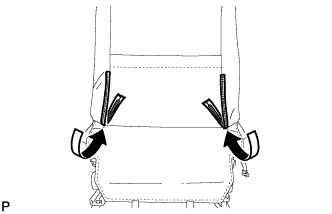
Push in the lower part of 2 fasteners to the separate type front seatback cover as shown in the illustration.
-
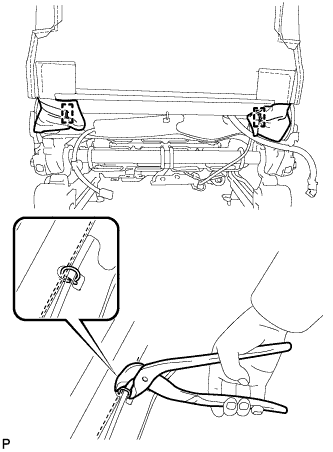
Using hog ring pliers, install 3 new hog rings.
Note
-
Be careful not to damage the cover.
-
When installing the hog rings, take care to minimize wrinkles as much as possible.
-
-
Using hog ring pliers, install 2 new hog rings.
Note
-
Be careful not to damage the cover.
-
When installing the hog rings, take care to minimize wrinkles as much as possible.
-
-
-
INSTALL SEPARATE TYPE FRONT SEAT CUSHION COVER
-
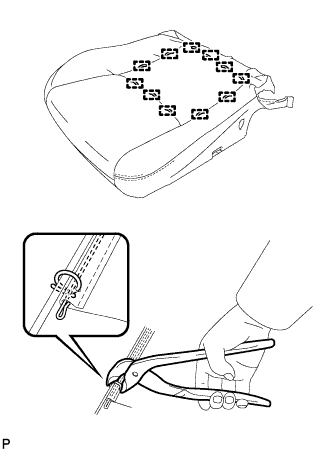
Using hog ring pliers, install the separate type front seat cushion cover to the separate type front seat cushion pad with 11 new hog rings.
Note
-
Be careful not to damage the cover.
-
When installing the hog rings, take care to minimize wrinkles as much as possible.
-
-

Using hog ring pliers, install 2 new hog rings.
Note
-
Be careful not to damage the cover.
-
When installing the hog rings, take care to minimize wrinkles as much as possible.
-
-
-
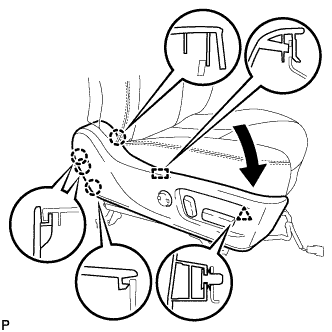
INSTALL SEPARATE TYPE FRONT SEAT CUSHION COVER WITH PAD
-
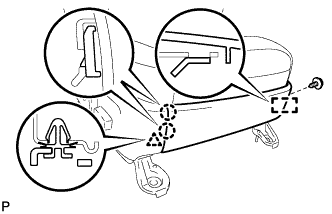
Engage each hook to install the separate type front seat cushion cover with pad to the front seat cushion spring sub-assembly as shown in the illustration.
-
Engage the 2 hooks as shown in the illustration.
-
Engage the fastener to connect the side airbag wire harness.
-
Connect the connector and engage the clamp to connect the seat heater wire harness.
-
Engage the 3 clamps to connect the seat heater wire harness.
-
Engage the 4 hooks.
-
Connect the rubber band.
-
-
INSTALL FRONT INNER SEAT CUSHION SHIELD
-
Engage the 5 claws and install the front inner seat cushion shield.
-
-
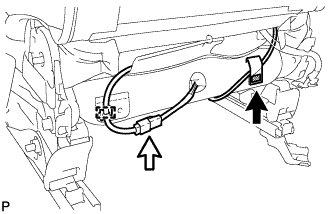
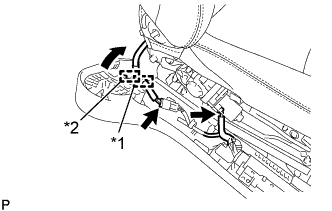
INSTALL FRONT SEAT WIRE
-
Text in Illustration *1 Clamp *2 Hook Engage the 3 claws to close the wire harness cover as shown in the illustration.
-
Engage the clamp and hook to install the front seat wire to the front seat cushion shield.
-
-
INSTALL LUMBAR SWITCH (POWER SEAT SWITCH ASSEMBLY)
-
Engage the 4 claws to install the lumbar switch (power seat switch assembly).
-
-
INSTALL FRONT POWER SEAT SWITCH
-
Install the front power seat switch with the 3 screws.
-
-
INSTALL RECLINING POWER SEAT SWITCH KNOB
-
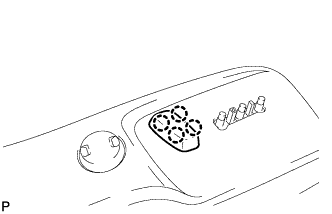
Engage the 4 claws to install the reclining power seat switch knob.
-
-
INSTALL SLIDE AND VERTICAL POWER SEAT SWITCH KNOB
-

Engage the 4 claws to install the slide and vertical power seat switch knob.
-
-
INSTALL FRONT SEAT CUSHION SHIELD ASSEMBLY
-
Text in Illustration *1 Clamp *2 Hook Connect the 2 connectors.
-
Engage the clamp and hook as shown in the illustration.
-
Engage the guide and 4 claws as shown in the illustration.
-
Engage the clip to install the front seat cushion shield assembly.
-

Engage the 6 clamps.
-
Connect the 4 connectors.
-
-
INSTALL FRONT INNER NO. 1 SEAT CUSHION SHIELD
-
Engage the 2 claws and clip.
-
Engage the guide to install the front inner No. 1 seat cushion shield to the front seat cushion shield with the screw.
-
-
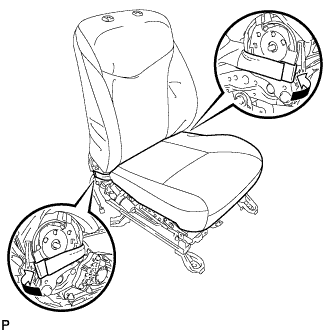
INSTALL FRONT SEAT INNER BELT ASSEMBLY
-
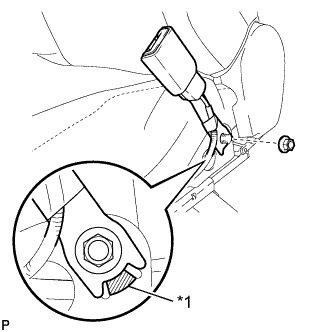
Text in Illustration *1 Protruding Part Install the front seat inner belt assembly with the nut.
- Torque:
- 42 N*m { 428 kgf*cm, 31 ft.*lbf }
Note
Do not allow the anchor part of the front seat inner belt assembly to overlap the protruding part of the front seat adjuster.
-
Connect each connector.
-
Engage each clamp.
-
-
INSTALL SEAT ADJUSTER COVER CAP
-
Install the seat adjuster cover cap.
Tech Tips
Use the same procedure for the LH side and RH side.
-