HV BATTERY THERMISTOR REMOVAL

-
REMOVE BATTERY SMART UNIT
-
REMOVE NO. 1 HYBRID VEHICLE BATTERY CARRIER BRACKET SUB-ASSEMBLY
CAUTION:
Wear insulated gloves.
-
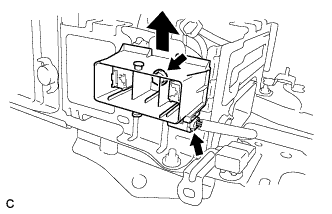
Disconnect the connector.
-
Remove the bolt and electric vehicle battery plug assembly as shown in the illustration.
-
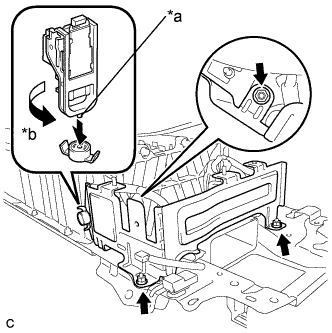
Text in Illustration *a Projection *b Turn Using the service plug grip, remove the battery cover lock striker.
Tech Tips
Insert the projection part of the service plug grip, and turn the button of the battery cover lock striker counterclockwise, to release the lock.
-
Remove the 3 nuts and No. 1 hybrid vehicle battery carrier bracket sub-assembly.
-
-
REMOVE NO. 4 HYBRID VEHICLE BATTERY CARRIER BRACKET SUB-ASSEMBLY
CAUTION:
Wear insulated gloves.
-
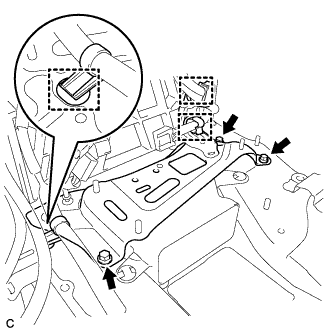
Disconnect the 3 wire harness clamps.
-
Remove the 3 bolts and No. 4 hybrid vehicle battery carrier bracket sub-assembly.
-
Disengage the 2 claws and remove the HV battery thermistor.
-
-
REMOVE UPPER HYBRID BATTERY COVER SUB-ASSEMBLY
CAUTION:
Be sure to wear insulated gloves and protective goggles.
-
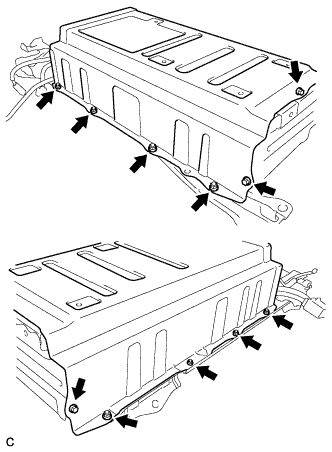
Remove the 3 bolts, 8 nuts and upper hybrid battery cover sub-assembly with the No. 1 hybrid battery shield sub-assembly.
-
-
REMOVE HYBRID BATTERY THERMISTOR
CAUTION:
Be sure to wear insulated gloves and protective goggles.
-
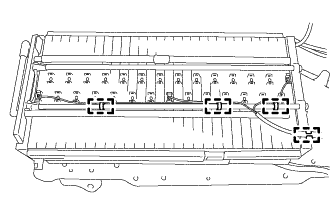
Remove the 4 clamps.
-
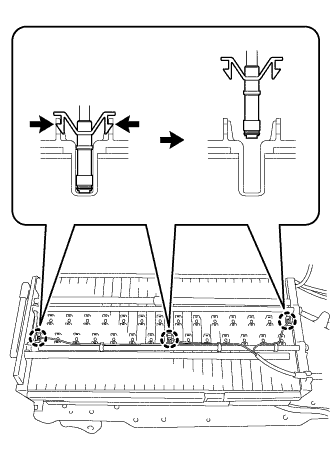
Disengage the claws of each hybrid battery thermistor (sensor portion) and remove the hybrid battery thermistor from the hybrid battery.
-