STEREO COMPONENT AMPLIFIER REMOVAL

-
PRECAUTION (w/ Navigation System for HDD)
Note
After the power switch is turned off, the display and navigation module display (HDD navigation system) records various types of memory and settings. As a result, after turning the power switch off, make sure to wait at least 60 seconds before disconnecting the cable from the negative (-) battery terminal.
-
REMOVE REAR NO. 2 FLOOR BOARD
-
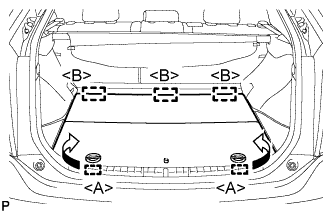
Disengage the 2 guides <A> as shown in the illustration.
-
Disengage the 3 guides <B> and remove the rear No. 2 floor board.
-
-
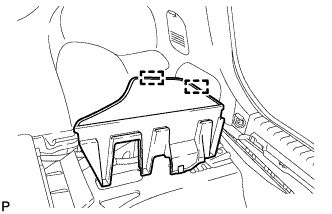
REMOVE REAR DECK FLOOR BOX
-
Remove the rear deck floor box.
-
-
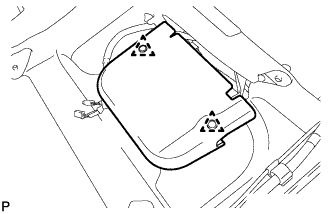
REMOVE REAR NO. 3 FLOOR BOARD
-
Disengage the 2 guides and remove the rear No. 3 floor board.
-
-
DISCONNECT CABLE FROM NEGATIVE BATTERY TERMINAL
CAUTION:
Wait at least 90 seconds after disconnecting the cable from the negative (-) battery terminal to disable the SRS system.
Note
When disconnecting the cable, some systems need to be initialized after the cable is reconnected Click here.
-
REMOVE FRONT SEAT HEADREST ASSEMBLY RH
Tech Tips
Use the same procedure for the RH side and LH side Click here.
-
REMOVE OUTER SEAT TRACK COVER RH
Tech Tips
Use the same procedure for the RH side and LH side Click here.
-
REMOVE INNER SEAT TRACK COVER RH
Tech Tips
Use the same procedure for the RH side and LH side Click here.
-
REMOVE FRONT SEAT ASSEMBLY RH
Tech Tips
Use the same procedure for the RH side and LH side Click here.
-
REMOVE AUDIO AMPLIFIER COVER
-
Using a clip remover, remove the 2 clips and audio amplifier cover.
-
-
REMOVE STEREO COMPONENT AMPLIFIER ASSEMBLY WITH BRACKET
-
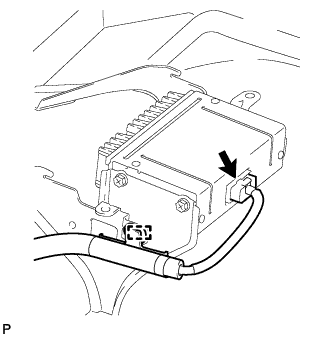
Disconnect the connector.
-
Disengage the clamp and disconnect the wire harness.
-
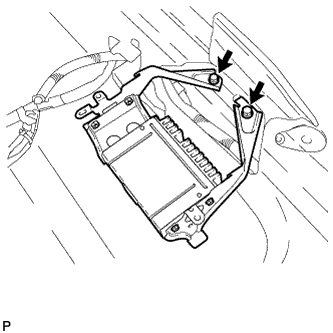
Remove the 2 bolts and stereo component amplifier assembly with bracket.
-
-
REMOVE NO. 2 AMPLIFIER OUTER BRACKET
-
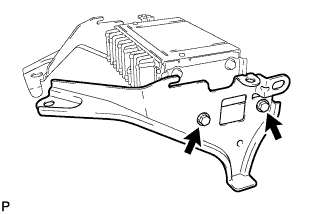
Remove the 2 screws and No. 2 amplifier outer bracket.
-
-
REMOVE NO. 2 AMPLIFIER INNER BRACKET
-
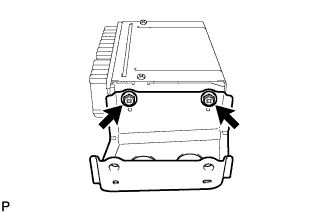
Remove the 2 screws and No. 2 amplifier inner bracket.
-
-
REMOVE NO. 1 AMPLIFIER BRACKET
-
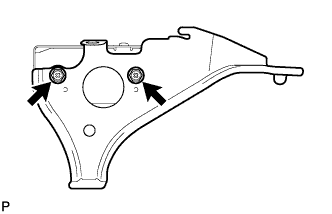
Remove the 2 screws and No. 1 amplifier bracket.
-
-
REMOVE STEREO COMPONENT AMPLIFIER ASSEMBLY