REAR SEAT OUTER BELT ASSEMBLY (for Sedan) REMOVAL

Tech Tips
-
Use the same procedure for the RH and LH sides.
-
The procedure listed below is for the LH side.
-
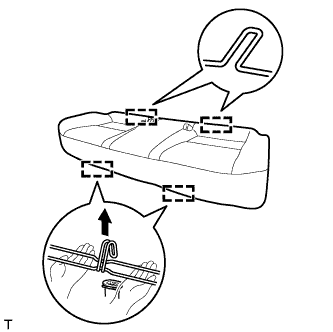
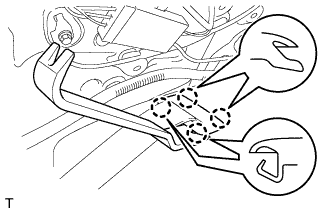
REMOVE REAR BENCH TYPE SEAT CUSHION ASSEMBLY
-
Detach the 2 front hooks of the seat cushion from the vehicle body.
Note
Follow the instructions below carefully as the cushion frame deforms easily.
-
Choose a hook to detach first. Place your hands near the hook as shown in the illustration. Then lift the seat cushion to detach the hook.
-
Repeat for the other hook.
-
-
Detach the 2 rear hooks of the seat cushion from the seatback.
Note
Be careful not to damage the vehicle body.
-
-
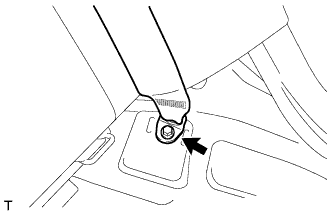
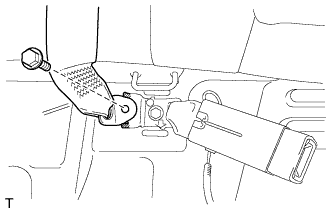
REMOVE REAR SIDE SEATBACK ASSEMBLY LH
-
Remove the bolt and disconnect the rear seat 3 point type belt anchor.
-
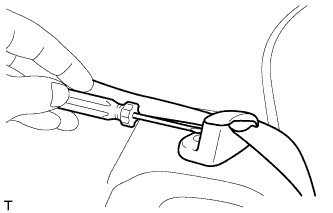
Using a screwdriver, detach the claw to open the cap of the rear seat shoulder belt guide.
-
Remove the seat belt from the belt guide.
-
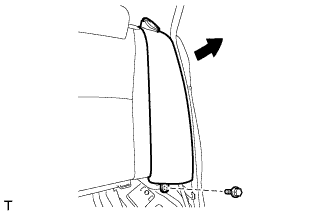
Remove the bolt, and then remove the side seatback LH as shown in the illustration.
-
-
REMOVE REAR SIDE SEATBACK ASSEMBLY RH
Tech Tips
Use the same procedures described for the LH side.
-
DISCONNECT REAR CENTER SEAT OUTER BELT ASSEMBLY
-
Remove the bolt and disconnect the center seat outer belt anchor.
-
-
REMOVE INNER ROOF SIDE GARNISH LH
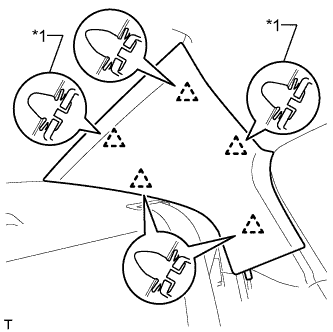
Text in Illustration *1 Clip A
-
Detach the 5 clips and remove the inner roof side garnish.
Tech Tips
The 2 clips labeled A remain attached to the body.
-
Remove the 2 clips labeled A from the vehicle body.
-
-
REMOVE INNER ROOF SIDE GARNISH RH
Tech Tips
Use the same procedure described for the LH side.
-
REMOVE REAR SEAT SHOULDER BELT HOLE COVER
-
Using a moulding remover, detach the 4 claws and remove the belt hole cover.
Tech Tips
Use the same procedure to remove all the belt hole covers.
-
-
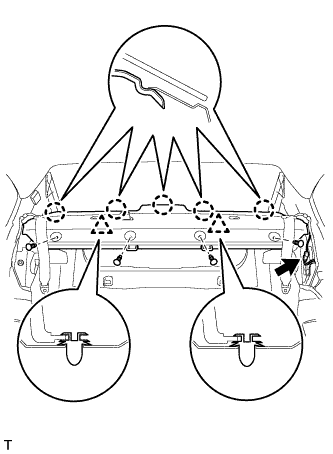
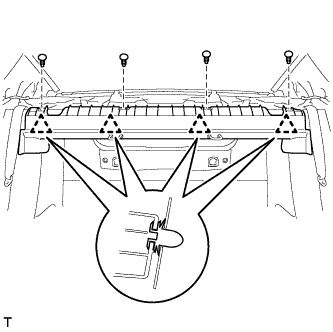
REMOVE PACKAGE TRAY TRIM PANEL ASSEMBLY
-
Disconnect the connector.
-
Remove the 4 clips.
-
Detach the 2 clips and raise the front portion of the package tray trim panel assembly.
-
Pass the 3 rear seat belt floor anchors through the package tray trim panel assembly.
-
Detach the 5 claws and remove the package tray trim panel assembly.
-
-
REMOVE NO. 1 ROOM PARTITION BOARD
-
Remove the 4 clips.
-
Using a moulding remover, detach the 4 clips and remove the partition board.
-
-
REMOVE NO. 1 PACKAGE TRAY TRIM PAD
Tech Tips
Perform the following procedure if replacing the No. 1 package tray trim pad.
-
Remove the package tray trim pad.
-
-
REMOVE NO. 2 PACKAGE TRAY TRIM PAD
Tech Tips
Perform the following procedure if replacing the No. 2 package tray trim pad.
-
Remove the package tray trim pad.
-
-
REMOVE NO. 3 PACKAGE TRAY TRIM PAD
Tech Tips
Perform the following procedure if replacing the No. 3 package tray trim pad.
-
Remove the package tray trim pad.
-
-
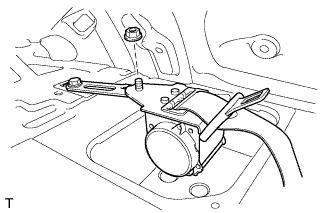
REMOVE REAR SEAT 3 POINT TYPE BELT ASSEMBLY LH
-
Remove the nut and seat belt.
-
-
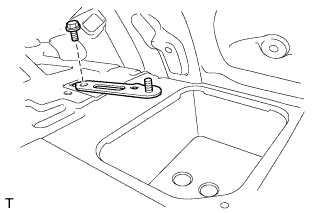
REMOVE OUTER BELT ANCHOR BRACKET SUB-ASSEMBLY LH
-
Remove the bolt and anchor bracket.
-