FRONT SEAT ASSEMBLY (for Manual Seat) DISASSEMBLY

CAUTION:
Wear protective gloves. Sharp areas on the parts may injure your hands.
Tech Tips
-
Use the same procedure for RHD and LHD vehicles.
-
The procedure listed below is for LHD vehicles.
-
Use the same procedure for the RH and LH sides.
-
The procedure listed below is for the LH side.
-
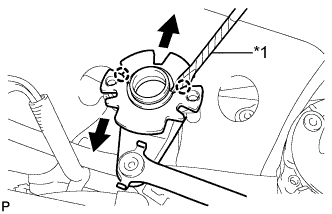
REMOVE VERTICAL SEAT ADJUSTER KNOB CAP (for Driver Side)
-
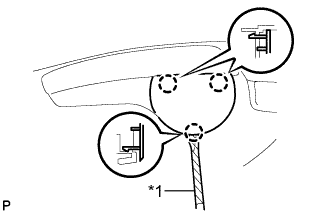
Text in Illustration *1 Protective Tape Using a screwdriver, detach the 3 claws and remove the vertical seat adjuster knob cap.
Tech Tips
Tape the screwdriver tip before use.
-
-
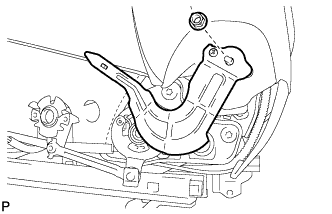
REMOVE VERTICAL ADJUSTING HANDLE LH (for Driver Side)
-
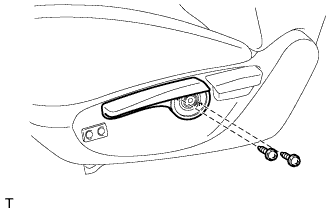
Remove the 2 screws and vertical adjusting handle LH.
-
-
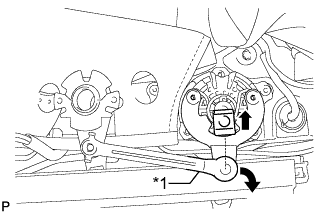
REMOVE RECLINING ADJUSTER RELEASE HANDLE LH
-
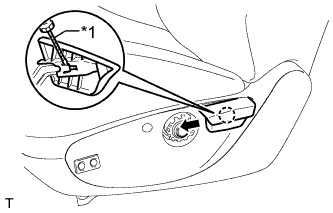
Text in Illustration *1 Protective Tape Raise the reclining adjuster release handle LH to reveal the claw. Using a screwdriver, detach the claw and remove the reclining adjuster release handle LH.
Tech Tips
Tape the screwdriver tip before use.
-
-
REMOVE FRONT SEAT CUSHION SHIELD LH
-
Detach the 2 rubber bands.
-
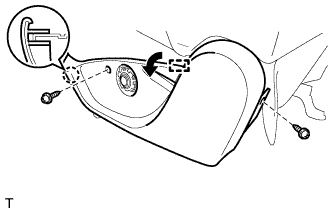
Remove the 2 screws.
-
Detach the hook and claw and remove the front seat cushion shield LH.
-
w/ Lumbar Support:
Disconnect the connector.
-
-
REMOVE LUMBAR FRONT POWER SEAT SWITCH (w/ Lumbar Support)
-

Remove the 2 screws and lumbar front power seat switch.
-
-
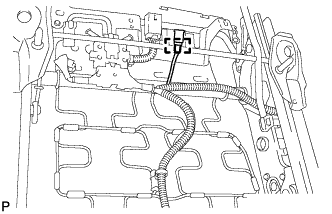
REMOVE FRONT SEAT INNER CUSHION SHIELD LH
-
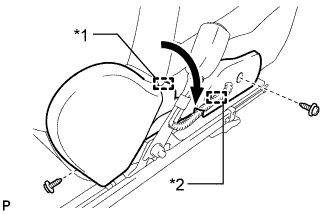
Text in Illustration *1 Hook *2 Wire Harness Clamp Remove the 2 screws.
-
Detach the hook and wire harness clamp and remove the front seat inner cushion shield LH.
-
-
REMOVE FRONT SEAT INNER BELT ASSEMBLY LH
-
for Driver Side:
Disconnect the connector and detach the clamps.
-
for Passenger Side:
Disconnect the connectors and detach the clamps.
-
Remove the nut and front seat inner belt.
-
-
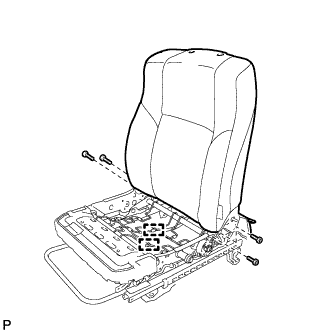
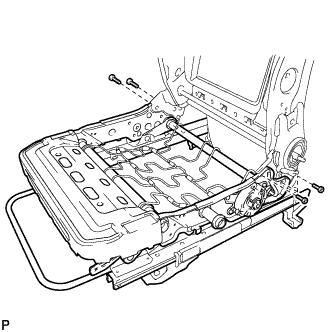
REMOVE SEAT CUSHION COVER WITH PAD
-

Remove the spring.
-
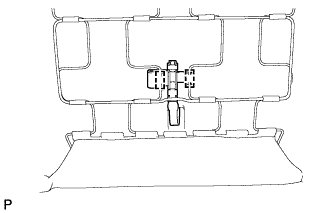
Using a 15 mm socket wrench, remove the nut and reclining handle.
-
for Driver Side:
-
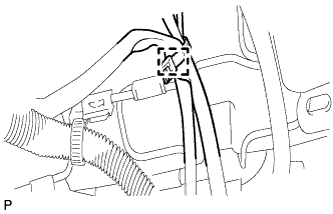
Text in Illustration *1 Connector Link Remove the clip and disconnect the connector link.
-
Text in Illustration *1 Protective Tape Using a screwdriver, detach the 2 claws and remove the vertical adjuster handle bracket with connector link.
Tech Tips
Tape the screwdriver tip before use.
-
-
w/ Seat Heater System:
-
Cut off the cable tie.
-
Disconnect the connector.
-
-
for Front Passenger Side:
Detach the 2 hooks and disconnect the connector holder.
-
w/ Lumbar Support:
Detach the wire harness clamp.
-
w/ Seat Heater System:
Disconnect the connector.
Text in Illustration *A w/ Seat Heater System - - -
Detach the hooks and remove the seat cushion cover with pad.
-
-
REMOVE SEPARATE TYPE FRONT SEAT CUSHION COVER
-

Detach the hooks and remove the separate type front seat cushion cover from the separate type front seat cushion pad.
Note
w/ Seat Heater System:
-
As the front seat cushion heater assembly is affixed to the separate type front seat cushion pad, do not remove the front seat cushion heater assembly from the separate type front seat cushion pad.
-
When replacing either the front seat cushion heater assembly or separate type front seat cushion pad due to a malfunction, be sure to replace both of them with new parts.
-
-
-
REMOVE SEPARATE TYPE FRONT SEATBACK ASSEMBLY
Tech Tips
Perform this procedure when it is necessary to remove and reinstall or replace the separate type front seatback assembly.
-
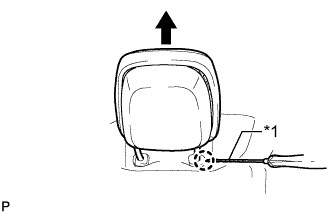
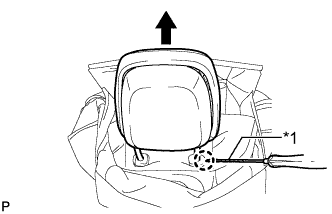
Text in Illustration *1 Protective Tape w/o Active Headrest:
Using a screwdriver, push the headrest support lock to release the lock and remove the front seat headrest assembly.
Tech Tips
Tape the screwdriver tip before use.
-
w/ Lumbar Support:
-
Detach the 2 hooks.
-
Detach the 2 hooks from the bottom of the separate type front seatback cover.
-
Detach the 2 hooks and disconnect the 2 straps.
-
Pass the 2 straps through the 2 holes of the separate type front seatback pad to the surface.
-
Detach the wire harness clamp.
-
Disconnect the connector.
-
-
w/ Active Headrest:
-
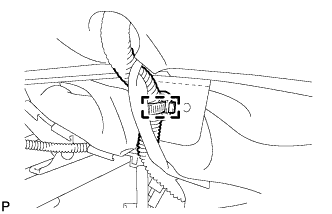
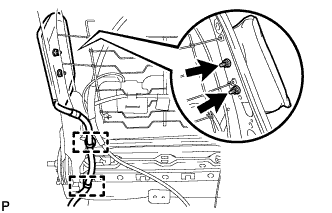
Text in Illustration *1 Seatback Cover Bracket Remove the screw and detach the seatback cover bracket.
-
Text in Illustration *1 Hook *2 Hog Ring Remove the hog rings and detach the 3 hooks from the center of the separate type front seatback pad.
-
Detach the 7 hooks and remove the actuator shield.
-
Text in Illustration *1 Cable End 
Pull Pull the cable to loosen it, and then disconnect the cable end from the active headrest lower unit.
-
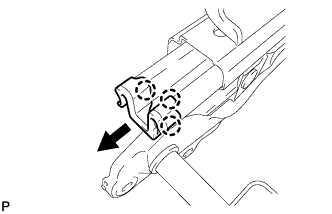
Detach the 2 claws and remove the active headrest lower unit.
-
Using a screwdriver, detach the 2 claws and disconnect the cable from the active headrest lower unit.
-
Text in Illustration *1 Hook *2 Hog Ring Remove the hog ring and detach the 2 hooks and open the seatback mat.
-

Cut off the cable tie.
-
Text in Illustration *1 Cable End Push the cable to push out the cable end from the clip.
-
Detach the 2 claws and remove the clip.
-

Pull the cable through the hole of the seatback frame.
-
Text in Illustration *1 Protective Tape Using a screwdriver, push the headrest support lock to release the lock and remove the front seat headrest assembly.
Tech Tips
Tape the screwdriver tip before use.
-
-
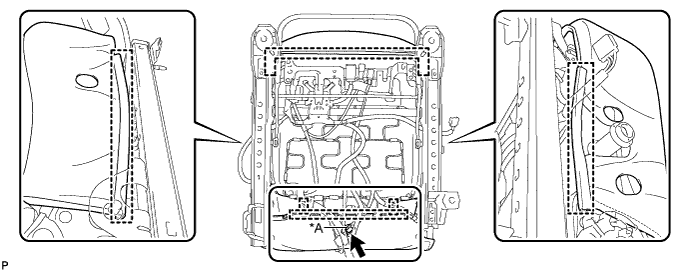
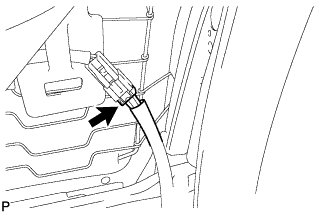
Detach the connector.
-
Detach the 2 wire harness clamps.
-
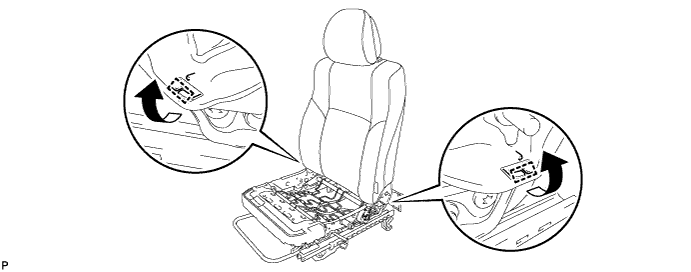
Using a T50 "TORX" socket wrench, remove the 4 "TORX" bolts and separate type front seatback assembly from the front seat adjuster assembly LH.
-
-
REMOVE SEPARATE TYPE FRONT SEATBACK COVER
-
Text in Illustration *1 Protective Tape w/o Active Headrest:
Using a screwdriver, push the headrest support lock to release the lock and remove the front seat headrest assembly.
Tech Tips
Tape the screwdriver tip before use.
-
Detach the 2 hooks.
-
Detach the 2 hooks from the bottom of the separate type front seatback cover.
-
Detach the 2 hooks and disconnect the 2 straps.
-
Pass the 2 straps through the 2 holes of the separate type front seatback pad to the surface.
-
Text in Illustration *1 Seatback Cover Bracket Remove the screw and detach the seatback cover bracket.
-
Text in Illustration *1 Hook *2 Hog Ring Remove the hog rings and detach the 3 hooks from the center of the separate type front seatback pad.
-
w/ Active headrest:
-
Detach the 7 hooks and remove the actuator shield.
-
Text in Illustration *1 Cable End Pull Pull the cable to loosen it, and then disconnect the cable end from the active headrest lower unit.
-
Detach the 2 claws and remove the active headrest lower unit.
-
Using a screwdriver, detach the 2 claws and disconnect the cable.
-
Text in Illustration *1 Hook *2 Hog Ring Remove the hog ring and detach the 2 hooks and open the seatback mat.
-
Cut off the cable tie.
-
Text in Illustration *1 Cable End Push the cable to push out the cable end from the clip.
-
Detach the 2 claws and remove the clip.
-
Pull the cable through the hole of the seatback frame.
-
Text in Illustration *1 Protective Tape Using a screwdriver, push the headrest support lock to release the lock and remove the front seat headrest assembly.
Tech Tips
Tape the screwdriver tip before use.
-
-
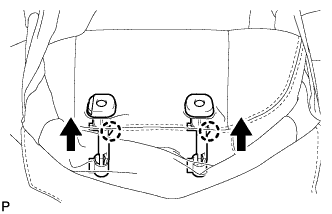
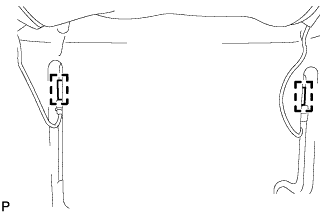
Detach the 2 claws and remove the 2 front seat headrest supports.
-
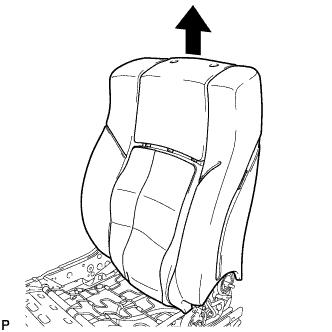
Detach the 2 hooks and remove the separate type front seatback cover.
-
-
REMOVE SEPARATE TYPE FRONT SEATBACK PAD
-
Remove the separate type front seatback pad.
Note
w/ Seat Heater System:
-
As the front seatback heater assembly is affixed to the separate type front seatback pad, do not remove the front seatback heater assembly from the separate type front seatback pad.
-
When replacing either the front seatback heater assembly or separate type front seatback pad due to a malfunction, be sure to replace both of them with new parts.
-
-
-
REMOVE LUMBAR SUPPORT ADJUSTER ASSEMBLY LH (w/ Lumbar Support)
-
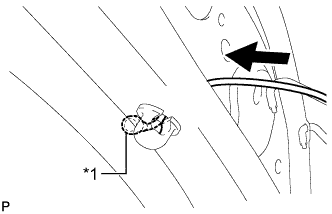
Disconnect the connector.
-
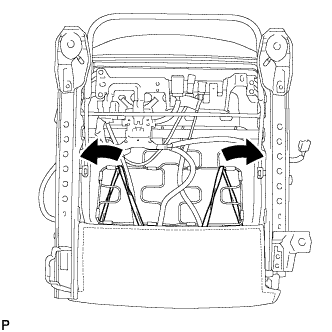
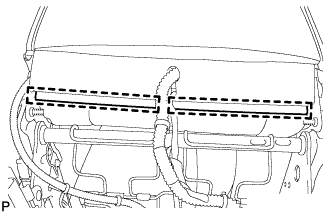
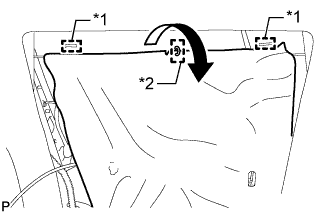
Detach the 8 hooks and remove the seatback spring.
-
Text in Illustration *1 Back Sheet Pull the wire harness and disconnect it from the 2 back sheets as shown in the illustration.
-
Text in Illustration *1 Back Sheet *2 Hook A *3 Hook B *4 Cable Tie Detach the 4 hooks A and fold back the 2 back sheets.
-
Cut off the 2 cable ties, detach the 2 hooks B, and then remove the lumbar support adjuster assembly LH from the seatback spring.
-
-
REMOVE FRONT SEAT AIRBAG ASSEMBLY LH
-

Disconnect the connector clamp and detach the 2 harness clamps underside of seat.
-
Detach the 2 harness clamps and remove the 2 nuts and front seat airbag assembly LH.
Note
The nuts must not be reused.
-
-
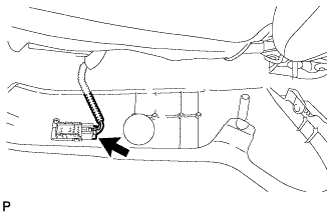
REMOVE SEAT CLIMATE CONTROL CONTROLLER LH (w/ Seat Heater System)
-
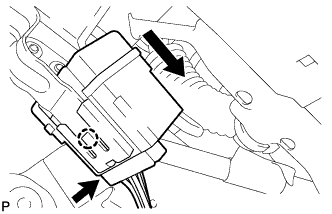
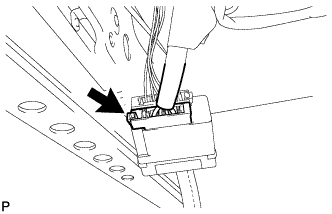
Disconnect the connector.
-
Detach the claw and remove the seat climate control controller LH.
-
-
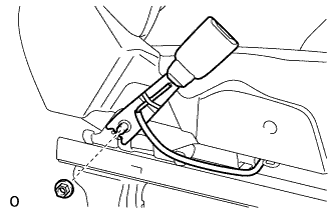
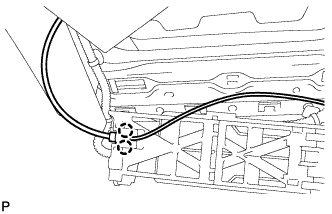
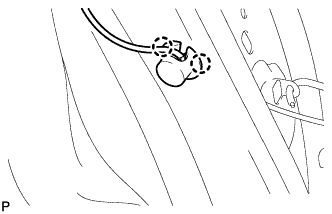
REMOVE FRONT SEAT WIRE LH (w/ Lumbar Support)
-
Detach the wire harness clamp.
-
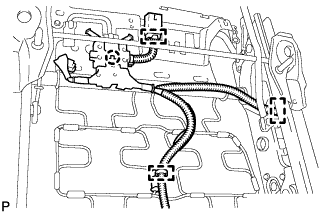
Detach the 3 wire harness clamps.
-
Detach the claw and remove the front seat wire LH.
-
-
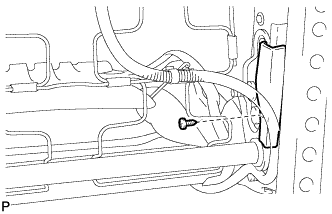
REMOVE FRONT SEAT LOWER CUSHION SHIELD LH
-
Remove the screw and front seat lower cushion shield LH.
-
-
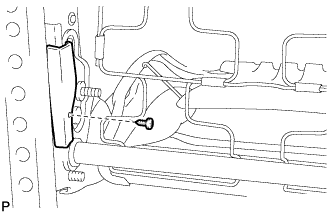
REMOVE FRONT SEAT INNER BELT ANCHOR BRACKET COVER LH
-
Remove the screw and front seat inner belt anchor bracket cover LH.
-
-
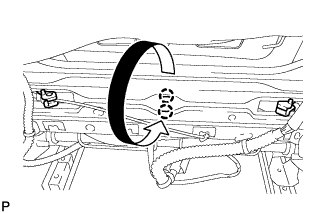
REMOVE FRONT SEAT ADJUSTER ASSEMBLY LH
-
Using a T50 "TORX" socket wrench, remove the 4 "TORX" bolts and front seat adjuster assembly LH.
-
-
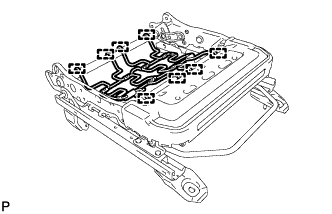
REMOVE SEPARATE TYPE FRONT SEAT CUSHION SPRING ASSEMBLY
-
Detach the 8 hooks and remove the separate type front seat cushion spring assembly from the front seat adjuster assembly LH.
-
-
REMOVE REAR UPPER SEAT TRACK COVER
-

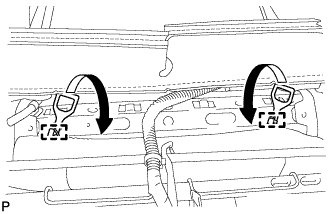
Detach the 3 claws and remove the rear upper seat track cover.
-
-
REMOVE NO. 2 REAR UPPER SEAT TRACK COVER
-
Detach the 3 claws and remove the No. 2 rear upper seat track cover.
-