FRONT SEAT SIDE AIRBAG ASSEMBLY REMOVAL

CAUTION:
Wear protective gloves. Sharp areas on the parts may injure your hands.
Tech Tips
-
Use the same procedure for RHD and LHD vehicles.
-
The procedure listed below is for LHD vehicles.
-
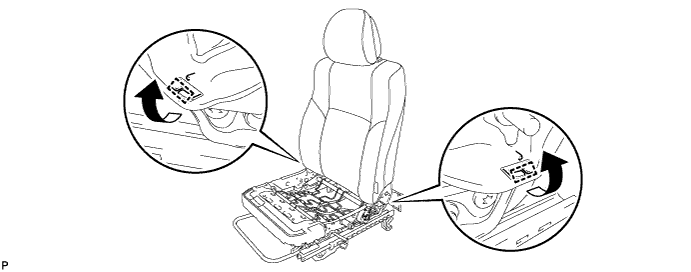
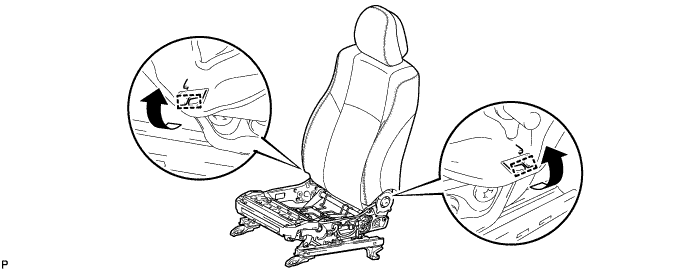
REMOVE FRONT SEAT ASSEMBLY LH
for Manual Seat: Click here
for Power Seat: Click here
-
REMOVE VERTICAL SEAT ADJUSTER KNOB CAP (for Manual Seat Driver Side)
-
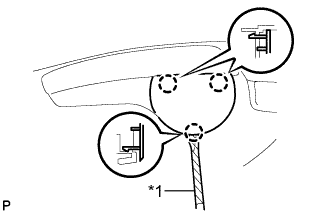
Text in Illustration *1 Protective Tape Using a screwdriver, detach the 3 claws and remove the vertical seat adjuster knob cap.
Tech Tips
Tape the screwdriver tip before use.
-
-
REMOVE VERTICAL ADJUSTING HANDLE LH (for Manual Seat Driver Side)
-
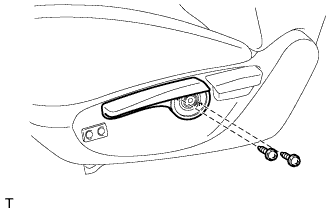
Remove the 2 screws and vertical adjusting handle LH.
-
-
REMOVE RECLINING ADJUSTER RELEASE HANDLE LH (for Manual Seat)
-
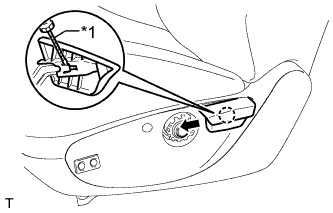
Text in Illustration *1 Protective Tape Raise the reclining adjuster release handle LH to reveal the claw. Using a screwdriver, detach the claw and remove the reclining adjuster release handle LH.
Tech Tips
Tape the screwdriver tip before use.
-
-
REMOVE RECLINING POWER SEAT SWITCH KNOB (for Power Seat)
-
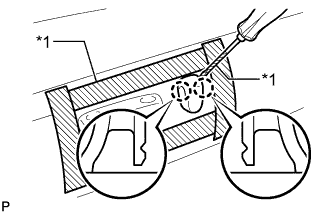
Text in Illustration *1 Protective Tape Apply protective tape around the front seat cushion shield LH.
-
Using a screwdriver, detach the 2 claws and remove the reclining power seat switch knob.
Tech Tips
Tape the screwdriver tip before use.
-
-
REMOVE SLIDE AND VERTICAL POWER SEAT SWITCH KNOB (for Power Seat)
-
Text in Illustration *1 Protective Tape Using a screwdriver, detach the 4 claws and remove the slide and vertical power seat switch knob.
Tech Tips
Tape the screwdriver tip before use.
-
-
REMOVE FRONT SEAT CUSHION SHIELD LH (for Manual Seat)
-
Detach the 2 rubber bands.
-
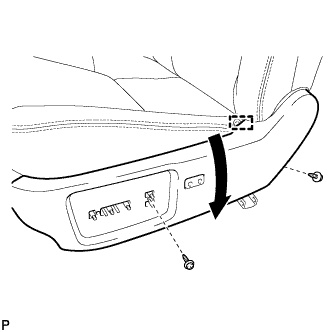
Remove the 2 screws.
-
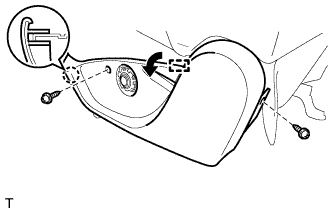
Detach the hook and claw and remove the front seat cushion shield LH.
-
w/ Lumbar Support:
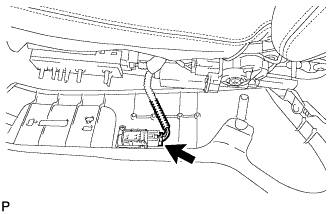
Disconnect the connector.
-
-
REMOVE FRONT SEAT CUSHION SHIELD LH WITH FRONT SEAT NO. 1 INNER CUSHION SHIELD LH (for Power Seat)
-
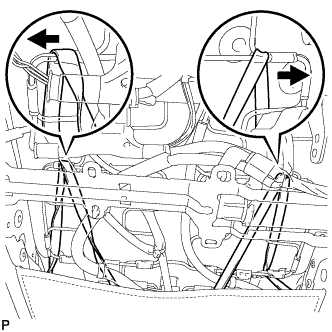
Detach the 2 rubber bands.
-
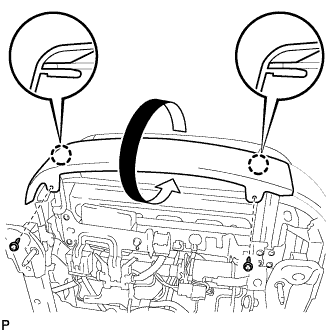
Remove the 2 screws and detach the 2 claws.
-
Remove the 2 screws.
-
Pull the front seat cushion shield LH to detach the hook and remove the front seat cushion shield LH with front seat No. 1 inner cushion shield.
-
for Driver Side:
Disconnect the connector.
-
-
REMOVE FRONT SEAT INNER CUSHION SHIELD LH
-
Detach the 2 rubber bands.
-
Remove the 2 screws.
-
Detach the hook and claw and remove the front seat cushion shield LH.
-
w/ Lumbar Support:
Disconnect the connector.
-
-
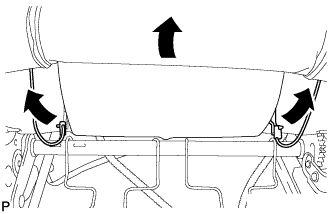
REMOVE SEPARATE TYPE FRONT SEATBACK COVER (for Manual Seat)
-
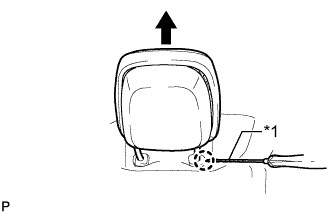
Text in Illustration *1 Protective Tape w/o Active Headrest:
Using a screwdriver, push the headrest support lock to release the lock and remove the front seat headrest assembly.
Tech Tips
Tape the screwdriver tip before use.
-
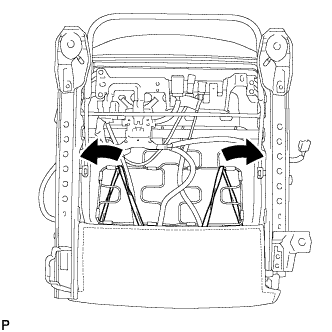
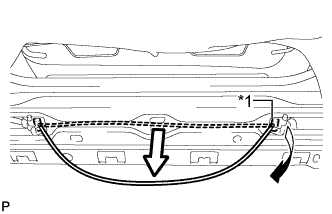
Detach the 2 hooks.
-
Detach the 2 hooks from the bottom of the separate type front seatback cover.
-
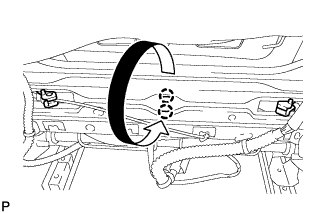
Detach the 2 hooks and disconnect the 2 straps.
-
Pass the 2 straps through the 2 holes of the separate type front seatback pad to the surface.
-
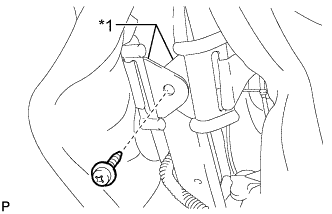
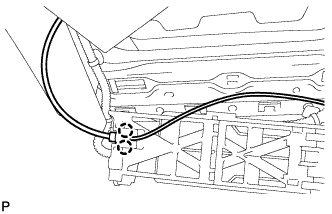
Text in Illustration *1 Seatback Cover Bracket Remove the screw and detach the seatback cover bracket.
-
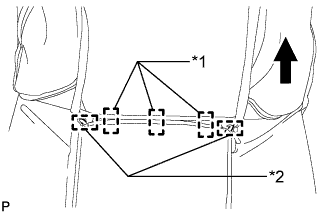
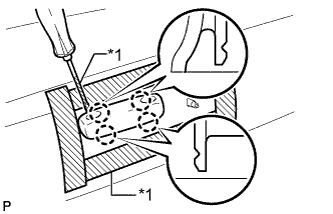
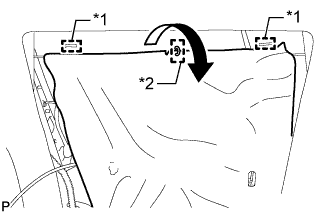
Text in Illustration *1 Hook *2 Hog Ring Remove the hog rings and detach the 3 hooks from the center of the separate type front seatback pad.
-
w/ Active headrest:
-
Detach the 7 hooks and remove the actuator shield.
-
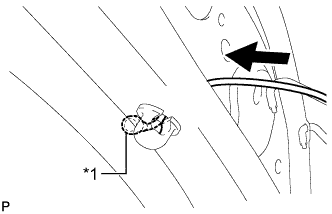
Text in Illustration *1 Cable End 
Pull Pull the cable to loosen it, and then disconnect the cable end from the active headrest lower unit.
-
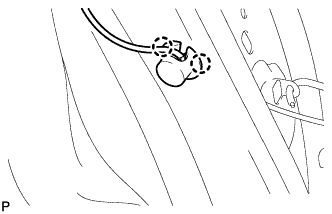
Detach the 2 claws and remove the active headrest lower unit.
-
Using a screwdriver, detach the 2 claws and disconnect the cable.
-
Text in Illustration *1 Hook *2 Hog Ring Remove the hog ring and detach the 2 hooks and open the seatback mat.
-

Cut off the cable tie.
-
Text in Illustration *1 Cable End Push the cable to push out the cable end from the clip.
-
Detach the 2 claws and remove the clip.
-

Pull the cable through the hole of the seatback frame.
-
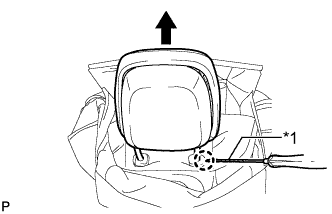
Text in Illustration *1 Protective Tape Using a screwdriver, push the headrest support lock to release the lock and remove the front seat headrest assembly.
Tech Tips
Tape the screwdriver tip before use.
-
-
Detach the 2 claws and remove the 2 front seat headrest supports.
-
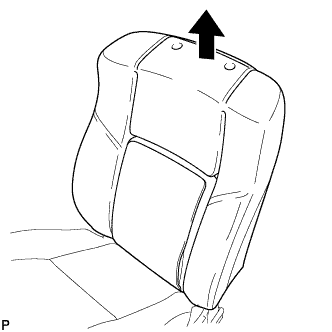
Detach the 2 hooks and remove the separate type front seatback cover.
-
-
REMOVE SEPARATE TYPE FRONT SEATBACK COVER (for Power Seat)
-
Detach the 2 hooks.
-
Detach the 2 hooks from the bottom of the separate type front seatback cover.
-
Detach the 2 hooks and disconnect the 2 straps.
-
Pass the 2 straps through the 2 holes of the separate type front seatback pad to the surface.
-
Text in Illustration *1 Seatback Cover Bracket Remove the screw and detach the seatback cover bracket.
-
Text in Illustration *1 Hook *2 Hog Ring Remove the hog rings and detach the 3 hooks from the center of the separate type front seatback pad.
-
Detach the 7 hooks and remove the actuator shield.
-
Text in Illustration *1 Cable End Pull Pull the cable to loosen it, and then disconnect the cable end from the active headrest lower unit.
-
Detach the 2 claws and remove the active headrest lower unit.
-
Using a screwdriver, detach the 2 claws and disconnect the cable.
-
Text in Illustration *1 Hook *2 Hog Ring Remove the hog ring and detach the 2 hooks and open the seatback mat.
-
Cut off the cable tie.
-
Text in Illustration *1 Cable End Push the cable to push out the cable end from the clip.
-
Detach the 2 claws and remove the clip.
-
Pull the cable through the hole of the seatback frame.
-
Text in Illustration *1 Protective Tape Using a screwdriver, push the headrest support lock to release the lock and remove the front seat headrest assembly.
Tech Tips
Tape the screwdriver tip before use.
-
Detach the 2 claws and remove the 2 front seat headrest supports.
-
Detach the 2 hooks and remove the separate type front seatback cover.
-
-
REMOVE SEPARATE TYPE FRONT SEATBACK PAD (for Manual Seat)
-
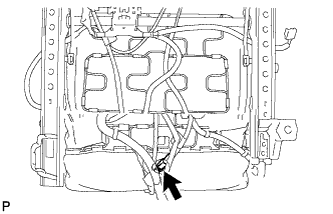
Disconnect the connector.
-
Remove the separate type front seatback pad.
Note
-
As the front seatback heater assembly is affixed to the separate type front seatback pad, do not remove the front seatback heater assembly from the separate type front seatback pad.
-
When replacing either the front seatback heater assembly or separate type front seatback pad due to a malfunction, be sure to replace both of them with new parts.
-
-
-
REMOVE SEPARATE TYPE FRONT SEATBACK PAD (for Power Seat)
-
Disconnect the connector.
-
Remove the separate type front seatback pad.
Note
-
As the front seatback heater assembly is affixed to the separate type front seatback pad, do not remove the front seatback heater assembly from the separate type front seatback pad.
-
When replacing either the front seatback heater assembly or separate type front seatback pad due to a malfunction, be sure to replace both of them with new parts.
-
-
-
REMOVE FRONT SEAT AIRBAG ASSEMBLY LH
-

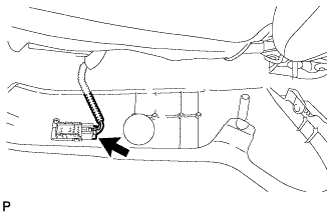
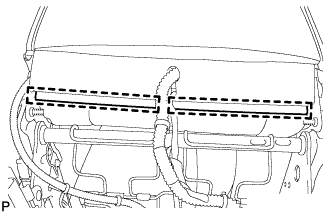
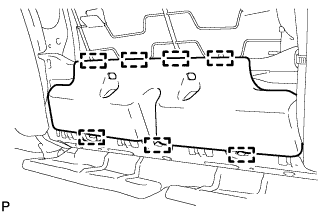
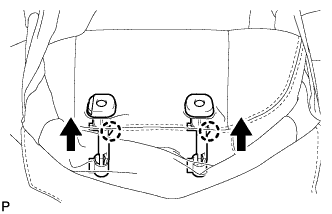
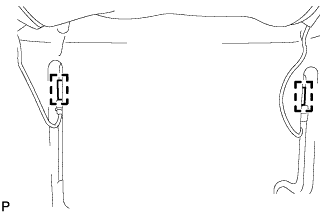
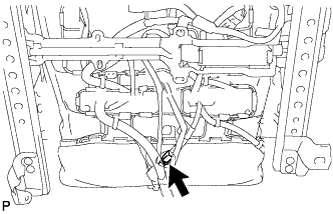
Disconnect the connector clamp and detach the 2 harness clamps underside of seat.
-
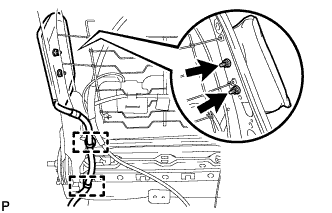
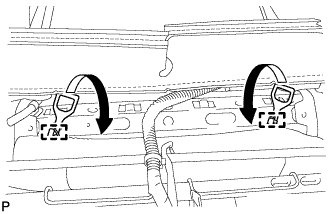
Detach the 2 harness clamps and remove the 2 nuts and front seat airbag assembly LH.
Note
The nuts must not be reused.
-