INSTRUMENT PANEL SPEAKER (for 11 Speakers) REMOVAL

Tech Tips
-
Use the same procedure for the RH and LH sides.
-
The procedure listed below is for the LH side.
-
REMOVE ENGINE ROOM SIDE COVER
-
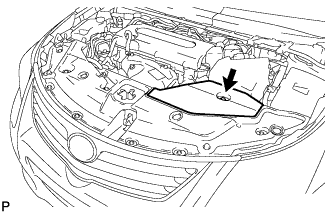
Remove the clip and engine room side cover.
-
-
DISCONNECT CABLE FROM NEGATIVE BATTERY TERMINAL
Note
-
w/ Navigation System (for HDD):
After the ignition switch is turned off, the HDD navigation system requires approximately a minute to record various types of memory and settings. As a result, after turning the ignition switch off, wait a minute or more before disconnecting the cable from the negative (-) battery terminal.
-
When disconnecting the cable, some systems need to be initialized after the cable is reconnected Click here.
-
-
REMOVE UPPER INSTRUMENT PANEL SUB-ASSEMBLY
-
Remove the upper instrument panel Click here.
-
-
REMOVE FRONT NO. 2 SPEAKER ASSEMBLY
-
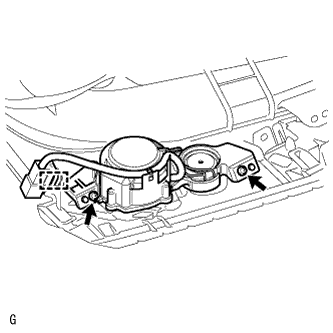
Detach the clamp.
-
Remove the 2 screws and speaker.
Note
Do not touch the cone part of the speaker.
-
-
REMOVE FRONT NO. 3 SPEAKER ASSEMBLY
-
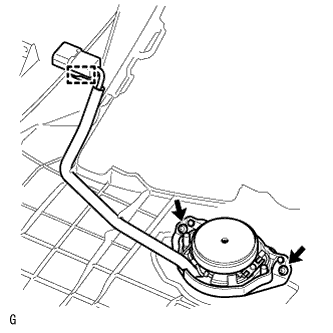
Detach the clamp.
-
Remove the 2 screws and speaker.
Note
Do not touch the cone part of the speaker.
-