ELECTRICAL KEY OSCILLATOR (for Wagon Inside Luggage Compartment) REMOVAL

-
REMOVE LOWER DECK TRIM SIDE BOARD LH (w/ Partition Board)
-
Remove the lower deck trim side board.
-
-
REMOVE LOWER DECK TRIM SIDE BOARD RH (w/ Partition Board)
-
Remove the lower deck trim side board.
-
-
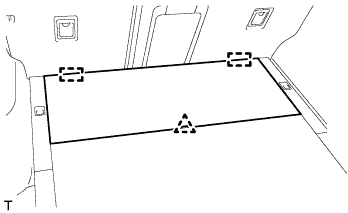
REMOVE DECK BOARD ASSEMBLY
-
Detach the clip and 2 guides, and remove the deck board.
-
-
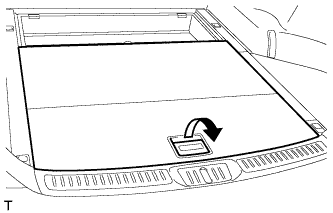
REMOVE DECK BOARD SUB-ASSEMBLY
-
Pull the lever and remove the deck board.
-
-
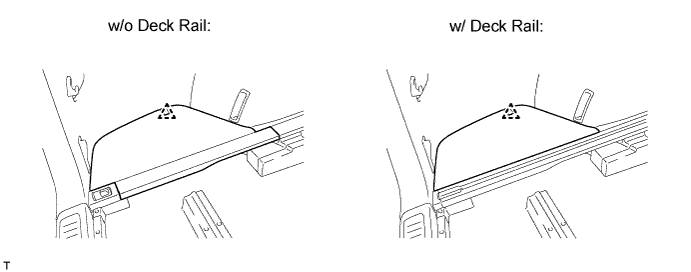
REMOVE NO. 3 DECK BOARD SUB-ASSEMBLY
-
Detach the clip and remove the No. 3 deck board.
-
-
REMOVE NO. 2 DECK BOARD SUB-ASSEMBLY
Tech Tips
Use the same procedure described for the No. 3 deck board.
-
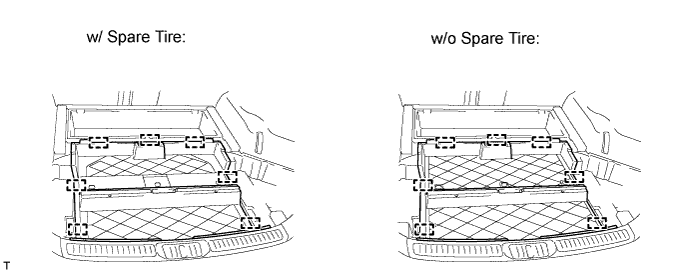
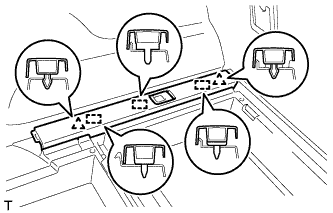
REMOVE REAR DECK FLOOR BOX
-
Detach the 7 guides and remove the rear deck floor box.
-
-
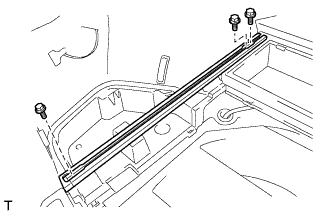
REMOVE FLOOR SIDE RAIL LH (w/ Deck Rail)
-
Remove the 3 bolts and floor side rail.
-
-
REMOVE FLOOR SIDE RAIL RH (w/ Deck Rail)
Tech Tips
Use the same procedure described for the LH side.
-
REMOVE NO. 2 DECK SIDE TRIM COVER (w/o Deck Rail)
-
Detach the 2 clips and 3 guides, and remove the deck side trim cover.
-
-
REMOVE NO. 1 DECK SIDE TRIM COVER (w/o Deck Rail)
Tech Tips
Use the same procedure described for the No. 2 deck side trim cover.
-
REMOVE NO. 6 DECK SIDE TRIM COVER (w/o Deck Rail)

-
Detach the 2 claws and remove the No. 6 deck side trim cover.
-
-
REMOVE NO. 5 DECK SIDE TRIM COVER (w/o Deck Rail)
Tech Tips
Use the same procedure described for the No. 6 deck side trim cover.
-
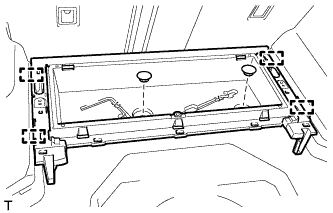
REMOVE DECK FLOOR BOX LH
-
Remove the bolt.
-
Detach the 5 guides and remove the deck floor box.
-
-
REMOVE DECK FLOOR BOX RH
Tech Tips
Use the same procedure described for the LH side.
-
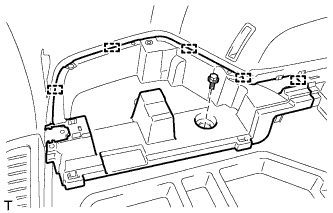
REMOVE FRONT DECK FLOOR BOX
-
Remove the 2 clips.
-
Detach the 4 guides and remove the front deck floor box.
-
-
REMOVE INDOOR NO. 3 ELECTRICAL KEY OSCILLATOR

-
Disconnect the connector.
-
Detach the claw and remove the electrical key oscillator.
-