OUTPUT SHAFT REASSEMBLY

-
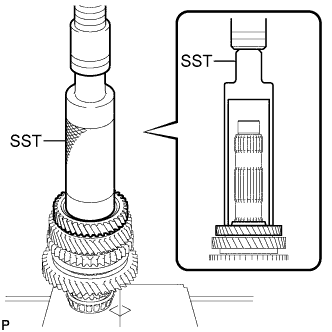
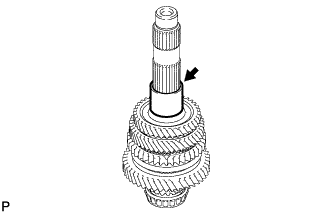
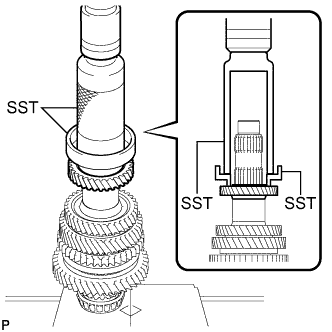
INSTALL FRONT OUTPUT SHAFT BEARING
-
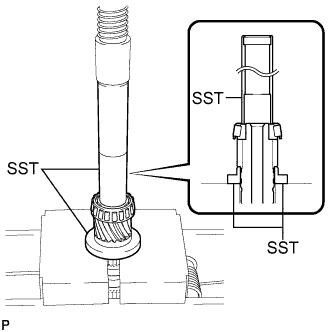
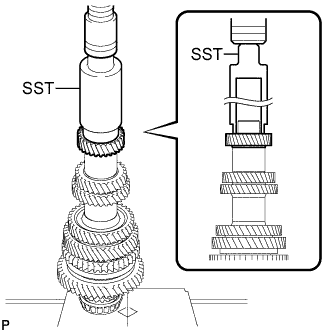
Using SST and a press, install a new front output shaft bearing to the output shaft.
- SST
- 09309-14040
- 09612-22011
-
-
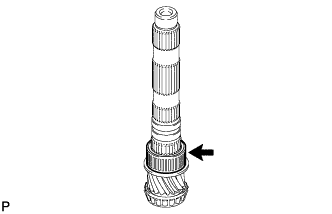
INSTALL 1ST GEAR BUSH
-

Coat the 1st gear bush with gear oil and install it to the output shaft.
-
-
INSTALL 1ST GEAR NEEDLE ROLLER BEARING
-
Coat the 1st gear needle roller bearing with gear oil and install it to the output shaft.
-
-
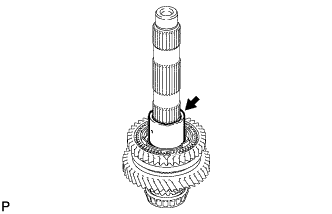
INSTALL 1ST GEAR
-
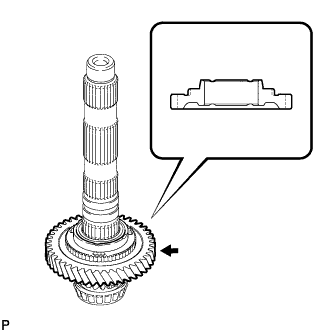
Coat the 1st gear with gear oil and install it to the output shaft.
Note
Install the 1st gear as shown in the illustration.
-
-
INSTALL NO. 1 SYNCHRONIZER RING SET (for 1st Gear)
-
Coat the 1st gear cone and No. 1 synchronizer ring set (inner ring, middle ring and outer ring) with gear oil.
-
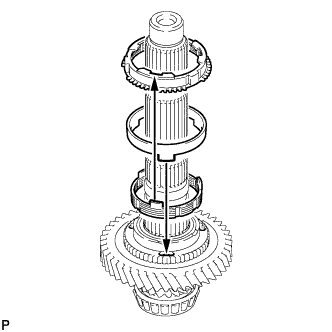
Install the inner ring to the 1st gear.
-
Install the middle ring to the 1st gear.
Note
Attach the claws of the middle ring to the grooves of the 1st gear.
-
Install the outer ring to the 1st gear.
Note
Align the claws of the inner ring with the grooves of the outer ring before installing the outer ring.
-
-
INSTALL NO. 1 TRANSMISSION CLUTCH HUB
-
Install the No. 1 transmission clutch hub to the output shaft.
Note
Align the cutout of the No. 1 transmission clutch hub with the protrusion of the outer ring as shown in the illustration.
-
-
INSTALL NO. 1 SYNCHROMESH SHIFTING KEY
-
Install the 3 No. 1 synchromesh shifting keys to the No. 1 transmission clutch hub.
-
-
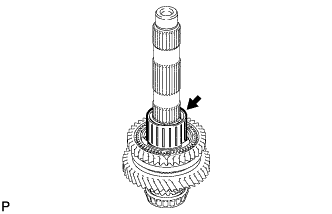
INSTALL REVERSE GEAR
-
Coat the reverse gear and No. 1 transmission clutch hub with gear oil.
-

Install the reverse gear to the No. 1 transmission clutch hub.
Note
Install the reverse gear as shown in the illustration.
-
-
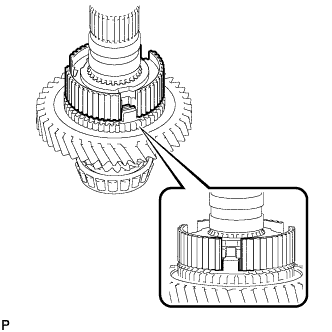
INSTALL NO. 1 SYNCHRONIZER RING SET (for 2nd Gear)
-
Coat the 2nd gear cone and No. 1 synchronizer ring set (inner ring, middle ring and outer ring) with gear oil.
-
Install the outer ring to the No. 1 transmission clutch hub.
Note
Align the protrusion of the outer ring with the cutout of the No. 1 transmission clutch hub before installing the outer ring.
-
Install the middle ring to the outer ring.
-

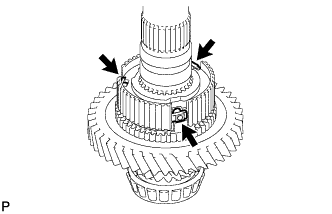
Text in Illustration *1 Cutout *2 Middle Ring *3 Outer Ring Install the inner ring to the middle ring.
Note
Align the cutouts of the outer ring with the protrusions of the inner ring before installing the inner ring.
-
-
INSTALL INNER 2ND GEAR BEARING RACE
-
Coat the inner 2nd gear bearing race with gear oil and install it to the output shaft.
-
-
INSTALL 2ND GEAR NEEDLE ROLLER BEARING
-
Coat the 2nd gear needle roller bearing with gear oil and install it to the output shaft.
-
-
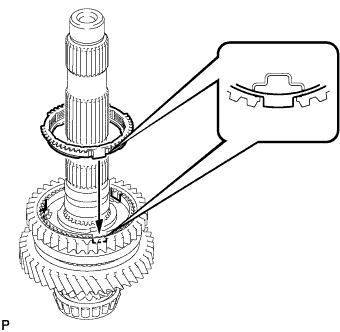
INSTALL 2ND GEAR
-
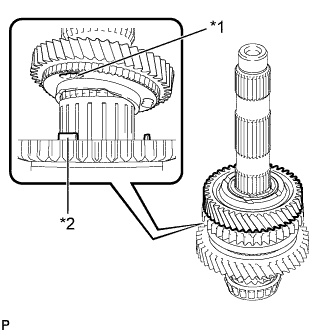
Text in Illustration *1 Groove *2 Claw Coat the 2nd gear with gear oil and install it to the output shaft.
Note
Align the claw of the middle ring with the groove of the 2nd gear before installing the 2nd gear.
-
-
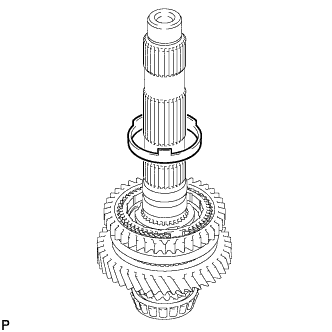
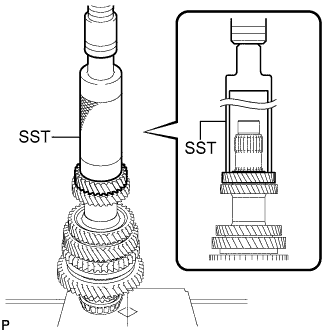
INSTALL 3RD DRIVEN GEAR
-
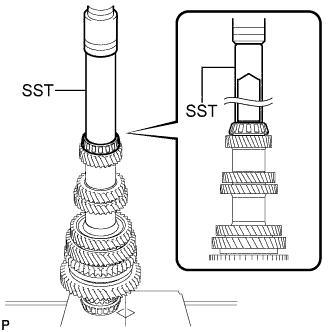
Using SST and a press, install the 3rd driven gear to the output shaft.
- SST
- 09316-60011 ( 09316-00011 )
-
-
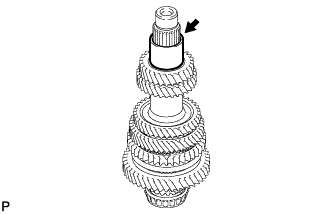
INSTALL OUTPUT GEAR SPACER
-
Install the output gear spacer to the output shaft.
-
-
INSTALL 4TH DRIVEN GEAR
-
Using SST and a press, install the 4th driven gear to the output shaft.
- SST
- 09309-37010
- 09502-24010
-
-
INSTALL 5TH DRIVEN GEAR
-
Using SST and a press, install the 5th driven gear to the output shaft.
- SST
- 09316-60011 ( 09316-00011 )
-
-
INSTALL OUTPUT GEAR SPACER
-
Install the output gear spacer to the output shaft.
-
-
INSTALL 6TH DRIVEN GEAR
-
Using SST and a press, install the 6th driven gear to the output shaft.
- SST
- 09226-10010
-
-
INSTALL REAR OUTPUT SHAFT BEARING
-
Using SST and a press, install a new rear output shaft bearing to the output shaft.
- SST
- 09608-04031
-
-
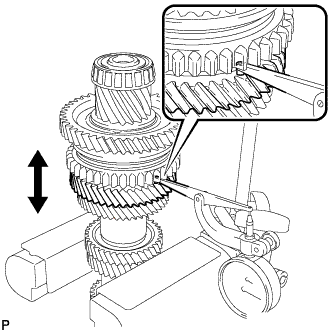
INSPECT 2ND GEAR RADIAL CLEARANCE
-
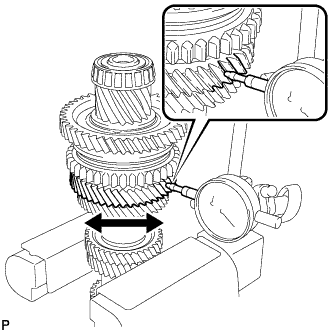
Using a dial indicator, measure the 2nd gear radial clearance.
Standard clearance for TMC Made 0.009 to 0.077 mm (0.000355 to 0.00303 in.) except TMC Made 0.009 to 0.075 mm (0.000355 to 0.00295 in.) Maximum clearance for TMC Made 0.077 mm (0.00303 in.) except TMC Made 0.075 mm (0.00295 in.) Tech Tips
Two different manual transaxle models produced by different manufacturers are available for this vehicle.
Referring to the Introduction section, check the serial number. Confirm which manufacturer produced the manual transaxle according to the following table.
Serial Number Manufacturer ##JTR############ for TMC Made ##EPP############ except TMC Made If the clearance is more than the maximum, replace the 2nd gear, 2nd gear needle roller bearing or output shaft. Replace the part or parts determined to be the most likely cause of the problem.
-
-
INSPECT 1ST GEAR RADIAL CLEARANCE
-
Using a dial indicator, measure the 1st gear radial clearance.
Standard clearance for TMC Made 0.009 to 0.077 mm (0.000355 to 0.00303 in.) except TMC Made 0.009 to 0.075 mm (0.000355 to 0.00295 in.) Maximum clearance for TMC Made 0.077 mm (0.00303 in.) except TMC Made 0.075 mm (0.00295 in.) Tech Tips
Two different manual transaxle models produced by different manufacturers are available for this vehicle.
Referring to the Introduction section, check the serial number. Confirm which manufacturer produced the manual transaxle according to the following table.
Serial Number Manufacturer ##JTR############ for TMC Made ##EPP############ except TMC Made If the clearance is more than the maximum, replace the 1st gear, 1st gear needle roller bearing or output shaft. Replace the part or parts determined to be the most likely cause of the problem.
-
-
INSPECT 2ND GEAR THRUST CLEARANCE
-
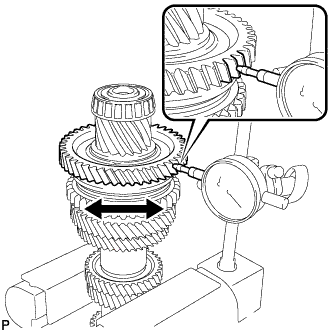
Using a dial indicator, measure the 2nd gear thrust clearance.
Standard clearance 0.15 to 0.33 mm (0.00591 to 0.0129 in.) Maximum clearance 0.33 mm (0.0129 in.) If the clearance is more than the maximum, replace the inner 2nd gear bearing race, No. 1 transmission clutch hub, 2nd gear or 3rd driven gear. Replace the part or parts determined to be the most likely cause of the problem.
-
-
INSPECT 1ST GEAR THRUST CLEARANCE
-

Using a dial indicator, measure the 1st gear thrust clearance.
Standard clearance 0.20 to 0.38 mm (0.00788 to 0.0149 in.) Maximum clearance 0.38 mm (0.0149 in.) If the clearance is more than the maximum, replace the No. 1 transmission clutch hub, 1st gear bush or 1st gear. Replace the part or parts determined to be the most likely cause of the problem.
-