TRANSMISSION CONTROL CABLE REMOVAL

-
REMOVE ENGINE ROOM SIDE COVER
-
Using a clip remover, remove the clip and engine room side cover.
-
-
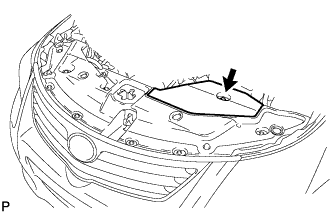
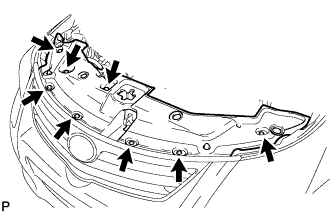
REMOVE RADIATOR SUPPORT OPENING COVER
-
Using a clip remover, remove the 8 clips and radiator support opening cover.
-
-
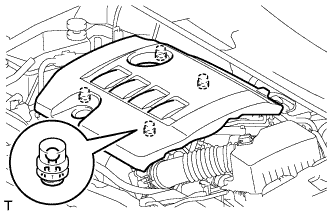
REMOVE NO. 1 ENGINE COVER SUB-ASSEMBLY (for 1AZ-FE)
-
Remove the 2 nuts and engine cover.
-
-
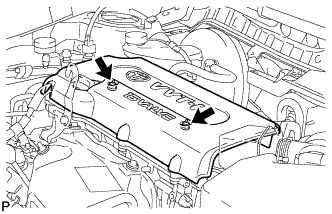
REMOVE NO. 2 CYLINDER HEAD COVER (for 3ZR-FE)
-
Hold the rear of the cover and raise it to detach the 2 clips on the rear of the cover. Continue to raise the cover to detach the 2 clips on the front of the cover and remove the cover.
Note
Attempting to detach both front and rear clips at the same time may cause the cover to break.
-
-
DISCONNECT CABLE FROM NEGATIVE BATTERY TERMINAL
Note
-
w/ Navigation System (for HDD):
After the ignition switch is turned off, the HDD navigation system requires approximately a minute to record various types of memory and settings. As a result, after turning the ignition switch off, wait a minute or more before disconnecting the cable from the negative (-) battery terminal.
-
When disconnecting the cable, some systems need to be initialized after the cable is reconnected Click here.
-
-
REMOVE BATTERY
-
Disconnect the cable from the positive (+) battery terminal.
-
Remove the bolt and loosen the nut.
-
Remove the battery clamp.
-
Remove the battery.
-
Remove the battery tray.
-
-
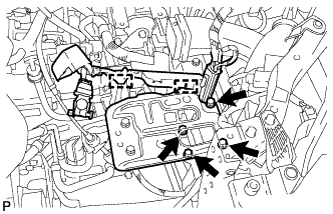
REMOVE BATTERY CARRIER
-
Detach the 2 wire harness clamps.
-
Remove the 4 bolts and battery carrier.
-
-
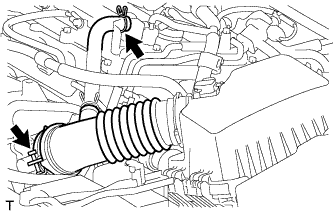
REMOVE AIR CLEANER CAP AND HOSE (for 1AZ-FE)
-

Disconnect the mass air flow meter connector and wire harness.
-
Disconnect the purge VSV.
-

Disconnect the No. 2 ventilation hose from the cylinder head cover.
-
Disconnect the No. 2 fuel vapor feed hose from the air cleaner hose.
-
Squeeze the tabs of the No. 1 air cleaner hose clamp, and then disconnect the No. 1 air cleaner hose from the throttle body.
-
Unfasten the 3 hook clamps, and then remove the air cleaner cap and hose.
-
-
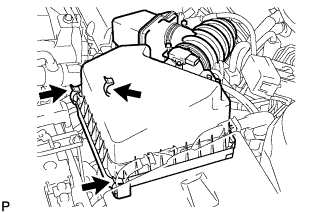
REMOVE AIR CLEANER CAP AND HOSE (for 3ZR-FE)
-
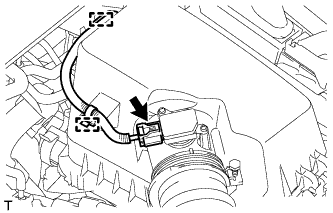
Disconnect the mass air flow meter connector.
-
Detach the wire harness from the 2 clamps.
-
Disconnect the 2 clamps.
-
Disconnect the ventilation hose.
-
Loosen the band and remove the air cleaner cap.
-
-
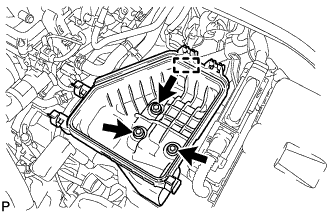
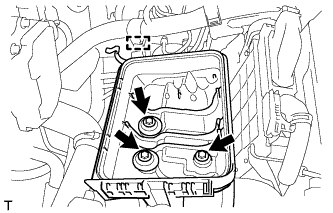
REMOVE AIR CLEANER CASE SUB-ASSEMBLY (for 1AZ-FE)
-
Disconnect the engine wire.
-
Remove the 3 bolts and air cleaner case.
-
-
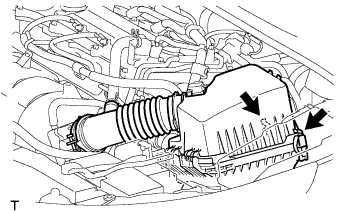
REMOVE AIR CLEANER CASE SUB-ASSEMBLY (for 3ZR-FE)
-
Detach the wire harness clamp from the air cleaner case.
-
Remove the 3 bolts and air cleaner case.
-
-
REMOVE CENTER EXHAUST PIPE ASSEMBLY (for 1AZ-FE)
-
Remove the 2 bolts.
-
Disconnect the 2 exhaust pipe supports, and remove the center exhaust pipe.
-
Remove the gasket from the front exhaust pipe.
-
-
REMOVE FRONT EXHAUST PIPE ASSEMBLY (for 1AZ-FE)
-
Remove the 2 bolts, 2 compression springs and front exhaust pipe.
-
Remove the gasket from the exhaust manifold.
-
Remove the straight screw plug.
-
-
REMOVE NO. 2 ENGINE UNDER COVER (for 3ZR-FE)
-
Using a clip remover, remove the 4 clips and under cover.
-
-
DISCONNECT HEATED OXYGEN SENSOR CONNECTOR (for 3ZR-FE)
-
REMOVE FRONT EXHAUST PIPE ASSEMBLY (for 3ZR-FE)
-
Remove the 2 bolts and 2 compression springs.
-
Remove the 2 exhaust pipe supports and front exhaust pipe assembly.
-
-
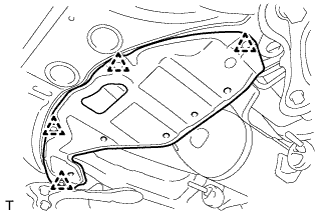
REMOVE FRONT FLOOR NO. 1 HEAT INSULATOR

-
Remove the 5 nuts and heat insulator.
-
-
REMOVE CONSOLE BOX ASSEMBLY
-
Remove the console box assembly Click here
-
-
REMOVE TRANSMISSION CONTROL CABLE ASSEMBLY
-
Move the shift lever to N.
-
Disconnect the end of the transmission control cable from the shift lever.
-
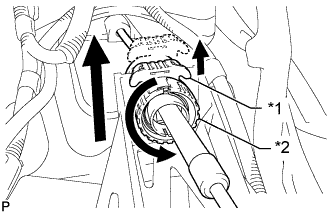
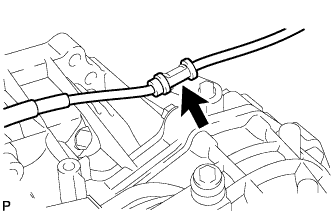
Text in Illustration *1 Stopper *2 Nut Pull out the stopper of the transmission control cable.
Note
Do not remove the stopper. If the stopper is removed, reinstall it to its original position.
-
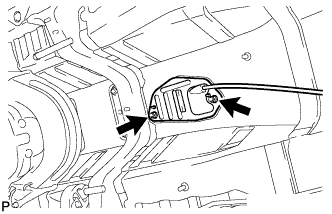
Rotate the nut counterclockwise approximately 180° and, while holding the nut in that position, disconnect the transmission control cable from the shift lever retainer.
Note
Do not over-rotate the nut as it will come off the internal spring and the transmission control cable will not be reusable.
-
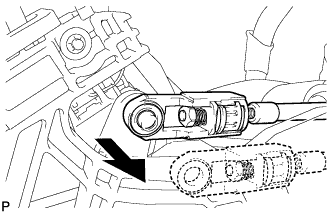
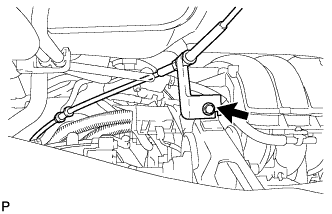
Remove the nut and disconnect the control cable assembly from the control shaft lever.
-
Remove the clip and disconnect the transmission control cable from the control cable bracket.
-
Disconnect the control cable from the transmission control cable support.
-
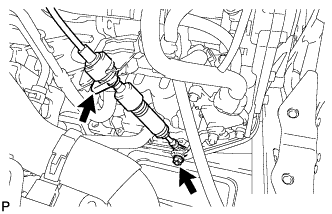
Remove the bolt and disconnect the transmission control cable support.
-
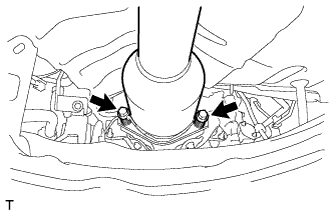
Remove the 2 nuts and disconnect the transmission control cable.
-
Pull out the transmission control cable to remove it.
-