TRANSMISSION WIRE REMOVAL

-
REMOVE RADIATOR SUPPORT OPENING COVER
-
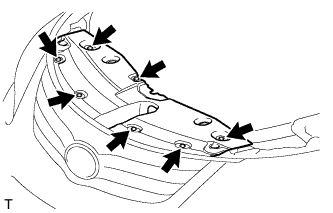
Remove the 7 clips and radiator support opening cover.
-
-
PRECAUTION
Note
After turning the ignition switch off, waiting time may be required before disconnecting the cable from the battery terminal. Therefore, make sure to read the disconnecting the cable from the battery terminal notice before proceeding with work Click here.
-
DISCONNECT CABLE FROM NEGATIVE BATTERY TERMINAL
Note
When disconnecting the cable, some systems need to be initialized after the cable is reconnected Click here.
-
REMOVE BATTERY
-
Disconnect the cable from the positive (+) battery terminal.
-
Remove the bolt and loosen the nut.
-
Remove the battery clamp.
-
Remove the battery.
-
Remove the battery tray.
-
-
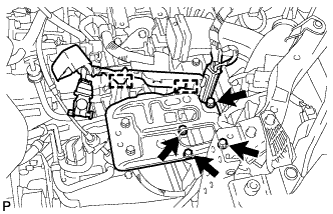
REMOVE BATTERY CARRIER
-
Detach the 2 wire harness clamps.
-
Remove the 4 bolts and battery carrier.
-
-
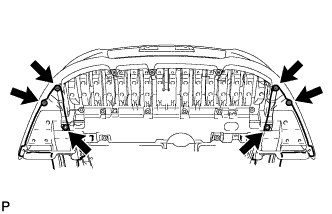
REMOVE FRONT LOWER BUMPER ABSORBER
-
Remove the 2 screws and 4 bolts.
-
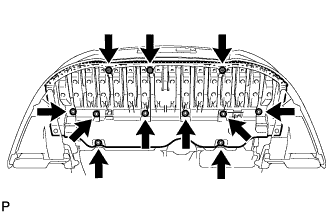
Remove the 3 screws, 8 bolts and front lower bumper absorber.
-
-
REMOVE NO. 1 ENGINE UNDER COVER
-
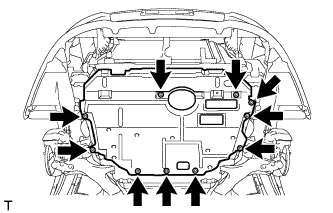
Remove the 10 clips and under cover.
-
-
DRAIN AUTOMATIC TRANSAXLE FLUID
-
Remove the drain plug and gasket, and drain the ATF.
-
Install a new gasket and the drain plug.
- Torque:
- 49 N*m { 500 kgf*cm, 36 ft.*lbf }
-
-
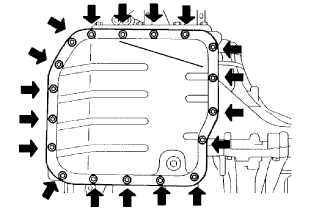
REMOVE AUTOMATIC TRANSAXLE OIL PAN SUB-ASSEMBLY
-
Remove the 18 bolts, oil pan and gasket.
Note
Some fluid will remain in the oil pan. Carefully remove the oil pan.
-
Remove the 2 magnets from the oil pan.
-
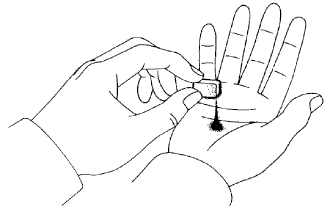
Examine particles in the pan.
-
Use the removed magnets to collect any steel chips. Look carefully at the chips and particles in the pan and on the magnet to anticipate what type of wear you will find in the transaxle.
Steel (magnetic): bearing, gear and plate wear
Brass (non-magnetic): bush wear
-
-
-
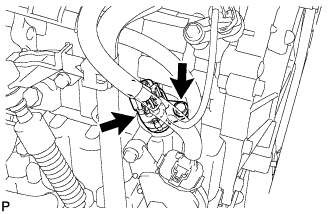
DISCONNECT TRANSMISSION WIRE
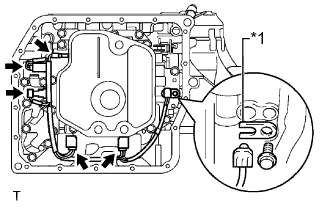
Text in Illustration *1 Lock Plate
-
Disconnect the 5 shift solenoid valve connectors.
-
Remove the bolt, lock plate and ATF temperature sensor.
-
-
REMOVE TRANSMISSION WIRE
-
Disconnect the transmission wire connector.
-
Remove the bolt and transmission wire.
-
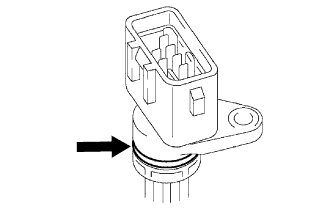
Remove the O-ring from the transmission wire.
-