SPEED SENSOR INSTALLATION

-
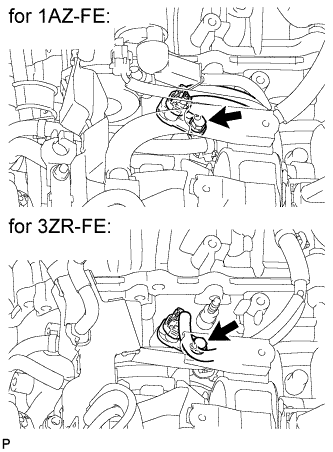
INSTALL SPEED SENSOR NC
-
Coat a new O-ring with ATF WS.
-
Install the O-ring to the sensor.
-
Install the sensor with the bolt.
- Torque:
- 8.8 N*m { 90 kgf*cm, 78 in.*lbf }
-
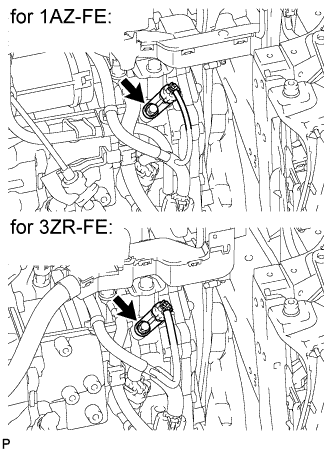
Connect the sensor connector.
-
-
INSTALL SPEED SENSOR NT
-
Coat a new O-ring with ATF WS.
-
Install the O-ring to the sensor.
-
Install the sensor with the bolt.
- Torque:
- 8.8 N*m { 90 kgf*cm, 78 in.*lbf }
-
Connect the sensor connector.
-
-
INSTALL AIR CLEANER CASE SUB-ASSEMBLY (for 1AZ-FE)
-
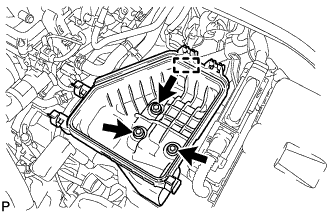
Install the air cleaner case with the 3 bolts.
- Torque:
- 7.0 N*m { 71 kgf*cm, 62 in.*lbf }
-
Connect the engine wire.
-
-
INSTALL AIR CLEANER CASE SUB-ASSEMBLY (for 3ZR-FE)
-
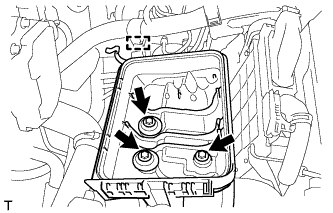
Install the air cleaner case with the 3 bolts.
- Torque:
- 7.0 N*m { 71 kgf*cm, 62 in.*lbf }
-
Attach the wire harness clamp to the air cleaner case.
-
-
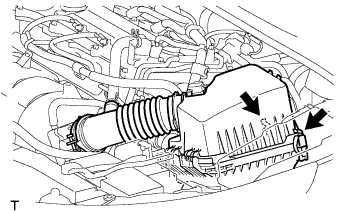
INSTALL AIR CLEANER CAP AND HOSE (for 1AZ-FE)
-
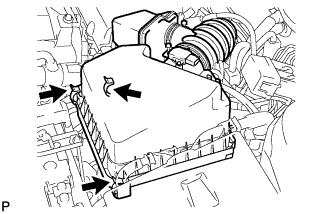
Insert the hinge part of the air cleaner cap and hose into the air cleaner case, and then fasten the 3 hook clamps.
-
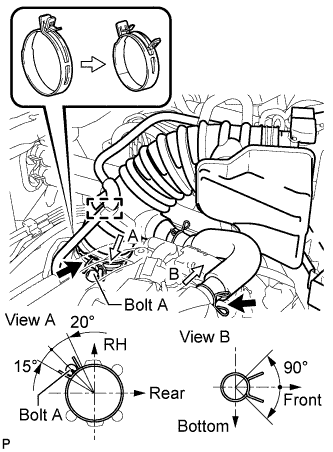
Align the matchmarks of the No. 1 air cleaner hose and throttle body. Then connect the No. 1 air cleaner hose to the throttle body and push apart the tabs of the No. 1 air cleaner hose clamp.
Note
Make sure that the hose clamp is at the correct angle.
-
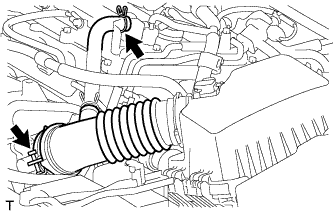
Connect the No. 2 fuel vapor feed hose to the air cleaner hose.
-
Connect the No. 2 ventilation hose to the air cleaner hose.
-
Connect the purge VSV.
-
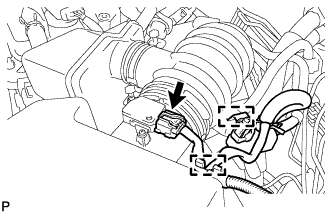
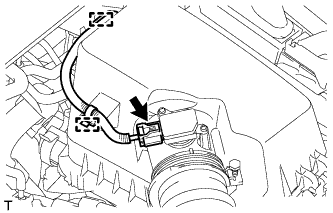
Connect the wire harness and mass air flow meter connector.
-
-
INSTALL AIR CLEANER CAP AND HOSE (for 3ZR-FE)
-
Connect the air cleaner cap with the band.
-
Connect the ventilation hose.
-
Connect the 2 clamps.
-
Attach the wire harness to the 2 clamps.
-
Connect the mass air flow meter connector.
-
-
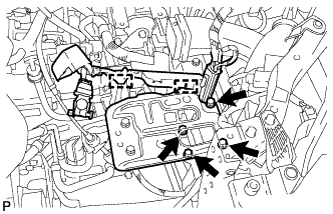
INSTALL BATTERY CARRIER
-
Install the battery carrier with the 4 bolts.
- Torque:
- 19 N*m { 194 kgf*cm, 14 ft.*lbf }
-
Attach the 2 wire harness clamps.
-
-
INSTALL BATTERY
-
Install the battery tray.
-
Install the battery.
-
Install the battery clamp with the bolt and tighten the nut.
- Torque:
- for bolt
- 17 N*m { 168 kgf*cm, 12 ft.*lbf }
- for nut
- 3.5 N*m { 36 kgf*cm, 31 in.*lbf }
-
Connect the cable to the positive (+) battery terminal.
- Torque:
- 5.4 N*m { 55 kgf*cm, 48 in.*lbf }
-
-
CONNECT CABLE TO NEGATIVE BATTERY TERMINAL
Note
When disconnecting the cable, some systems need to be initialized after the cable is reconnected Click here.
-
INSTALL NO. 1 ENGINE COVER SUB-ASSEMBLY (for 1AZ-FE)
-
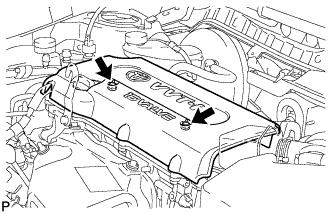
Install the cover with the 2 nuts.
- Torque:
- 9.0 N*m { 92 kgf*cm, 80 in.*lbf }
-
-
INSTALL NO. 2 CYLINDER HEAD COVER (for 3ZR-FE)
-
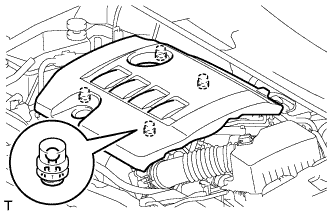
Attach the 4 clips to install the cover.
Note
-
Be sure to attach the clips securely.
-
Do not apply excessive force or hit the cover to attach the clips. This may cause the cover to break.
-
-
-
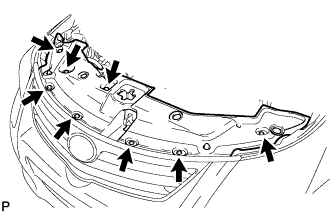
INSTALL RADIATOR SUPPORT OPENING COVER
-
Install the radiator support opening cover with the 8 clips.
-
-
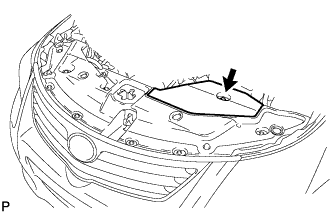
INSTALL ENGINE ROOM SIDE COVER
-
Install the engine room side cover with the clip.
-