OIL PRESSURE SWITCH INSTALLATION

-
INSTALL ENGINE OIL PRESSURE SWITCH ASSEMBLY
-

Text in Illustration *1 Adhesive Apply adhesive to 2 or 3 threads of the oil pressure switch.
Adhesive Toyota Genuine Adhesive 1344, Three Bond 1344 or equivalent Note
Do not let adhesive adhere to the oil hole.
-
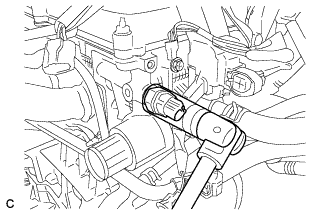
Using a 24 mm deep socket wrench, install the oil pressure switch.
- Torque:
- 15 N*m { 153 kgf*cm, 11 ft.*lbf }
Note
Do not start the engine for at least 1 hour after installation.
-
Connect the oil pressure switch connector.
-
-
INSTALL AIR CLEANER CAP AND HOSE
-
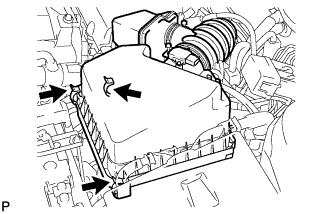
Insert the hinge part of the air cleaner cap and hose into the air cleaner case, and then fasten the 3 hook clamps.
-
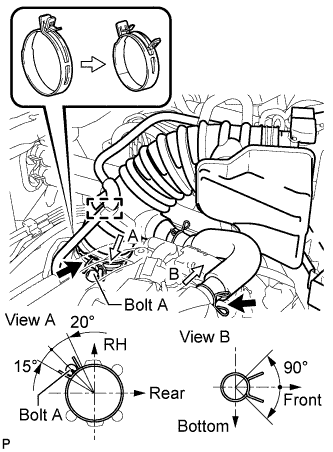
Align the matchmarks of the No. 1 air cleaner hose and throttle body. Then connect the No. 1 air cleaner hose to the throttle body and push apart the tabs of the No. 1 air cleaner hose clamp.
Note
Make sure that the hose clamp is at the correct angle.
-
Connect the No. 2 fuel vapor feed hose to the air cleaner hose.
-
Connect the No. 2 ventilation hose to the air cleaner hose.
-
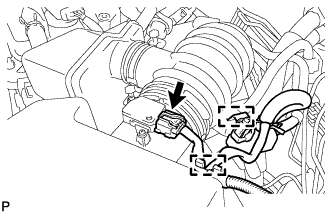
Connect the purge VSV.
-
Connect the wire harness and mass air flow meter connector.
-
-
INSTALL NO. 1 ENGINE COVER SUB-ASSEMBLY
-
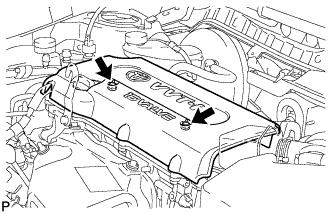
Install the cover with the 2 nuts.
- Torque:
- 9.0 N*m { 92 kgf*cm, 80 in.*lbf }
-
-
INSPECT FOR OIL LEAK
-
Start the engine. Make sure that there are no oil leaks from the area that was worked on.
-
-
CHECK ENGINE OIL LEVEL
-
Warm up the engine, and then stop the engine and wait for 5 minutes.
-
Check that the engine oil level is between the low level and full level marks on the dipstick.
If low, check for leakage and add oil up to the full level mark.
Note
Do not fill engine oil above the full level mark.
-