RADIATOR REMOVAL

-
REMOVE RADIATOR SUPPORT OPENING COVER
-
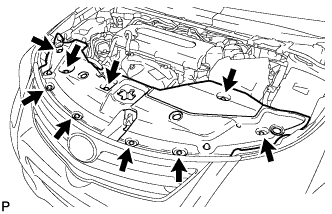
Remove the 9 clips and radiator support opening cover.
-
-
RECOVER REFRIGERANT FROM REFRIGERATION SYSTEM
-
Start the engine.
-
Turn the A/C switch on.
-
Operate the cooler compressor while the engine speed is approximately 1000 rpm for 5 to 6 minutes to circulate the refrigerant and collect the compressor oil remaining in each component into the cooler compressor.
-
Stop the engine.
-
Recover the refrigerant from the A/C system using a refrigerant recovery unit.
-
-
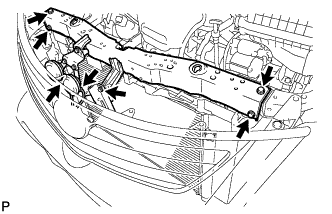
REMOVE FRONT LOWER BUMPER ABSORBER
-
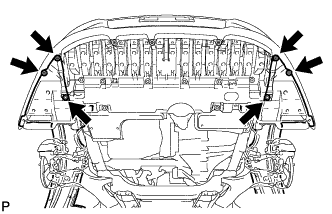
Remove the 4 screws and 2 bolts.
Tech Tips
Pull down the fender liner so that the front lower bumper absorber can be removed in the next step.
-
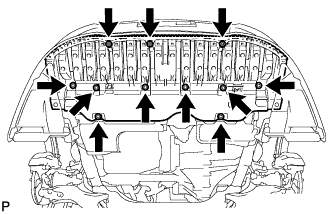
Remove the 3 screws, 8 bolts and front lower bumper absorber.
-
-
REMOVE NO. 1 ENGINE UNDER COVER
-

Remove the 5 clips and under cover.
-
-
REMOVE NO. 1 ENGINE UNDER COVER (for Rough Road Area Specification Vehicles)
-
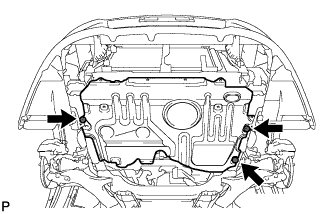
Remove the 3 bolts and under cover.
-
-
REMOVE BATTERY CLAMP SUB-ASSEMBLY
-
Remove the bolt and loosen the nut.
-
Detach the hook of the battery clamp from the battery carrier, and then remove the battery clamp.
-
-
REMOVE BATTERY
-
DRAIN ENGINE COOLANT
Tech Tips
Collect the coolant in a container and dispose of it according to the regulations in your area.
CAUTION:
Do not remove the radiator cap while the engine and radiator are still hot. Pressurized, hot engine coolant and steam may be released and cause serious burns.
-
Loosen the radiator drain cock plug.
-
Remove the radiator cap. Then drain the coolant from the radiator.
-
Loosen the cylinder block drain cock plug. Then drain the coolant from the engine.
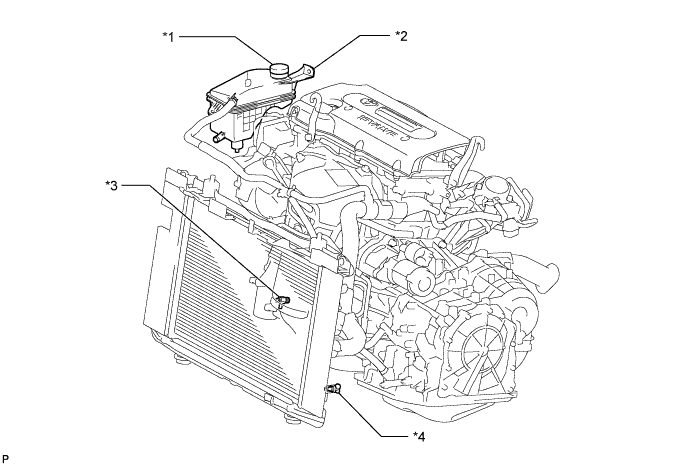
Text in Illustration *1 Radiator Reservoir Cap *3 Cylinder Block Drain Cock Plug *2 Radiator Reservoir *4 Radiator Drain Cock Plug -
Tighten the radiator drain cock plug by hand.
-
Tighten the cylinder block drain cock plug.
- Torque:
- 13 N*m { 130 kgf*cm, 9 ft.*lbf }
-
-
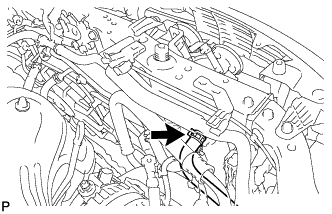
REMOVE NO. 1 RADIATOR HOSE
-

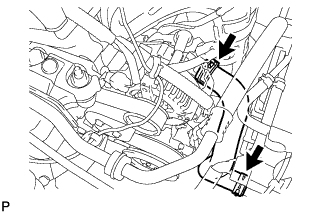
Disconnect the No. 1 radiator hose clamp.
-
Disconnect the No. 1 radiator hose from the No. 2 water by-pass hose.
-
Remove the No. 1 radiator hose.
-
-
REMOVE NO. 2 RADIATOR HOSE
-
Remove the No. 2 radiator hose.
-
-
DISCONNECT NO. 3 WATER BY-PASS HOSE
-
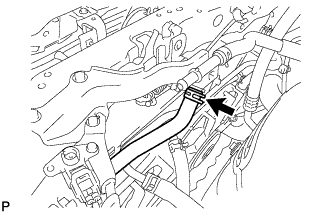
Disconnect the No. 3 water by-pass hose from the No. 2 water by-pass hose.
-
-
REMOVE NO. 2 WATER BY-PASS HOSE
-
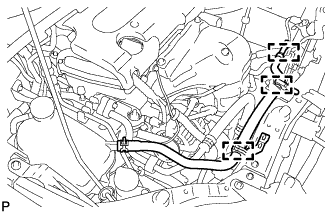
Disconnect the 3 clamps and remove the No. 2 water by-pass hose.
-
-
DISCONNECT NO. 1 WATER BY-PASS HOSE
-
Disconnect the No. 1 water by-pass hose.
-
-
DISCONNECT OIL COOLER HOSE
-
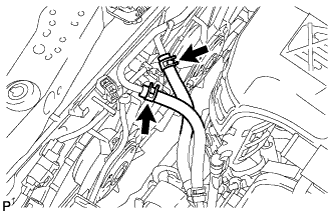
Disconnect the 2 oil cooler hoses.
-
-
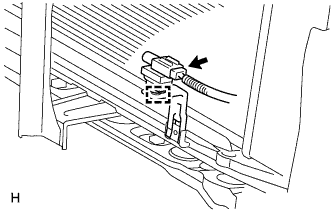
DISCONNECT COOLING FAN MOTOR HARNESS
-
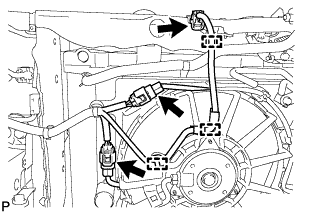
Disconnect the 2 fan motor connectors.
-
Disconnect the variable resistor connector and 3 clamps.
-
-
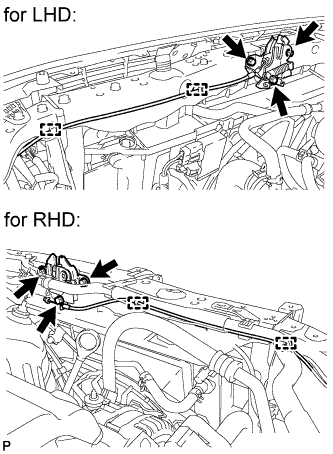
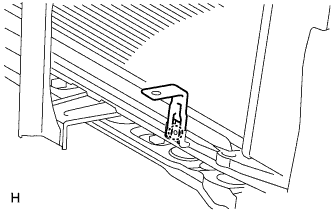
REMOVE NO. 1 WATER HOSE CLAMP BRACKET
-
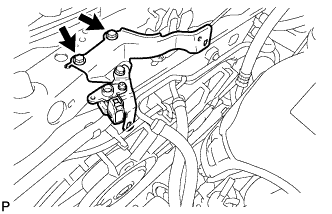
Remove the 2 bolts and No. 1 water hose clamp bracket.
-
-
REMOVE HOOD LOCK ASSEMBLY
-
Disconnect the 2 clamps.
-
Remove the 3 bolts and disconnect the hood lock.
-
-
DISCONNECT DISCHARGE HOSE SUB-ASSEMBLY
-
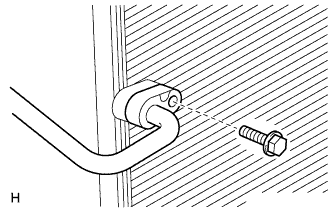
Remove the bolt and disconnect the discharge hose sub-assembly from the condenser.
Note
Seal the openings of the disconnected parts using vinyl tape to prevent entry of moisture and foreign matter.
-
Remove the O-ring from the discharge hose sub-assembly.
Note
Seal the openings of the disconnected parts using vinyl tape to prevent entry of moisture and foreign matter.
-
-
DISCONNECT SUCTION PIPE SUB-ASSEMBLY
-

Remove the bolt and disconnect the suction pipe sub-assembly from the condenser.
Note
Seal the openings of the disconnected parts using vinyl tape to prevent entry of moisture and foreign matter.
-
Remove the O-ring from the suction pipe sub-assembly.
Note
Seal the openings of the disconnected parts using vinyl tape to prevent entry of moisture and foreign matter.
-
-
REMOVE AMBIENT TEMPERATURE SENSOR
-
Disconnect the connector.
-
Using a screwdriver, detach the clamp and remove the sensor.
Tech Tips
Tape the screwdriver tip before use.
-
Detach the claw and remove the cooler bracket.
-
-
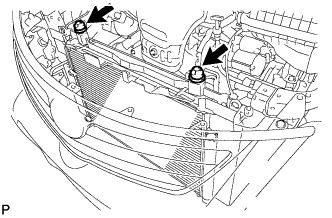
REMOVE UPPER RADIATOR SUPPORT
-
Disconnect the 2 horn connectors.
-
Remove the 5 bolts and upper radiator support.
-
-
REMOVE RADIATOR SUPPORT CUSHION
-
Remove the 2 radiator support cushions.
-
-
REMOVE RADIATOR ASSEMBLY
-
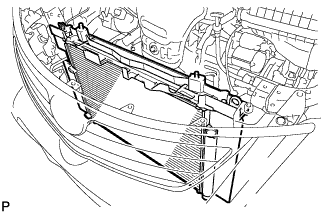
Remove the radiator with the 2 radiator support lower cushions.
Tech Tips
After detaching the radiator, make sure that both radiator support lower cushions are present.
-
-
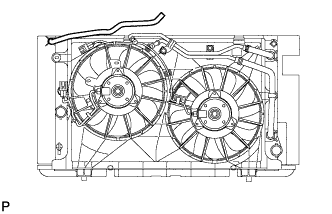
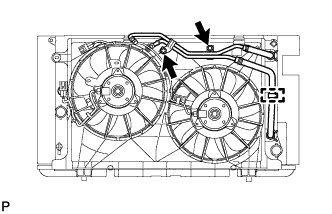
REMOVE NO. 2 FAN SHROUD
-
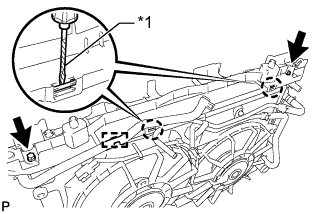
Text in Illustration *1 Protective Tape Disconnect the No. 3 water by-pass hose from the No. 2 fan shroud.
-
Remove the 2 bolts
-
Using a screwdriver, detach the 2 claws and remove the No. 2 fan shroud.
Tech Tips
Tape the screwdriver tip before use.
-
-
REMOVE NO. 3 WATER BY-PASS HOSE
-
Remove the No. 3 water by-pass hose.
-
-
REMOVE OIL COOLER TUBE ASSEMBLY
-
Disconnect the oil cooler tube and detach the clamp.
-
Remove the 2 bolts and oil cooler tube.
-
-
REMOVE CONDENSER ASSEMBLY WITH RECEIVER
-
Remove the condenser assembly with receiver.
-
Remove the 4 cooler condenser cushions.
-
-
REMOVE FAN SHROUD WITH COOLING FAN
-
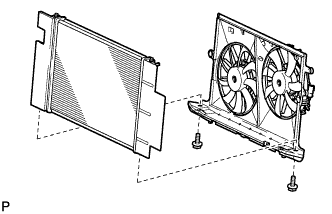
Remove the 2 bolts and fan shroud from the radiator.
-
-
REMOVE RADIATOR DRAIN COCK PLUG
-
Remove the drain cock plug.
-
Remove the O-ring.
-