FRONT CRANKSHAFT OIL SEAL REMOVAL

-
REMOVE NO. 2 CYLINDER HEAD COVER
-
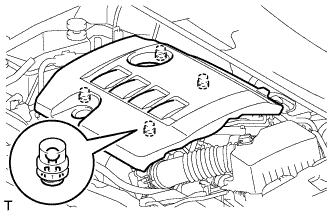
Hold the rear of the cover and raise it to detach the 2 clips on the rear of the cover. Continue to raise the cover to detach the 2 clips on the front of the cover and remove the cover.
Note
Attempting to detach both front and rear clips at the same time may cause the cover to break.
-
-
REMOVE RADIATOR SUPPORT OPENING COVER
-
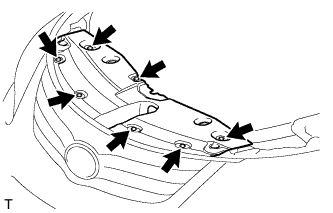
Remove the 7 clips and radiator support opening cover.
-
-
REMOVE FRONT WHEEL RH
-
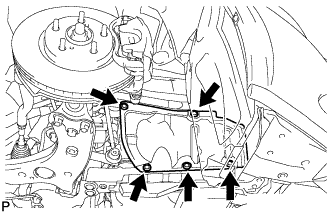
REMOVE FRONT LOWER BUMPER ABSORBER
-
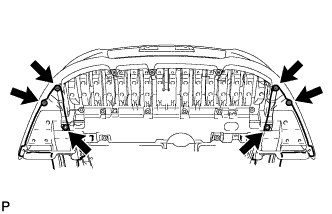
Remove the 4 screws and 2 bolts.
-
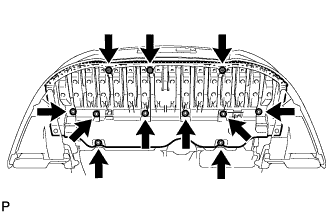
Remove the 3 screws, 8 bolts and front lower bumper absorber.
-
-
REMOVE NO. 1 ENGINE UNDER COVER
-
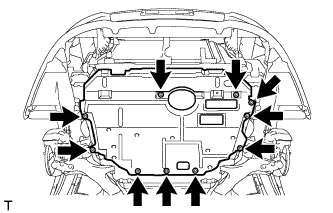
Remove the 10 clips and under cover.
-
-
REMOVE NO. 1 ENGINE UNDER COVER (for Rough Road Area Specification Vehicles)
-
Remove the 3 clips and under cover.
-
-
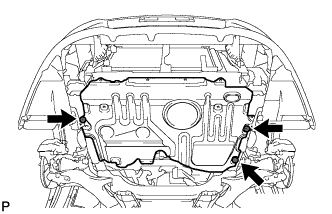
REMOVE REAR ENGINE UNDER COVER RH
-
Remove the 5 clips and under cover RH.
-
-
REMOVE FRONT SUSPENSION MEMBER REINFORCEMENT RH
-
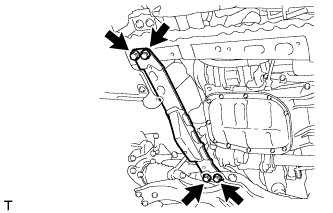
Remove the 4 bolts and front suspension member reinforcement RH.
-
-
REMOVE V-RIBBED BELT
-
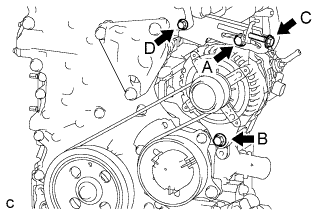
Loosen bolts A and B.
-
Loosen bolt C and remove the V-ribbed belt.
Note
Do not loosen bolt D.
-
-
REMOVE CRANKSHAFT PULLEY
-
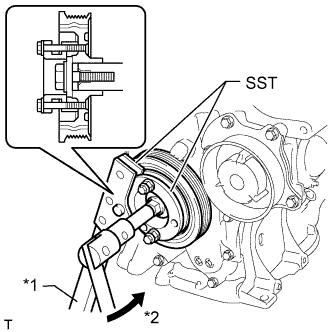
Text in Illustration *1 Hold *2 Turn Using SST, hold the crankshaft pulley and loosen the pulley bolt. Further loosen the bolt until 2 or 3 threads are screwed into the crankshaft.
- SST
- 09213-58014 ( 91551-80840 )
- 09330-00021
-
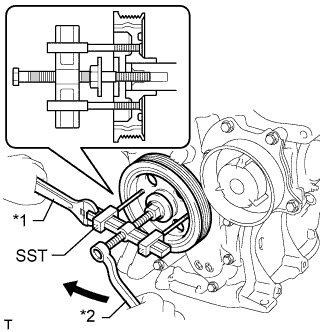
Text in Illustration *1 Hold *2 Turn Using SST and the pulley bolt, remove the crankshaft pulley and pulley bolt.
- SST
- 09950-50013 ( 09951-05010, 09952-05010, 09953-05020, 09954-05021 )
Tech Tips
Apply lubricant to the threads and end of SST.
-
-
REMOVE TIMING CHAIN COVER OIL SEAL
-
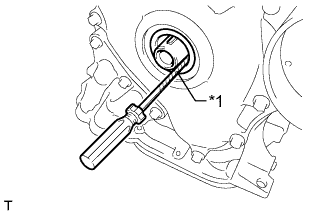
Text in Illustration *1 Protective Tape Using a screwdriver, pry out the oil seal.
Tech Tips
Tape the screwdriver tip before use.
Note
-
Do not damage the surface of the oil seal press fit hole or the crankshaft.
-
After removing the oil seal, check the crankshaft for damage. If damaged, smooth the surface with 400-grit sandpaper.
-
-