CAMSHAFT REMOVAL

-
REMOVE RADIATOR SUPPORT OPENING COVER
-
Remove the 9 clips and radiator support opening cover.
-
-
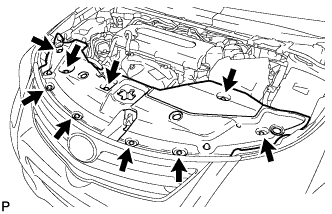
REMOVE FRONT LOWER BUMPER ABSORBER
-
Remove the 4 screws and 2 bolts.
Tech Tips
Pull down the fender liner so that the front lower bumper absorber can be removed in the next step.
-
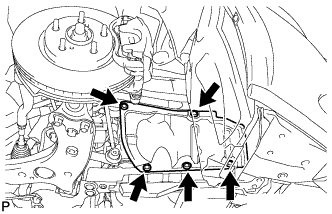
Remove the 3 screws, 8 bolts and front lower bumper absorber.
-
-
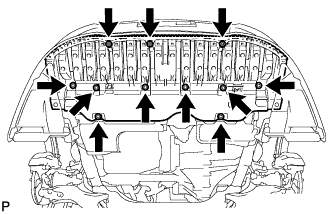
REMOVE NO. 1 ENGINE UNDER COVER
-

Remove the 5 clips and under cover.
-
-
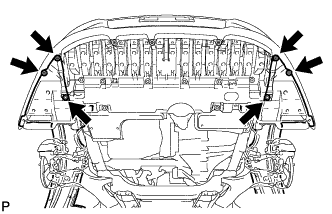
REMOVE NO. 1 ENGINE UNDER COVER (for Rough Road Area Specification Vehicles)
-
Remove the 3 bolts and under cover.
-
-
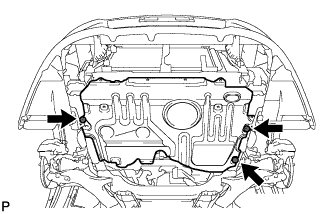
REMOVE REAR ENGINE UNDER COVER RH
-
Remove the 5 clips and under cover.
-
-
REMOVE NO. 1 ENGINE COVER SUB-ASSEMBLY
-
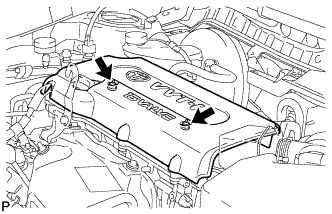
Remove the 2 nuts and engine cover.
-
-
REMOVE IGNITION COIL ASSEMBLY
-
Disconnect the 4 ignition coil connectors.
-
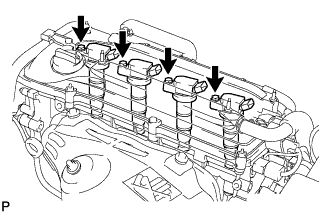
Remove the 4 bolts and 4 ignition coils.
-
-
REMOVE SPARK PLUG
-
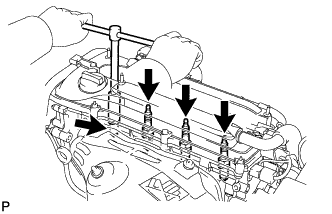
Using a 16 mm plug wrench, remove the 4 spark plugs.
-
-
REMOVE CYLINDER HEAD COVER SUB-ASSEMBLY
-
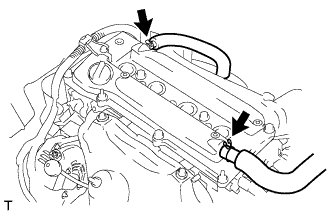
Disconnect the 2 ventilation hoses from the cylinder head cover.
-
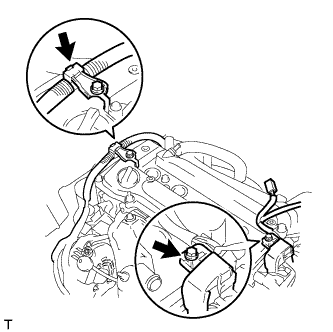
Remove the 2 bolts and disconnect the 2 engine wires.
-
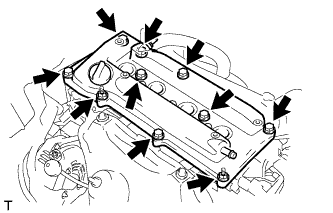
Remove the 8 bolts, 2 nuts and cylinder head cover.
-
-
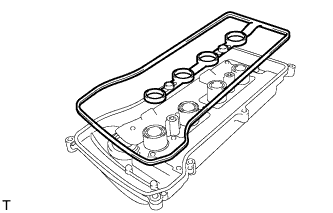
REMOVE CYLINDER HEAD COVER GASKET
-
SET NO. 1 CYLINDER TO TDC/COMPRESSION
-
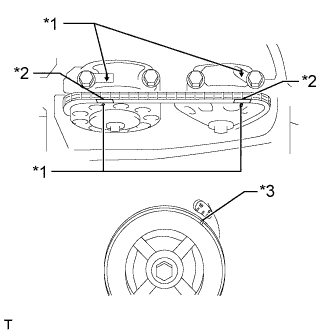
Text in Illustration *1 Timing Mark *2 Paint Mark *3 Groove Turn the crankshaft pulley until the groove and the timing mark "0" on the timing chain cover are aligned.
-
Check that each timing mark on the camshaft timing gear and sprocket is aligned with each timing mark located on the No. 1 and No. 2 bearing caps as shown in the illustration.
If not, turn the crankshaft pulley 1 revolution (360°) to align the timing marks as illustrated.
-
Place paint marks on the chain in alignment with the timing marks on the camshaft timing gear and camshaft timing sprocket.
-
-
REMOVE NO. 1 CHAIN TENSIONER ASSEMBLY
-
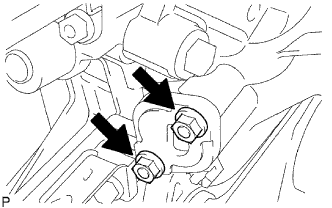
Remove the 2 nuts, chain tensioner and gasket.
Note
Do not turn the crankshaft without the chain tensioner.
-
-
LOOSEN CAMSHAFT TIMING GEAR OR SPROCKET (for Exhaust Side)
-
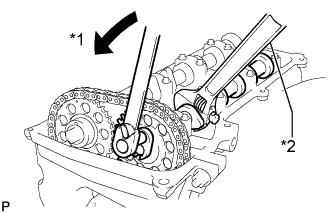
Text in Illustration *1 Loosen *2 Hold While holding the camshaft with a wrench, loosen the camshaft timing set bolt.
-
-
REMOVE NO. 2 CAMSHAFT
-

Using several steps, uniformly loosen and remove the 10 bearing cap bolts in the sequence shown in the illustration.
-
Remove the 5 bearing caps.
-
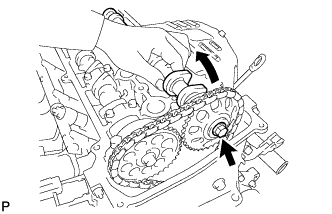
While holding the No. 2 camshaft by hand, remove the camshaft timing sprocket set bolt.
-
Remove the camshaft timing sprocket from the No. 2 camshaft with the timing chain wrapped on the sprocket and remove the No. 2 camshaft.
-
Remove the camshaft timing sprocket from the timing chain.
-
-
REMOVE CAMSHAFT
-
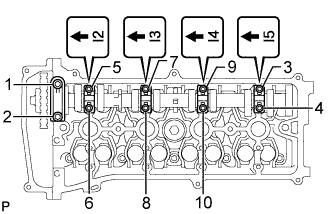
Using several steps, uniformly loosen and remove the 10 bearing cap bolts in the sequence shown in the illustration.
-
Remove the 5 bearing caps.
-
Remove the camshaft and camshaft timing gear while holding the timing chain by hand.
-
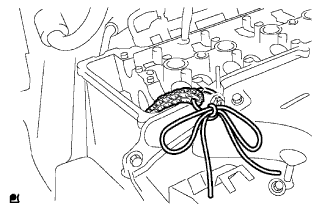
Tie the timing chain with a string as shown in the illustration.
Note
Be careful not to drop anything inside the timing chain cover.
-
-
REMOVE CAMSHAFT TIMING GEAR OR SPROCKET (for Intake Side)
-
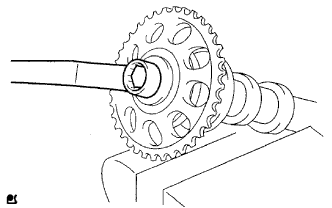
Clamp the camshaft in a vise, and make sure that the camshaft timing gear or sprocket does not rotate.
-
Remove the bolt and camshaft timing gear or sprocket.
-