НАСОС СИСТЕМЫ ОХЛАЖДЕНИЯ СНЯТИЕ
-
DISCONNECT NEGATIVE BATTERY TERMINAL
CAUTION:
Wait at least 90 seconds after disconnecting the cable from the negative (-) battery terminal to prevent airbag and seat belt pretensioner activation.
-
REMOVE NO. 1 ENGINE UNDER COVER
-
Remove the 4 bolts and under cover.
-
-
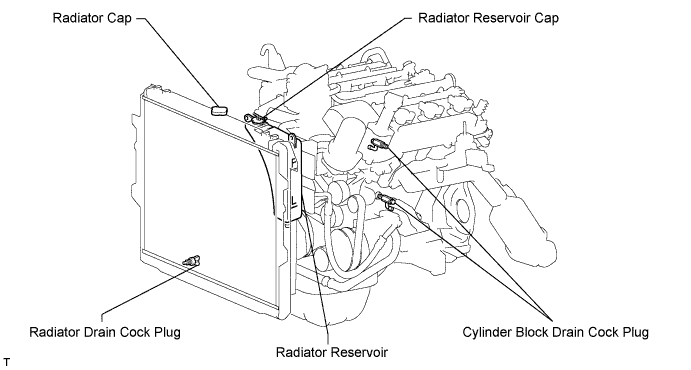
DRAIN ENGINE COOLANT
-
Remove the radiator cap.
-
Loosen the 2 cylinder block drain cock plugs and radiator drain cock plug, and then drain the coolant.
Tech Tips
Collect the coolant in a container and dispose of it according to the regulations in your area.
-
-
REMOVE V-BANK COVER
-
Remove the 2 nuts and cover.
-
-
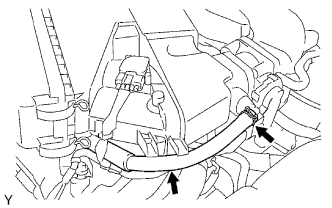
DISCONNECT RADIATOR HOSE INLET
-
Disconnect the hose inlet from the radiator tank upper.
-
-
DISCONNECT RADIATOR HOSE OUTLET
-
Disconnect the hose outlet from the radiator tank lower.
-
-
REMOVE FAN SHROUD

-
Disconnect the radiator reservoir hose from the radiator tank upper.
-
Loosen the 4 nuts holding the fluid coupling fan.
-
Remove the drive belt Click here.
-
Remove the 2 bolts holding the fan shroud.
-
Remove the 4 nuts of the fluid coupling fan, and then remove the shroud together with the coupling fan.
Note
Be careful not to damage the radiator core.
-
Remove the fan pulley from the water pump.
-
-
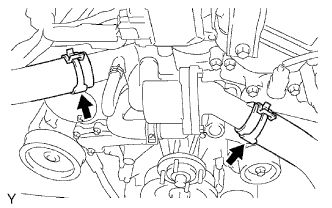
DISCONNECT NO. 2 VENTILATION HOSE
-
REMOVE AIR CLEANER ASSEMBLY
-
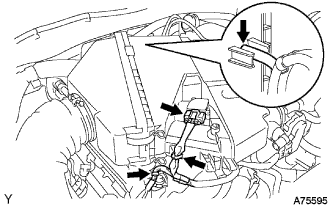
Disconnect the vacuum hose.
-
Disconnect the MAF meter connector.
-
Remove the 2 wire harness clamps.
-
Loosen the 2 hose clamps.
-
Remove the 2 bolts and air cleaner.
-
-
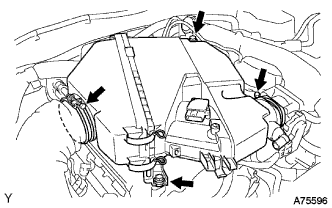
REMOVE WATER INLET HOUSING
-
Disconnect the 2 radiator hoses from the housing.
-
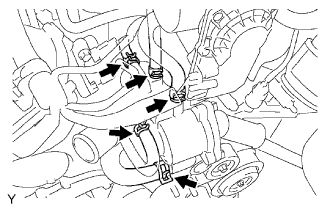
Disconnect the 3 water by-pass hoses.
-
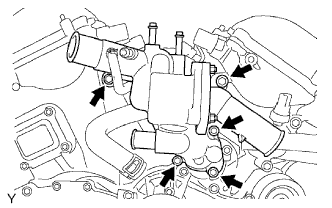
Remove the 5 bolts and water inlet.
-
Remove the O-ring from the water outlet pipe.
-
Remove the O-ring from the water pump.
-
-
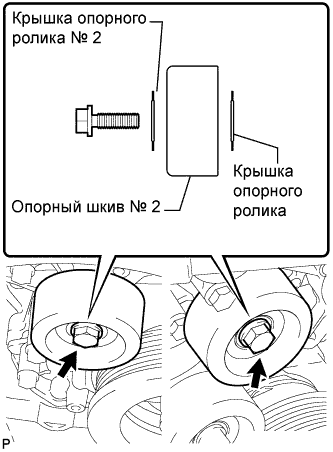
REMOVE NO. 2 IDLER PULLEY
Note
Use the same procedure for both No. 2 idler pulleys.
-
w/ Idler Pulley Cover Plate:
-
Remove the bolt, No. 2 idler pulley cover plate, idler pulley and idler pulley cover plate.
-
-
w/o Idler Pulley Cover Plate:
-
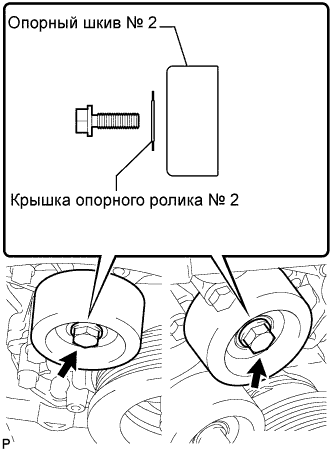
Remove the bolt, No. 2 idler pulley cover plate and idler pulley.
-
-
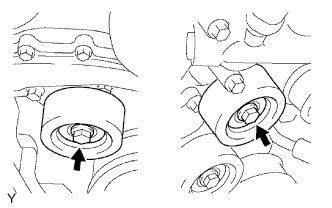
for Integrated Type:
Remove the 2 bolts and 2 No. 2 idler pulleys.
-
-
REMOVE GENERATOR ASSEMBLY
-
Disconnect the terminal cap.
-
Remove the 2 bolts, nut and generator wire.
-
Disconnect the generator connector.
-
Remove the 2 bolts and generator.
-
-
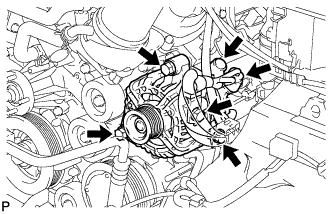
REMOVE V-RIBBED BELT TENSIONER ASSEMBLY
-

Remove the 5 bolts and V-ribbed belt tensioner.
-
-
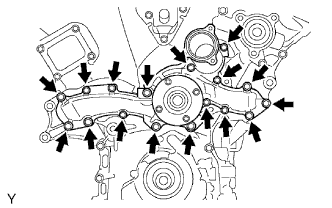
REMOVE WATER PUMP ASSEMBLY
-
Remove the 17 bolts, water pump and gasket.
-