FRONT CONSOLE BOX DISASSEMBLY
-
REMOVE CONSOLE REAR END PANEL
-
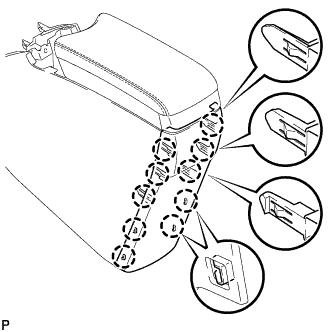
Disengage the 10 claws to remove the console rear end panel.
-
-
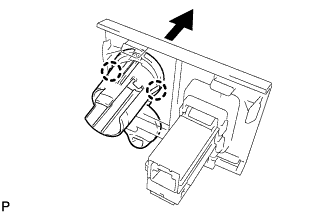
REMOVE CONSOLE COMPARTMENT DOOR SUB-ASSEMBLY
-
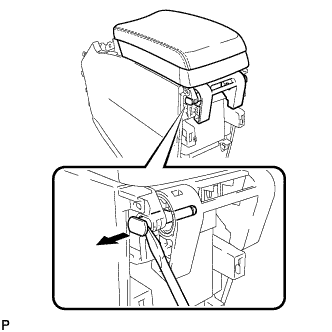
Using a screwdriver, pull out the box door hinge shafts.
Tech Tips
-
The illustration is for the LH side.
-
Use the same procedure for the RH side and LH side.
-
-
Remove the console compartment door sub-assembly.
-
-
REMOVE CONSOLE COMPARTMENT DOOR PAD SUB-ASSEMBLY
-
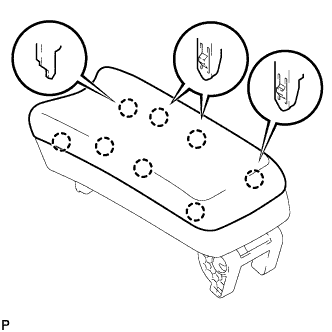
Disengage the 8 claws and remove the console compartment door pad sub-assembly.
-
-
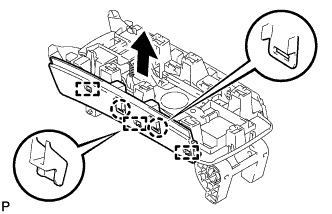
REMOVE REAR CONSOLE COMPARTMENT DOOR BOX COVER
-

Pull the rear console compartment door box cover in the direction indicated by the arrow to disengage the claw and 5 guides, and remove the rear console compartment door box cover.
-
-
REMOVE NO. 2 CONSOLE COMPARTMENT DOOR INSERT
-
Pull the No. 2 console compartment door insert in the direction indicated by the arrow to disengage the 2 claws and 3 guides, and remove the No. 2 console compartment door insert.
-
-
REMOVE NO. 1 CONSOLE COMPARTMENT DOOR INSERT
Tech Tips
Use the same procedure as for the No. 2 console compartment door insert.
-
REMOVE NO. 2 BOX SIDE PANEL
-
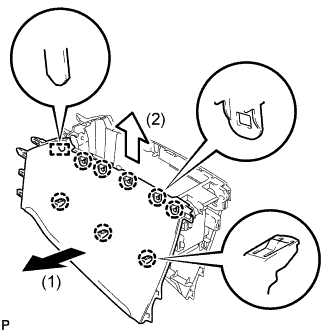
Pull the No. 2 box side panel in the direction indicated by the arrow to disengage the 8 claws and guide, and remove the No. 2 box side panel as shown in the illustration.
-
-
REMOVE NO. 1 BOX SIDE PANEL
Tech Tips
Use the same procedure as for the No. 2 box side panel.
-
REMOVE FRONT CONSOLE BOX FILLER SUB-ASSEMBLY
-
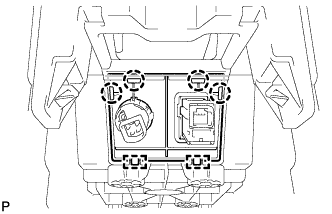
Disengage the 4 claws and 2 guide, to remove the front console box filler sub-assembly.
-
-
REMOVE NO. 1 STEREO JACK ADAPTER ASSEMBLY
-
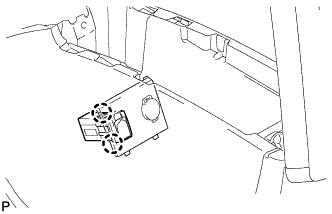
Disengage the 2 claws and remove the No. 1 stereo jack adapter assembly.
-
-
REMOVE CENTER POWER OUTLET SOCKET ASSEMBLY
-
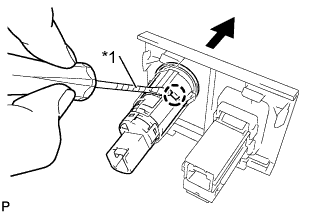
Text in Illustration *1 Protective Tape Using a screwdriver, disengage the claw and remove the center power outlet socket assembly.
Tech Tips
Tape the screwdriver tip before use.
-
-
REMOVE CENTER POWER OUTLET SOCKET COVER
-
Disengage the 2 claws and remove the center power outlet socket cover.
-