FRONT SEAT ASSEMBLY (for Power Seat) INSTALLATION
-
INSTALL FRONT SEAT ASSEMBLY
-
Place the front seat assembly in the cabin.
Note
Be careful not to damage the vehicle body.
-
Connect the connectors under the seat.
-
Connect the cable to the auxiliary negative (-) battery terminal.
Note
When disconnecting the cable, some systems need to be initialized after the cable is reconnected Click here.
-
Temporarily install the front seat assembly with the 4 bolts.
-
Operate the power seat switch knob and move the seat to the rearmost position.
-

Tighten the 2 bolts on the front side of the seat.
- Torque:
- 37 N*m { 377 kgf*cm, 27 ft.*lbf }
Note
Tighten the bolts in the order indicated in the illustration.
-
Operate the power seat switch knob and move the seat to the foremost position.
-
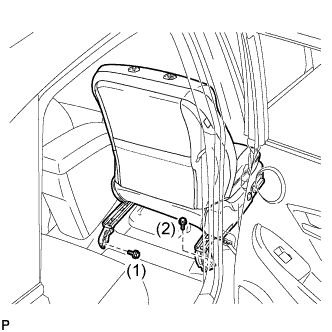
Tighten the 2 bolts on the rear side of the seat.
- Torque:
- 37 N*m { 377 kgf*cm, 27 ft.*lbf }
Note
Tighten the bolts in the order indicated in the illustration.
-
-
INSTALL INNER SEAT TRACK COVER
-
Engage the 2 claws to install the inner seat track cover.
-
-
INSTALL OUTER SEAT TRACK COVER
-
Engage the 2 claws to install the outer seat track cover.
-
-
INSTALL FRONT SEAT HEADREST ASSEMBLY
-
INSTALL REAR NO. 3 FLOOR BOARD UPPER PLATE
-
Engage the 2 claws to install the rear No. 3 floor board upper plate.
-
-
INSTALL DECK FLOOR BOX RH
-
Install the deck floor box RH Click here.
-
Install the rear No. 2 floor board.
-
-
INSTALL REAR NO. 3 FLOOR BOARD
-
Install the rear No. 3 floor board.
-
-
INSPECT FRONT SEAT ASSEMBLY
-
Check the power seat operation Click here.
-
Check the seat heater operation.
-
Turn the power switch on.
-
Turn the seat heater switch on.
-
Wait 5 minutes or more and confirm that the seat surface becomes warm.
-
-
-
INSPECT SRS WARNING LIGHT