EXHAUST MANIFOLD REMOVAL

-
REMOVE WINDSHIELD WIPER MOTOR AND LINK ASSEMBLY
-
REMOVE COWL BODY MOUNTING REINFORCEMENT LH (for LHD)
-

Remove the 3 bolts and cowl body mounting reinforcement LH.
-
-
REMOVE COWL BODY MOUNTING REINFORCEMENT RH (for RHD)
-

Remove the 3 bolts and cowl body mounting reinforcement RH.
-
-
REMOVE OUTER COWL TOP PANEL SUB-ASSEMBLY (for LHD)
-
Disengage the clamp and separate the wire harness.
-
Disengage the claw and bend the No. 1 heater air duct splash shield seal.
-
Disengage the claw and bend the water guard plate RH.
-
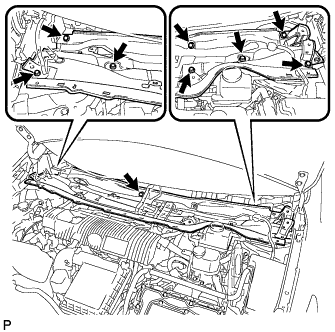
Remove the 9 bolts and outer cowl top panel sub-assembly.
-
-
REMOVE OUTER COWL TOP PANEL SUB-ASSEMBLY (for RHD)
-

Disengage the clamp and separate the wire harness from the outer cowl top panel sub-assembly.
-
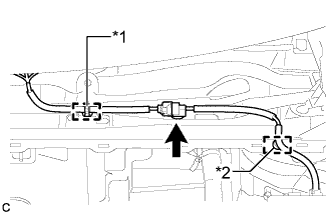
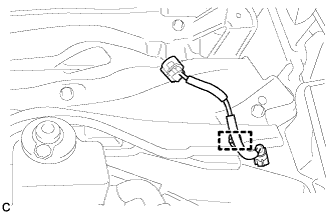
Disengage the clamp*1 and disconnect the connector (w/ Windshield Deicer).
-
Disengage the clamp*2 and separate the wire harness from the outer cowl top panel sub-assembly.
-
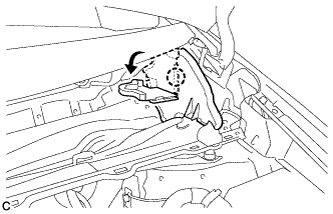
Disengage the claw and bend the No. 1 heater air duct splash shield seal.
-
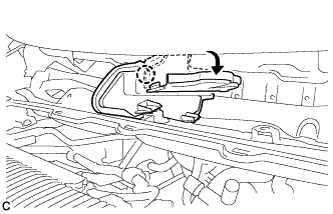
Disengage the claw and bend the water guard plate RH.
-
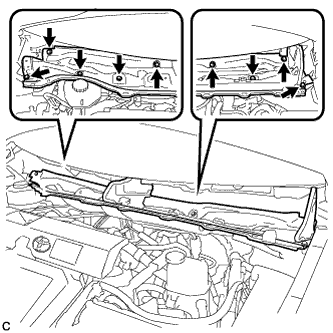
Remove the 9 bolts and outer cowl top panel sub-assembly.
-
-
REMOVE NO. 2 CYLINDER HEAD COVER
-

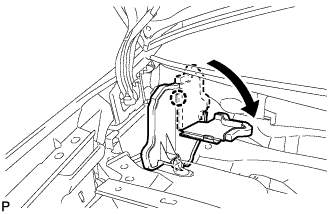
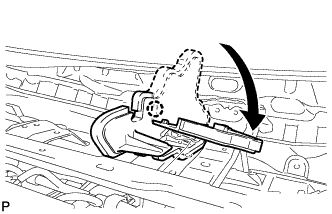
Remove the 3 clips and No. 2 cylinder head cover.
Note
-
Attempting to disengage both front and rear clips at the same time may cause the cover to break.
-
Pull the cover straight up to remove. Attempting to pull the cover forward may cause it to break.
-
-
-
REMOVE NO. 1 ENGINE UNDER COVER
-
REMOVE NO. 2 ENGINE UNDER COVER
-
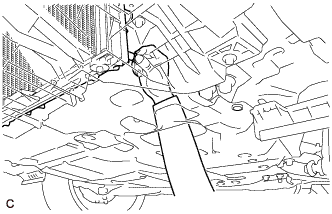
REMOVE NO. 3 ENGINE UNDER COVER
-
Remove the 4 clips and No. 3 engine under cover.
-
-
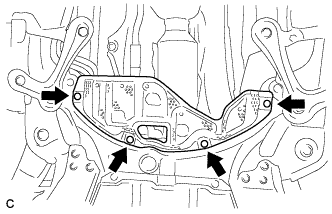
REMOVE FRONT CENTER FLOOR BRACE SUB-ASSEMBLY
-
Remove the 4 bolts and front center floor brace sub-assembly.
-
-
DRAIN COOLANT (for Engine)
Note
Do not remove the reservoir tank cap and radiator drain cock plug while the engine and radiator are still hot. Pressurized, hot engine coolant and steam may be released and cause serious burns.
-
Loosen the radiator drain cock plug.
Tech Tips
Collect the coolant in a container and dispose of it according to the local regulations.
-
Remove the reserve tank cap and drain the coolant.
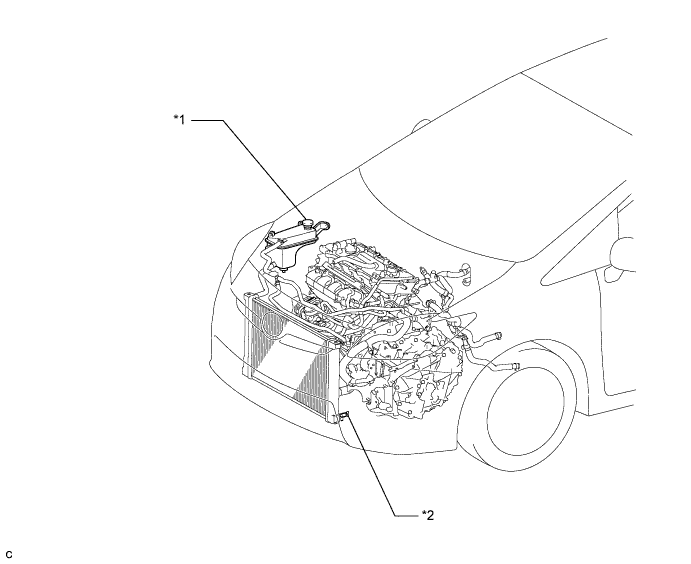
Text in Illustration *1 Reservoir Tank Cap *2 Radiator Drain Cock Plug
-
-
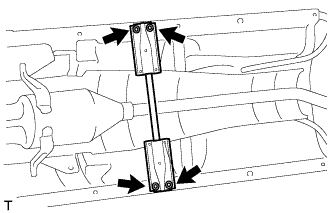
REMOVE FRONT EXHAUST PIPE ASSEMBLY
CAUTION:
Perform this procedure when the coolant is not hot.
-
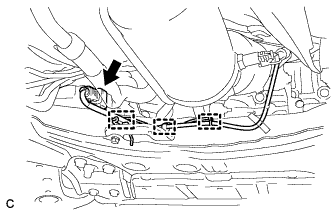
Disconnect the 3 clamps and heated oxygen sensor connector.
-
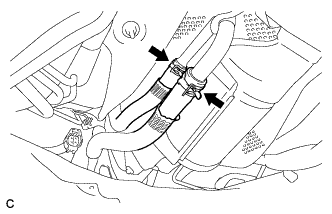
Disconnect the 2 heater water hoses.
-
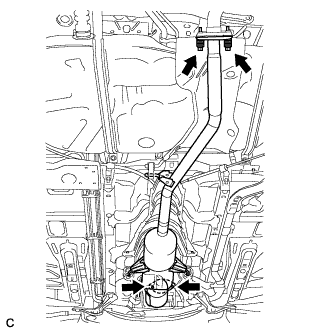
Remove the 4 bolts and 4 compression springs.
-
Remove the front exhaust pipe assembly from the 3 exhaust pipe supports.
-
Remove the 2 gaskets from the front exhaust pipe assembly and exhaust manifold.
-
-
REMOVE FRONT NO. 1 FLOOR HEAT INSULATOR
-
Remove the 3 nuts and No. 1 floor heat insulator.
-
-
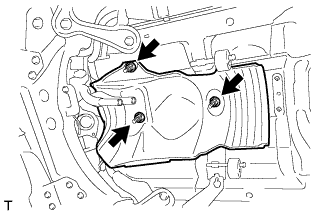
REMOVE NO. 1 EXHAUST MANIFOLD HEAT INSULATOR
-

Remove the 3 bolts and No. 1 exhaust manifold heat insulator.
-
-
REMOVE AIR FUEL RATIO SENSOR
-
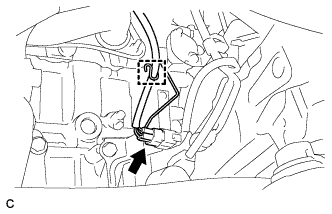
Disconnect the air fuel ratio sensor connector and clamp.
-

Using SST, remove the air fuel ratio sensor.
- SST
- 09224-00010
-
-
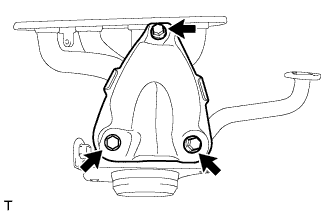
REMOVE MANIFOLD STAY
-

Remove the 3 bolts and manifold stay.
-
-
REMOVE EXHAUST MANIFOLD
-

Remove the 7 nuts, exhaust manifold and 2 gaskets.
-
-
REMOVE NO. 2 EXHAUST MANIFOLD HEAT INSULATOR
-
Remove the 3 bolts and No. 2 exhaust manifold heat insulator.
-