PCV VALVE INSTALLATION
-
INSTALL VENTILATION VALVE SUB-ASSEMBLY
-
Apply adhesive to 2 or 3 threads of the ventilation valve sub-assembly.
Adhesive Toyota genuine adhesive 1324, three bond 1324 or equivalent -
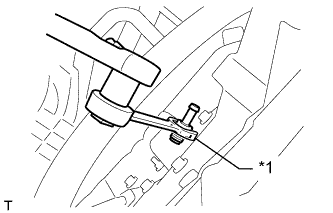
Text in Illustration *1 Ball Joint Lock Nut Wrench (22 mm) Using a ball joint lock nut wrench (22 mm), install the ventilation valve sub-assembly.
- Torque:
- 20 N*m { 204 kgf*cm, 15 ft.*lbf }
Note
Use the formula to calculate special torque values for situations where a ball joint lock nut wrench is combined with a torque wrench Click here.
-
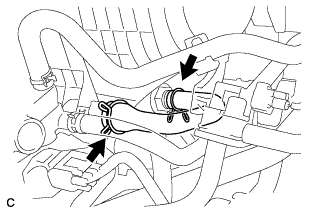
Install the ventilation hose to the ventilation valve sub-assembly.
-
-
INSTALL NO. 1 ENGINE UNDER COVER
-
INSTALL AIR CLEANER CASE
-
Install the air cleaner case with the 3 bolts.
- Torque:
- 7.0 N*m { 71 kgf*cm, 62 in.*lbf }
-
Connect the No. 4 water by-pass hose to the air cleaner case with the 3 clamps.
-
Install the air cleaner filter element.
-
-
INSTALL INLET AIR CLEANER ASSEMBLY
-
Install the inlet air cleaner assembly with the 2 bolts.
- Torque:
- 7.0 N*m { 71 kgf*cm, 62 in.*lbf }
-
-
INSTALL AIR CLEANER CAP SUB-ASSEMBLY
-
Install the air cleaner cap sub-assembly with the 2 clamps and hose band.
-
Connect the air flow meter connector.
-
-
INSTALL NO. 2 CYLINDER HEAD COVER
-
Engage the 3 clips to install the No. 2 cylinder head cover.
Note
-
Be sure to engage the clips securely.
-
Do not apply excessive force or hit the cover to engage the clips. This may cause the cover to break.
-
-