HV BATTERY STACK REMOVAL
-
PRECAUTION
CAUTION:
-
The hybrid system has high-voltage circuits. Accidents, such as electric shock, or electric leaks may result if the hybrid system is not operated in a correct manner. Make sure to follow the correct procedure Click here.
-
When disposing of HV batteries and hybrid vehicle supply stack sub-assemblies, make sure to return them through an authorized collection agent who is capable of handling them safely.
-
Before returning the HV battery, make sure to perform a recovery inspection Click here.
-
Before returning the hybrid vehicle supply stack sub-assembly, make sure to perform a recovery inspection Click here.
-
Make a note of the output DTCs as some of them may be necessary for "Recovery Inspection" of the HV battery and hybrid vehicle supply stack sub-assembly.
-
-
READ VALUE USING GTS
-
Connect the GTS to the DLC3.
-
Turn the power switch on (IG).
-
Enter the following menus: Powertrain / Hybrid Control / Data List / Temp of Batt TB1 - 12.
-
Read the Data List.
Note
If any of the temperatures listed in "Temp of Batt TB1 - 12" are 50°C or more, leave the vehicle until the temperature drops to less than 50°C.
-
-
CHECK FOR DTCS
-
Check for DTCs Click here
Note
Confirm that DTC P0AA6 (Hybrid Battery Voltage System Isolation Fault) is not output before doing removal or installation work inside the battery. If this DTC is output, perform troubleshooting for this DTC first.
-
-
PERFORM UTILITY
Tech Tips
Make sure to perform "Normal Battery Stack Average Voltage Calculation" before removing a hybrid vehicle supply stack sub-assembly to be able to appropriately adjust the voltage of the replacement stack Click here.
-
REMOVE HYBRID BATTERY JUNCTION BLOCK ASSEMBLY
-
REMOVE BATTERY SMART UNIT
CAUTION:
Wear insulated gloves.
-
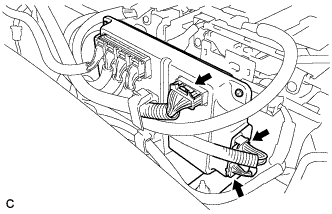
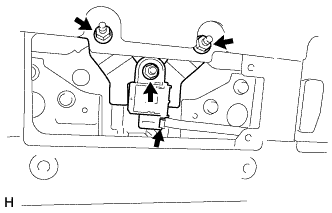
Disconnect the 3 connectors.
-
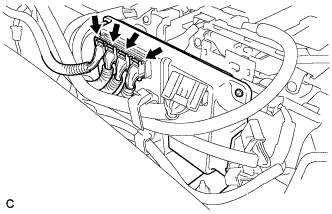
Disconnect the 4 connectors.
Note
Insulate the removed connectors with insulating tape.
-
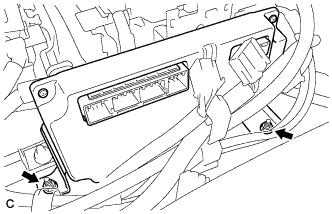
Remove the 2 nuts and battery smart unit.
-
-
REMOVE NO. 1 HYBRID BATTERY INTAKE DUCT
-
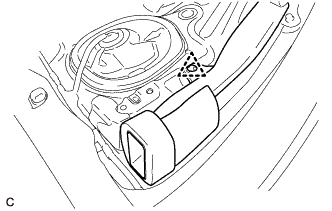
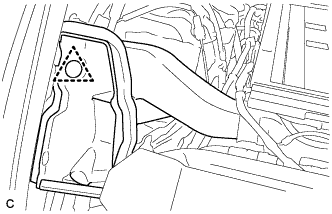
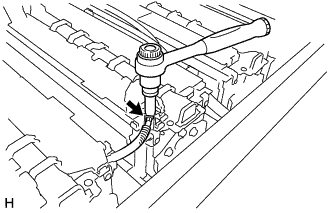
Remove the clip and No. 1 hybrid battery intake duct.
-
-
REMOVE NO. 2 HYBRID BATTERY INTAKE DUCT
-
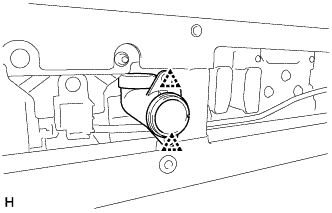
Remove the clip and No. 2 hybrid battery intake duct.
-
-
REMOVE NO. 4 HYBRID BATTERY INTAKE DUCT
CAUTION:
Be sure to wear insulated gloves and protective goggles.
-
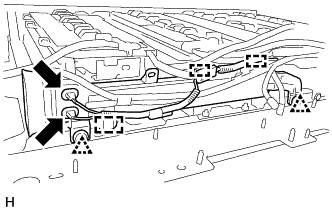
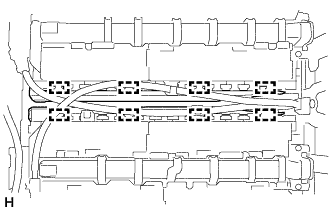
Disconnect the 2 intake air temperature sensors and 3 clamps.
Note
When disengaging each intake air temperature sensor, pull out the clamp while squeezing.
-
Disconnect the 2 clips and remove the No. 4 hybrid battery intake duct.
-
-
REMOVE NO. 3 HYBRID BATTERY INTAKE DUCT
CAUTION:
Be sure to wear insulated gloves and protective goggles.
-
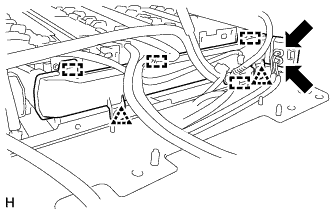
Disconnect the 2 intake air temperature sensors and 4 clamps.
Note
When disengaging each intake air temperature sensor, pull out the clamp while squeezing.
-
Disconnect the 2 clips and remove the No. 3 hybrid battery intake duct .
-
-
REMOVE NO. 2 HYBRID VEHICLE BATTERY HOSE
CAUTION:
Be sure to wear insulated gloves and protective goggles.
-
Disconnect the 2 clips and remove the No. 2 hybrid vehicle battery hose.
-
-
REMOVE NO. 1 HYBRID VEHICLE BATTERY HOSE
CAUTION:
Be sure to wear insulated gloves and protective goggles.
-

Disconnect the 8 clips and remove the No. 1 hybrid vehicle battery hose.
-
-
REMOVE NO. 1 HYBRID VEHICLE SUPPLY STACK SUB-ASSEMBLY
CAUTION:
Be sure to wear insulated gloves and protective goggles.
-
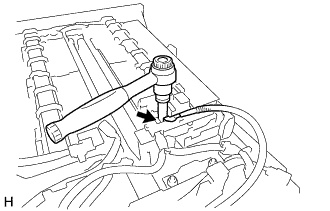
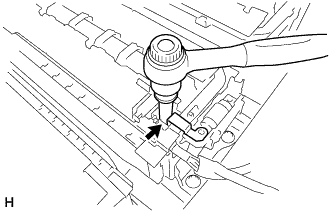
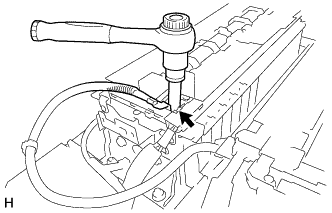
Using an insulated tool, remove the nut and disconnect the No. 1 hybrid vehicle battery pack cable.
Note
Insulate the disconnected terminal with insulating tape.
-
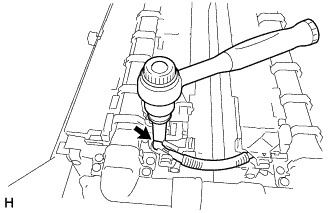
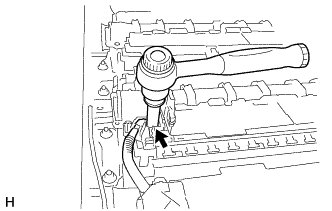
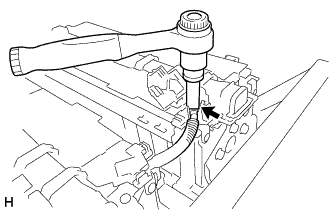
Using an insulated tool, remove the nut and disconnect the No. 3 hybrid vehicle battery pack cable.
Note
Insulate the disconnected terminal with insulating tape.
-
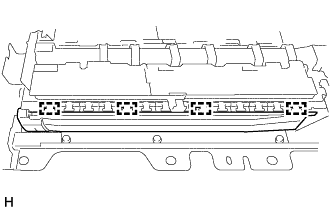
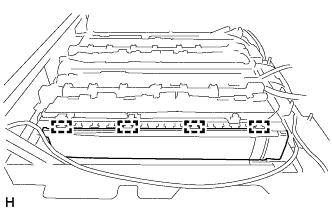
Disengage the 4 claws and remove the No. 5 hybrid battery intake duct.
-
Disengage the 8 claws and remove the No. 1 hybrid battery exhaust duct and No. 2 hybrid battery exhaust duct.
-
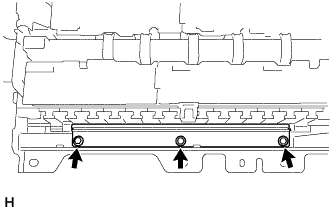
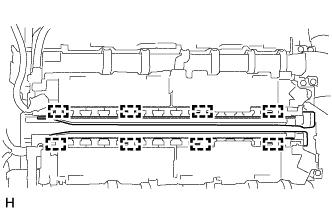
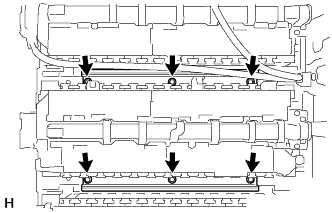
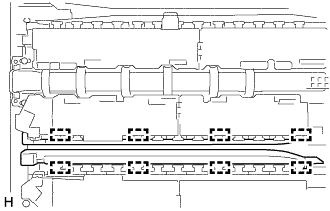
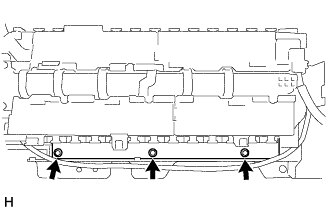
Remove the 3 bolts and No. 1 hybrid vehicle battery shield reinforcement.
-
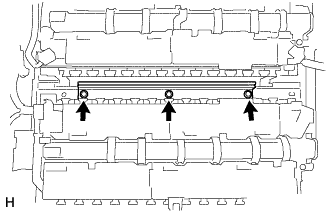
Remove the 3 bolts and No. 2 hybrid vehicle battery shield reinforcement.
-
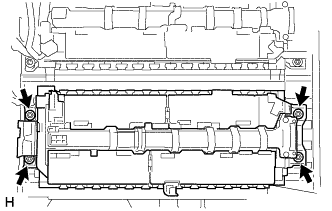
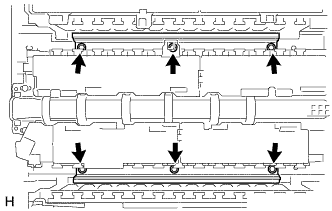
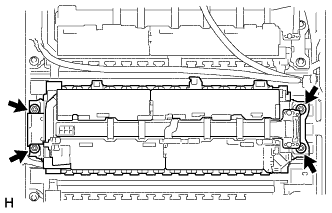
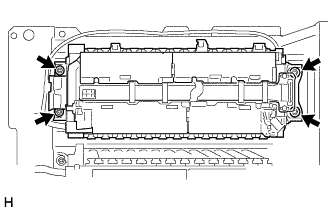
Remove the 4 nuts and No. 1 hybrid vehicle supply stack sub-assembly.
Note
Before installing a new hybrid vehicle supply stack sub-assembly, the voltage should be adjusted to the appropriate value.
-
-
REMOVE NO. 2 HYBRID VEHICLE SUPPLY STACK SUB-ASSEMBLY
CAUTION:
Be sure to wear insulated gloves and protective goggles.
-
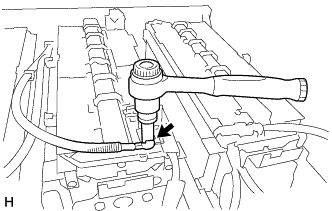
Using an insulated tool, remove the nut and disconnect the electric vehicle battery plug assembly.
Note
Insulate the disconnected terminal with insulating tape.
-
Using an insulated tool, remove the nut and disconnect the No. 3 hybrid vehicle battery pack cable.
Note
Insulate the disconnected terminal with insulating tape.
-
Disengage the 8 claws and remove the No. 1 hybrid battery exhaust duct and No. 2 hybrid battery exhaust duct.
-
Disengage the 8 claws and remove the No. 5 hybrid battery exhaust duct and No. 6 hybrid battery exhaust duct.
-
Remove the 6 bolts and 2 No. 2 hybrid vehicle battery shield reinforcements.
-

Remove the 4 nuts and No. 2 hybrid vehicle supply stack sub-assembly.
Note
Before installing a new hybrid vehicle supply stack sub-assembly, the voltage should be adjusted to the appropriate value.
-
-
REMOVE NO. 3 HYBRID VEHICLE SUPPLY STACK SUB-ASSEMBLY
CAUTION:
Be sure to wear insulated gloves and protective goggles.
-

Using an insulated tool, remove the 2 bolts and electric vehicle fuse.
-
Using an insulated tool, remove the nut and disconnect the electric vehicle battery plug assembly.
Note
Insulate the disconnected terminal with insulating tape.
-
Disconnect the connector.
-
Remove the 3 nuts, electric vehicle battery plug assembly and No. 1 hybrid vehicle battery rear shield bracket.
-
Using an insulated tool, remove the nut and No. 6 hybrid vehicle battery terminal.
-
Disengage the 2 claws and remove the hybrid battery terminal block.
-
Using an insulated tool, remove the nut and disconnect the No. 3 hybrid vehicle battery pack cable.
Note
Insulate the disconnected terminal with insulating tape.
-
Disengage the 8 claws and remove the No. 1 hybrid battery exhaust duct and No. 2 hybrid battery exhaust duct.
-
Disengage the 8 claws and remove the No. 5 hybrid battery exhaust duct and No. 6 hybrid battery exhaust duct.
-
Remove the 6 bolts and 2 No. 2 hybrid vehicle battery shield reinforcements.
-
Remove the 4 nuts and No. 3 hybrid vehicle supply stack sub-assembly.
Note
Before installing a new hybrid vehicle supply stack sub-assembly, the voltage should be adjusted to the appropriate value.
-
-
REMOVE NO. 4 HYBRID VEHICLE SUPPLY STACK SUB-ASSEMBLY
CAUTION:
Be sure to wear insulated gloves and protective goggles.
-
Using an insulated tool, remove the nut and disconnect the No. 2 hybrid vehicle battery pack cable.
Note
Insulate the disconnected terminal with insulating tape.
-
Using an insulated tool, remove the nut and disconnect the No. 3 hybrid vehicle battery pack cable.
Note
Insulate the disconnected terminal with insulating tape.
-
Disengage the 4 claws and remove the No. 5 hybrid battery intake duct.
-
Disengage the 8 claws and remove the No. 1 hybrid battery exhaust duct and No. 2 hybrid battery exhaust duct.
-
Remove the 3 bolts and No. 1 hybrid vehicle battery shield reinforcement.
-

Remove the 3 bolts and No. 2 hybrid vehicle battery shield reinforcement.
-
Remove the 4 nuts and No. 4 hybrid vehicle supply stack sub-assembly.
Note
Before installing a new hybrid vehicle supply stack sub-assembly, the voltage should be adjusted to the appropriate value.
-
-
PERFORM RECOVERY INSPECTION
-
Before returning the hybrid vehicle supply stack sub-assembly, make sure to perform a recovery inspection Click here.
-