ROOF HEADLINING REASSEMBLY

-
INSTALL NO. 1 ROOF WIRE
-
Position the positioning tape as shown in the illustration and install the No. 1 roof wire.
-
Apply tape in the order shown in the illustration to fix the No. 1 roof wire in place.
Tech Tips
Adjust any slack of the No. 1 roof wire as indicated by the dashed lines in the illustration and apply tape.

Text in Illustration *1 Positioning Tape - -
-
-
INSTALL PACKING
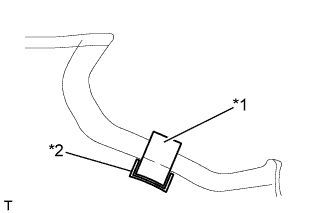
Text in Illustration *1 Packing *2 Marking Tech Tips
Use the same procedure for both packings.
-
Align a new packing with the marking on the roof headlining and install the packing to the position shown in the illustration using double-sided tape.
-
-
INSTALL ROOF HEADLINING PACKING
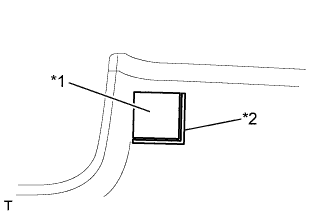
Text in Illustration *1 Packing *2 Marking Tech Tips
Use the same procedure for both roof headlining packings.
-
Align a new roof headlining packing with the marking on the roof headlining and install the roof headlining packing to the position shown in the illustration using double-sided tape.
-
-
INSTALL NO. 1 AIR OUTLET REGISTER ASSEMBLY
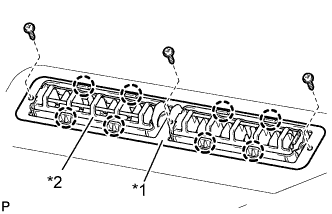
Text in Illustration *1 Bracket *2 No. 1 Air Outlet Register
-
Attach the 8 claws to install the bracket and No. 1 air outlet register.
-
Install the 3 screws.
-
-
INSTALL NO. 1 AIR OUTLET REGISTER ASSEMBLY
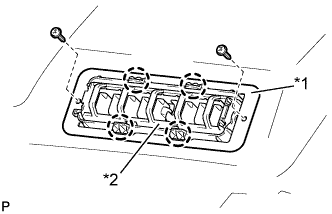
Text in Illustration *1 Bracket *2 No. 1 Air Outlet Register Tech Tips
Use the same procedure for both No. 1 air outlet registers.
-
Attach the 4 claws to install the bracket and No. 1 air outlet register.
-
Install the 2 screws.
-