FRONT SEAT ASSEMBLY DISASSEMBLY

CAUTION:
Wear protective gloves. Sharp areas on the parts may injure your hands.
Tech Tips
-
Use the same procedure for the RH and LH sides.
-
The procedure listed below is for the LH side.
-
REMOVE FRONT SEAT INNER BELT ASSEMBLY LH
-
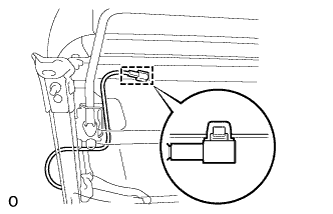
Detach the clamp.
-
Detach the wire harness from the clamp.
-
Roll up over the front seat cushion cover LH.
-
Remove the nut and front seat inner belt assembly LH.
-
Remove the front seat belt anchor plate.
-
-
REMOVE FRONT SEAT INNER BELT ASSEMBLY RH (for Front Passenger Side)
-
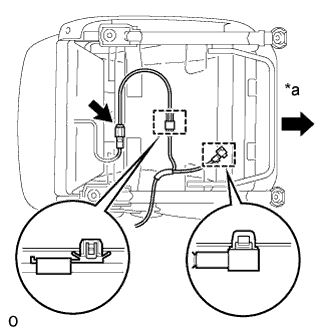
Disconnect the connector.
-
Detach the 2 clamps.
Text in Illustration *a Front -
Detach the wire harness from the clamp.
-
Roll up over the front seat cushion cover RH.
-
Remove the nut and front seat inner belt assembly RH.
-
Remove the front seat belt anchor plate.
-
-
REMOVE FRONT SEAT CUSHION COVER LH
-
Remove the cushion cover.
-
-
REMOVE FRONT SEAT CUSHION INNER SHIELD LH
-
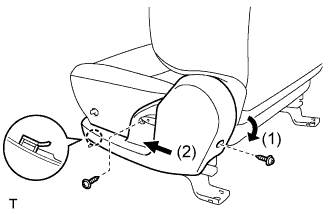
Remove the 2 screws.
-
Detach the rear part of the inner shield in the order shown in the illustration, and then remove the cushion shield.
-
-
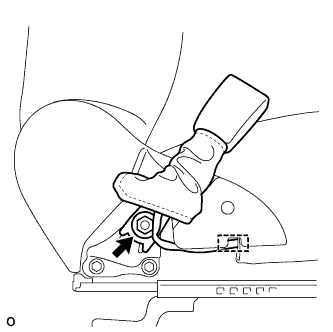
REMOVE VERTICAL SEAT ADJUSTER KNOB LH (w/ Vertical Adjuster)
-

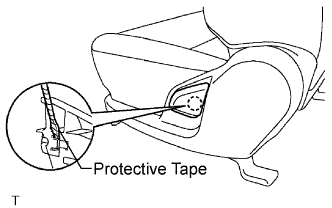
Using a screwdriver, remove the snap ring as shown in the illustration.
Tech Tips
Tape the screwdriver tip before use.
-
Remove the knob.
-
-
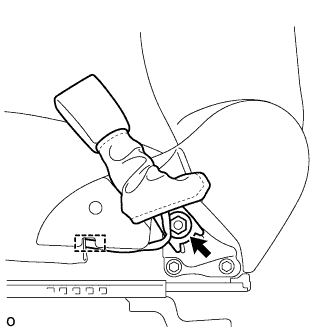
REMOVE RECLINING ADJUSTER RELEASE HANDLE LH
-
Raise the reclining adjuster release handle to reveal the claw. Using a screwdriver, detach the claw and remove the release handle.
Tech Tips
Tape the screwdriver tip before use.
-
-
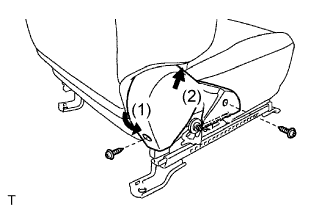
REMOVE FRONT SEAT CUSHION SHIELD LH
-
Remove the 2 screws.
-
Detach the rear part of the cushion shield in the order shown in the illustration, and then detach the claw and remove the cushion shield.
-
-
REMOVE SEATBACK SPRING
-
Remove the seatback spring.
-
-
REMOVE SEPARATE TYPE FRONT SEATBACK ASSEMBLY LH
-
Remove the 4 bolts and seatback.
-
-
REMOVE SEPARATE TYPE FRONT SEATBACK COVER
-
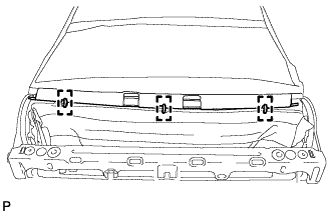
Remove the hog rings from the wires of the seatback cover. Then roll up the seatback cover.
-
Remove the hog rings and detach the 2 straps of the seatback cover. Then roll up the seatback cover.
-
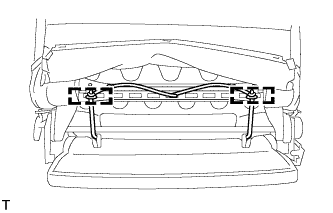
Remove the hog rings from the center of the seatback pad and roll up the seatback cover.
-
Remove the hog rings from the upper part of the seatback pad. Then roll up the seatback cover.
-
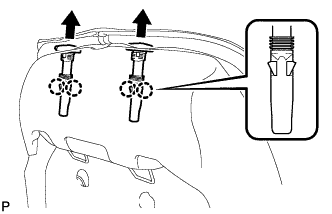
Detach the 4 claws and remove the 2 headrest supports.
-
Remove the hog rings and seatback cover.
-
-
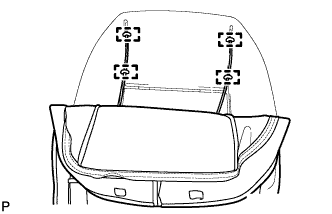
REMOVE SEPARATE TYPE FRONT SEATBACK PAD
-
Remove the seatback pad.
-
-
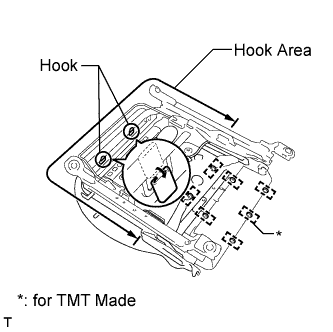
REMOVE SEAT CUSHION COVER WITH PAD
-
w/ Occupant Detection Sensor:
Detach the wire harness clamp.
-
Detach the 2 hooks.
-
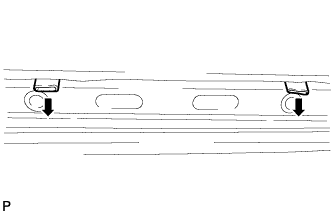
Detach the hooks in the hook area shown in the illustration.
-
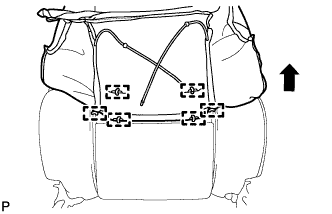
Remove the hog rings and seat cushion cover with pad from the seat cushion frame.
-
-
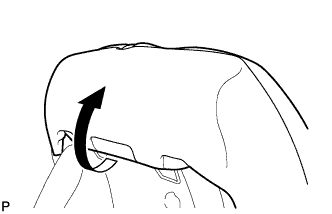
REMOVE FRONT SEAT CUSHION PROTECTOR
-
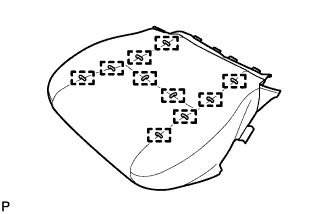
Remove the 2 protectors.
-
-
REMOVE SEPARATE TYPE FRONT SEAT CUSHION COVER
-
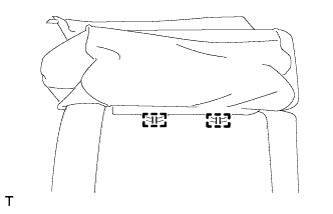
Remove the hog rings and seat cushion cover.
-
-
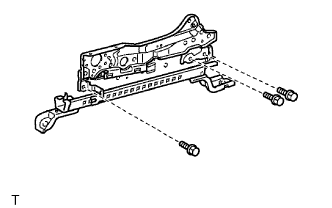
REMOVE FRONT SEAT CUSHION FRAME SUB-ASSEMBLY
-
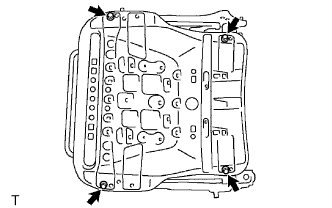
Remove the 4 bolts and seat cushion frame.
-
-
REMOVE VERTICAL ADJUSTING SHAFT SUB-ASSEMBLY (w/ Vertical Adjuster)
-
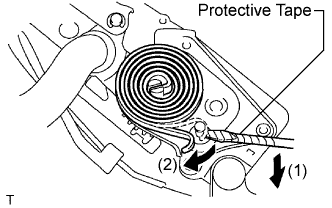
Using a screwdriver, detach the seat spring from the reclining adjuster lower arm.
Tech Tips
Tape the screwdriver tip before use.
-
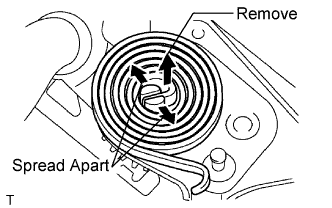
Using a screwdriver, spread apart the tabs that hold the spring, and then remove the spring.
Tech Tips
Tape the screwdriver tip before use.
-
Using a 6 mm socket hexagon wrench, remove the front seat No. 2 adjuster pin.
-
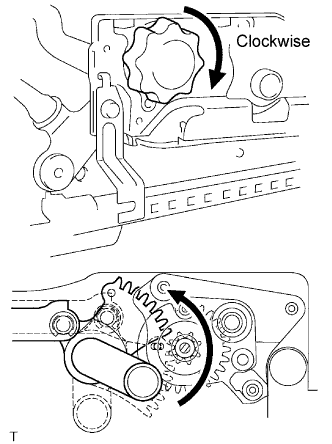
Temporarily install the vertical seat adjuster knob.
-
Turn the knob clockwise and move the gear of the vertical adjusting shaft to the position shown in the illustration.
-
Remove the vertical seat adjuster knob.
-
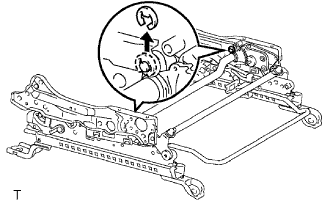
Using a screwdriver, remove the 2 E-rings and vertical adjusting shaft.
-
-
REMOVE SEAT TRACK HANDLE SUB-ASSEMBLY
-
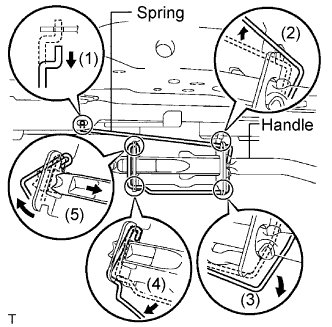
Detach the spring of the seat track in the order shown in the illustration. Then remove the handle.
-
-
REMOVE FRONT SEAT ADJUSTER ROD (w/ Vertical Adjuster)
-
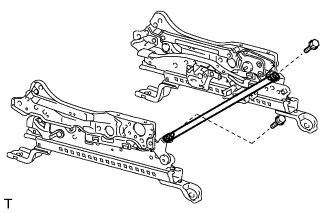
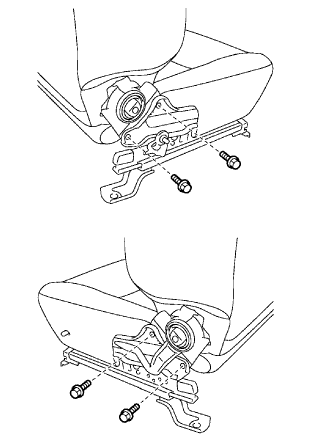
Remove the 2 bolts and front seat adjuster rod.
-
-
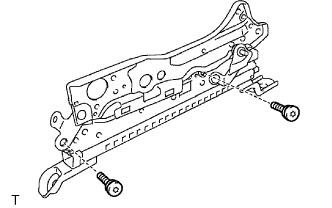
REMOVE RECLINING ADJUSTER LOWER ARM SUB-ASSEMBLY LH
-
w/ Vertical Adjuster:
Using a T40 "TORX" socket wrench, remove the 2 "TORX" bolts and reclining adjuster lower arm.
-
w/o Vertical Adjuster:
Remove the 3 bolts and reclining adjuster lower arm.
-
-
REMOVE RECLINING ADJUSTER LOWER ARM SUB-ASSEMBLY RH
-
w/ Vertical Adjuster:
Tech Tips
Use the same procedures described for the LH side.
-
w/o Vertical Adjuster:
Tech Tips
Use the same procedures described for the LH side.
-
-
REMOVE FRONT SEAT CUSHION EDGE PROTECTOR
-
Remove the seat cushion edge protector.
-