REAR NO. 2 SEAT ASSEMBLY DISASSEMBLY

Tech Tips
-
Use the same procedures for the RH side and LH side.
-
The procedures listed below are for the RH side.
CAUTION:
Wear protective gloves. Sharp areas on the seatback frames and seat cushion frame may injure your hands.
-
REMOVE REAR NO. 2 SEAT HEADREST ASSEMBLY
-
REMOVE REAR SEAT CUSHION HINGE COVER LOWER RH
-
Return the seatback to the upright position.
-

Remove the 2 screws and hinge cover.
-
-
REMOVE NO. 1 RECLINING ADJUSTER RELEASE HANDLE RH
-
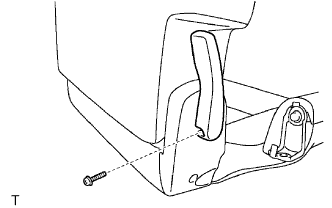
Remove the screw and release handle.
-
-
REMOVE REAR NO. 2 SEAT RECLINING COVER RH
-
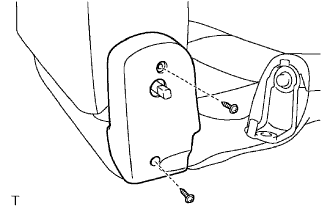
Remove the 2 screws and reclining cover.
-
-
REMOVE REAR NO. 2 SEATBACK ASSEMBLY
-
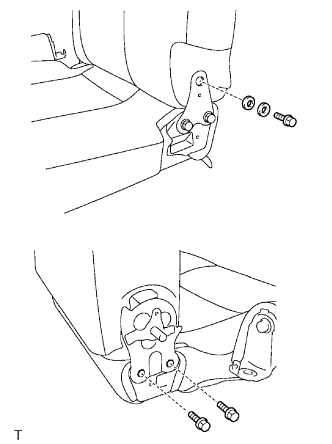
Remove the 3 bolts, plate, spacer and rear No. 2 seatback.
-
-
REMOVE REAR NO. 2 SEATBACK COVER
-
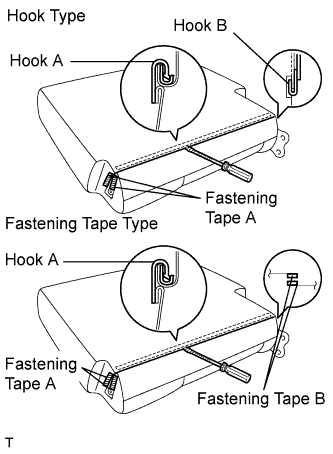
Using a screwdriver, detach the hook labeled A.
Tech Tips
Tape the screwdriver tip before use.
-
Open the fastening tape labeled A.
-
Using a screwdriver, detach the hook labeled B or open the fastening tape labeled B.
Tech Tips
-
Depending on the type of seat cover, hooks or fastening tape is present.
-
Tape the screwdriver tip before use.
-
-
Roll up the seatback cover.
-
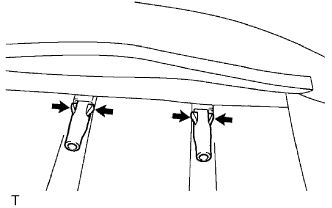
Detach the 4 claws and remove the 2 headrest supports.
-
Remove the seatback cover (with pad) from the seatback frame.
-
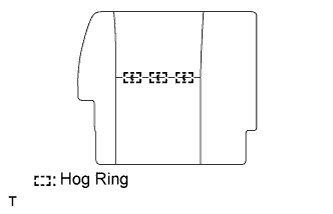
Remove the 3 hog rings and seatback cover from the seatback pad.
-
-
REMOVE NO. 3 SEAT OUTER FRONT LEG SUB-ASSEMBLY RH
-
Remove the bolt, 2 plates and leg.
-
-
REMOVE NO. 3 SEAT OUTER REAR LEG SUB-ASSEMBLY RH
-
Remove the bolt, 2 plates and leg.
-
-
REMOVE REAR SEAT HINGE COVER
-
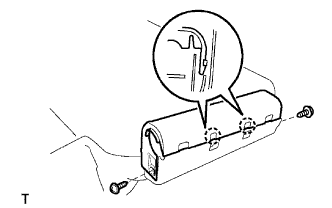
Remove the 2 screws.
-
Using a screwdriver, detach the 2 claws and remove the hinge cover.
Tech Tips
Tape the screwdriver tip before use.
-
-
REMOVE REAR NO. 2 SEAT COVER RH
-
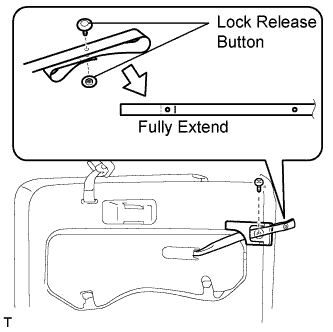
Remove the 2 lock release buttons and fully extend the release band.
-
Remove the screw and the rear seat cover.
-
-
REMOVE NO. 2 SEAT CUSHION COVER RH
-
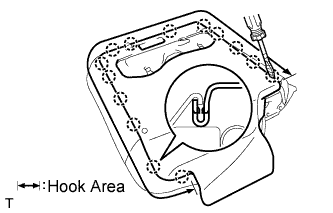
Using a screwdriver, detach the 14 claws and hooks.
Tech Tips
Tape the screwdriver tip before use.
-
Remove the rear No. 2 seat cushion cover from the No. 2 seat cushion cover RH. Then fold back the rear No. 2 seat cushion cover so that the 5 screws are visible.
-
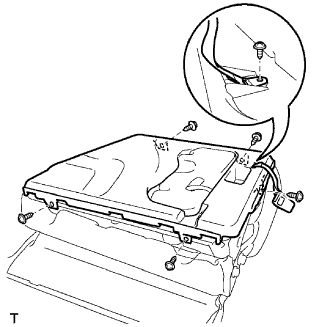
Remove the 5 screws.
-
Remove the screw on the inner side of the No. 2 seat cushion cover, and then remove the fold seat stopper band. Then remove the No. 2 seat cushion cover RH.
-
-
REMOVE REAR SEAT LEG COVER
-
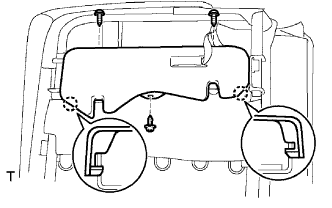
Remove the 3 screws.
-
Using a screwdriver, detach the 2 claws and remove the leg cover.
Tech Tips
Tape the screwdriver tip before use.
-
-
REMOVE REAR NO. 2 SEAT INNER BELT ASSEMBLY
-
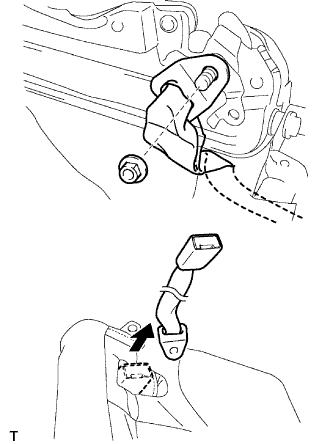
Remove the nut connecting the inner belt to the seat leg. Then remove the belt through the hole in the rear No. 2 seat cushion cover (with pad).
-
-
REMOVE NO. 2 SEAT LEG SUB-ASSEMBLY RH
-
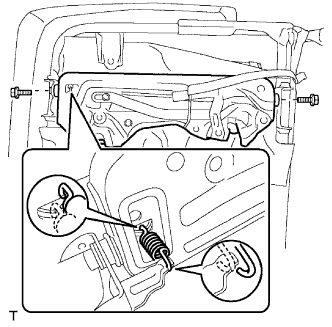
Remove the 2 bolts and No. 3 seat cushion spring as shown in the illustration. Then remove the seat leg.
-
-
REMOVE NO. 1 SEAT CUSHION CARPET
-
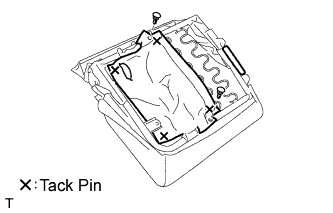
Cut off the 4 tack pins fastened to the carpet.
-
Using a clip remover, remove the 2 clips and carpet.
-
-
REMOVE REAR SEAT CUSHION UNDER CLOTH
-
REMOVE REAR NO. 2 SEAT CUSHION COVER
-
Using a screwdriver, detach the hook and remove the seat cushion cover (with pad) from the seat cushion frame.
Tech Tips
Tape the screwdriver tip before use.
-
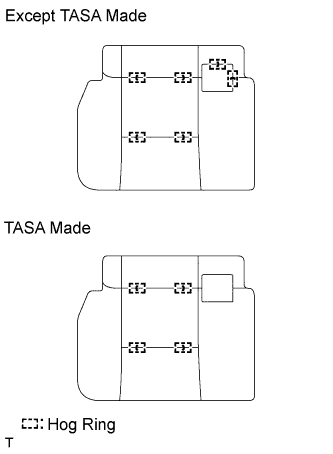
Except TASA made:
Remove the 6 hog rings and seat cushion cover from the seat cushion pad.
-
TASA Made:
Remove the 4 hog rings and seat cushion cover from the seat cushion pad.
-
-
REMOVE NO. 2 SEAT LEG PLATE
-
Remove the 2 bolts and plate.
-