REAR NO. 1 SEAT ASSEMBLY (for RH Side) DISASSEMBLY

CAUTION:
Wear protective gloves. Sharp areas on the seatback frame and seat cushion frame may injure your hands.
-
REMOVE REAR SEAT HEADREST ASSEMBLY
-
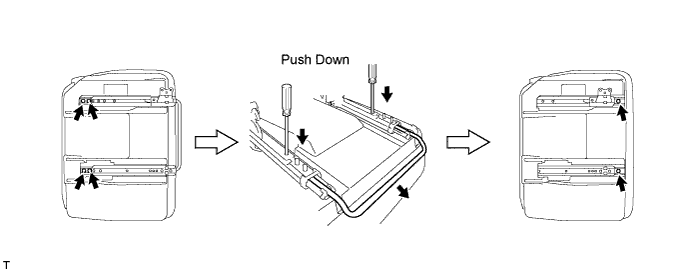
REMOVE REAR NO. 1 SEAT RECLINING COVER LH
-
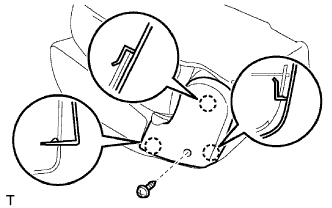
Remove the screw.
-
Using a screwdriver, detach the 3 claws and remove the reclining cover.
Tech Tips
Tape the screwdriver tip before use.
-
-
REMOVE RECLINING ADJUSTER RELEASE HANDLE RH
-
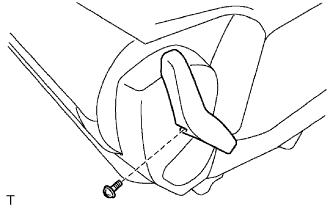
Remove the screw and release handle.
-
-
REMOVE REAR NO. 1 SEAT RECLINING COVER RH
-
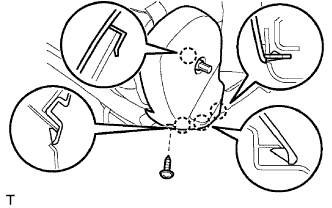
Remove the screw.
-
Using a screwdriver, detach the 4 claws and remove the reclining cover.
Tech Tips
Tape the screwdriver tip before use.
-
-
REMOVE REAR NO. 1 SEATBACK ASSEMBLY
-
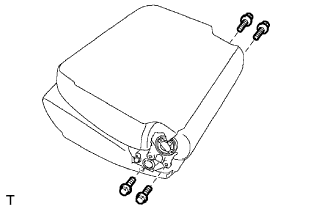
Remove the 4 bolts and seatback.
-
-
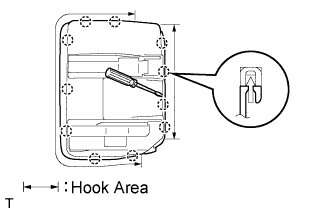
REMOVE REAR NO. 1 SEATBACK COVER
-
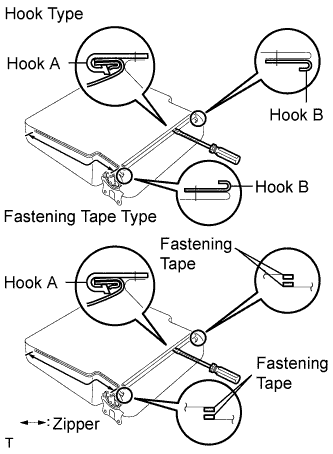
Using a screwdriver, detach the hook labeled A.
Tech Tips
Tape the screwdriver tip before use.
-
Using a screwdriver, detach the 2 hooks labeled B or open the fastening tapes.
Tech Tips
-
Depending on the type of seat cover, hooks or fastening tape is present.
-
Tape the screwdriver tip before use.
-
-
Open the zipper.
-
Roll up the seatback cover.
-
Remove the 2 bolts, 2 bushes and armrest.
-
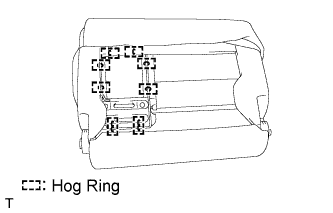
Remove the 10 hog rings.
-
Detach the 4 claws and remove the 2 headrest supports.
-
Remove the seatback cover (with pad) from the seatback frame.
-
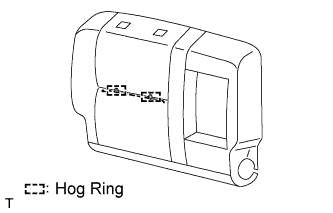
Remove the 2 hog rings and seatback cover from the seatback pad.
-
-
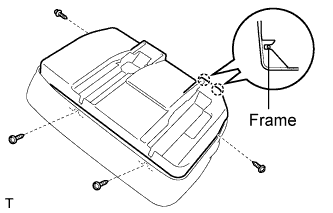
REMOVE REAR SEATBACK BOARD RH
-
REMOVE REAR SEAT ARMREST ARM LH
-
Remove the nut and arm.
-
-
REMOVE REAR SEAT ARMREST ARM RH
-
Remove the nut and arm.
-
-
REMOVE REAR NO. 1 SEAT BELT ASSEMBLY INNER RH
-
Remove the bolt and belt.
-
-
REMOVE REAR NO. 1 SEAT LOCK COVER RH (for Slide Seat Type)
-
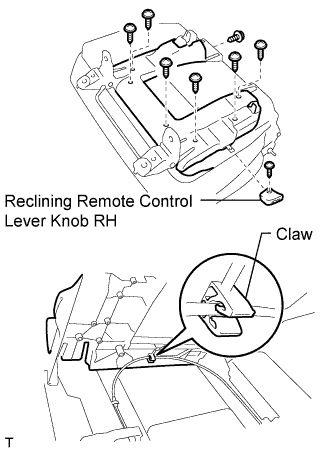
Remove the screw and reclining remote control lever knob.
-
Remove the 7 screws.
-
Raise the lock cover and remove the rear seat lock control cable from the lock cover's claw. Then remove the lock cover.
-
-
REMOVE REAR SEAT LOCK COVER RH (for Non-slide Seat Type)
-
Using a screwdriver, detach the claws and remove the 2 lock covers.
Tech Tips
Tape the screwdriver tip before use.
-
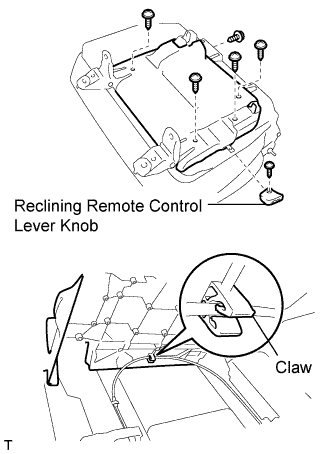
Remove the screw and reclining remote control lever knob.
-
Remove the 5 screws.
-
Raise the lock cover and remove the rear seat lock control cable from the lock cover's claw. Then remove the lock cover.
-
-
REMOVE REAR NO. 2 SEAT LOCK COVER RH
-
Remove the 2 screws and lock cover.
-
-
REMOVE REAR SEAT HINGE ASSEMBLY LH (for Slide Seat Type)
-
Remove the 2 nuts and hinge.
-
-
REMOVE REAR SEAT HINGE ASSEMBLY LH (for Non-slide Seat Type)
-
Using a T40 "TORX" socket, remove the 2 "TORX" bolts and hinge.
-
-
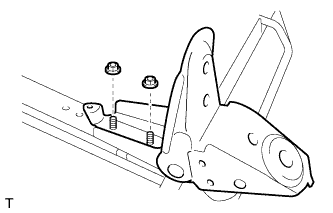
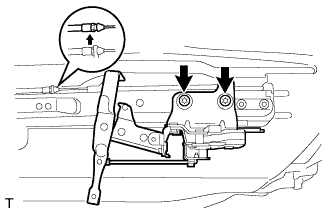
REMOVE REAR SEAT HINGE ASSEMBLY RH (for Slide Seat Type)
-
Remove the 2 nuts and hinge.
-
-
REMOVE REAR SEAT HINGE ASSEMBLY RH (for Non-slide Seat Type)
-
Using a T40 "TORX" socket, remove the 2 "TORX" bolts and hinge.
-
-
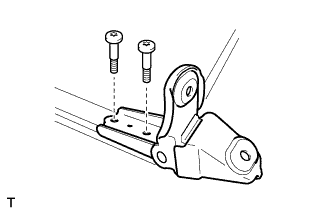
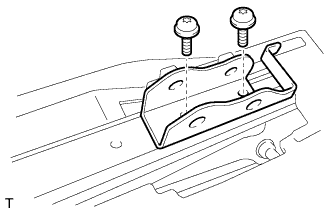
REMOVE REAR OUTER SEAT TRACK BRACKET RH (for Non-slide Seat Type)
-
Using a T40 "TORX" socket, remove the 2 "TORX" bolts and bracket.
-
-
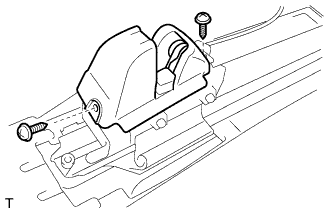
REMOVE REAR SEATBACK LOCK RELEASE BUTTON (for Slide Seat Type)
-
Using 2 clip removers, remove the 2 rear seatback lock release buttons from the reclining release handle sub-assembly.
Tech Tips
-
Tape the clip remover tip before use.
-
If a rear seatback lock release button is damaged, replace it with a new one.
-
-
-
REMOVE RECLINING RELEASE HANDLE SUB-ASSEMBLY (for Slide Seat Type)
-
Remove the release handle from the rear seat lock through the hole in the rear seat cushion under cover.
-
-
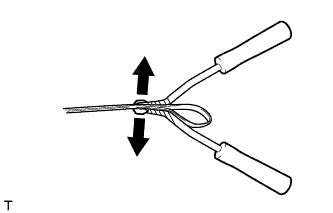
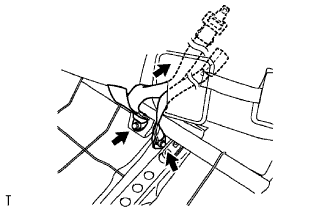
REMOVE REAR SEAT LOCK ASSEMBLY LH
-
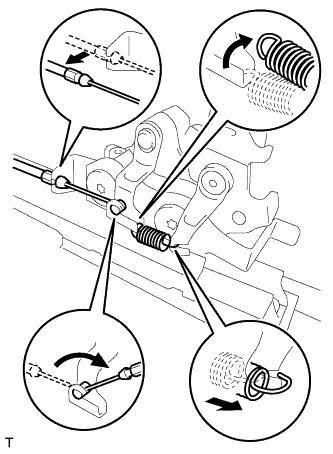
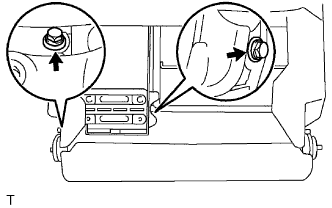
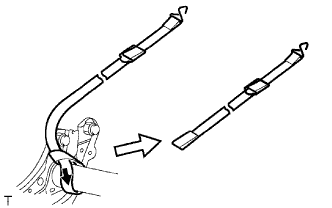
Using a screwdriver, remove the support spring and disconnect the lock control cable as shown in the illustration.
Tech Tips
Tape the screwdriver tip before use.
-
Using a T40 "TORX" socket, remove the 2 "TORX" bolts, plate and lock.
-
-
REMOVE REAR SEAT LOCK ASSEMBLY RH
-
Using a screwdriver, remove the support spring.
Tech Tips
Tape the screwdriver tip before use.
-
Disconnect the lock control cable from the seat track.
-
Using a T40 "TORX" socket, remove the 2 "TORX" bolts and lock (together with the lock control cable).
-
Remove the E-ring, plate and lock control cable from the lock.
-
-
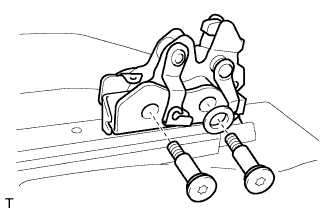
REMOVE REAR NO. 1 SEAT TRACK BRACKET (for Slide Seat Type)
-
Using a T40 "TORX" socket, remove the 2 "TORX" bolts and bracket.
-
-
REMOVE REAR NO. 1 SEAT CUSHION ASSEMBLY (for Slide Seat Type)
-
Lift the seat track adjusting handle and move the seat track to the foremost position.
-
Using a T40 "TORX" socket, remove the 4 "TORX" bolts.
-
Lift the seat track adjusting handle and move the seat track to the rearmost position.
-
Using a screwdriver, push down the handle stopper and detach the claws. Then remove the seat track adjusting handle.
-
Using a T40 "TORX" socket, remove the 2 "TORX" bolts and seat cushion from the 2 seat tracks.
-
-
REMOVE SEAT LEG SUB-ASSEMBLY LH (for Non-slide Seat Type)
-
Using a T40 "TORX" socket, remove the 2 "TORX" bolts and seat leg.
-
-
REMOVE SEAT LEG SUB-ASSEMBLY RH (for Non-slide Seat Type)
-
Using a T40 "TORX" socket, remove the 2 "TORX" bolts and seat leg.
-
-
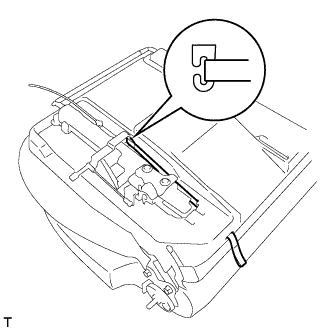
REMOVE REAR SEAT CUSHION UNDER COVER SUB-ASSEMBLY RH (w/ Slide)
-
Using a screwdriver, detach the 11 claws and hooks.
Tech Tips
Tape the screwdriver tip before use.
-
Remove the under cover from the seat cushion cover. Then fold back the seat cushion cover so that the 4 screws are visible.
-
Remove the 4 screws.
-
Detach the 2 claws and remove the under cover.
-
-
REMOVE REAR SEAT LAP TYPE BELT ASSEMBLY CENTER
-
Remove the bolt and lap type belt center through the hole in the seat cushion cover (with pad).
-
-
REMOVE REAR SEAT LAP TYPE BELT ASSEMBLY RH
-
Remove the bolt and lap type belt through the hole in the seat cushion cover (with pad).
-
-
REMOVE REAR NO. 1 SEAT CUSHION COVER
-
Remove the seat cushion cover (with pad) from the seat cushion frame.
-
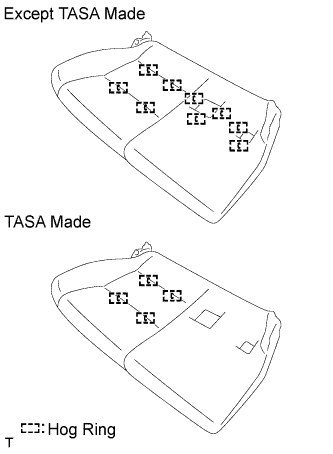
Except TASA made:
Remove the 9 hog rings and seat cushion cover from the seat cushion pad.
-
TASA made:
Remove the 4 hog rings and seat cushion cover from the seat cushion pad.
-
-
REMOVE NO. 1 FOLD SEAT STOPPER BAND ASSEMBLY
-
Pull the band in the direction indicated by the black arrow in the illustration. Then remove the band.
-