POWER OUTLET SOCKET REMOVAL

-
REMOVE SWITCH BASE
-
Detach the 8 claws.
Tech Tips
If the claws are difficult to detach, detach the claws from the back of the switch base.
-
Disconnect the connectors and remove the switch base.
-
-
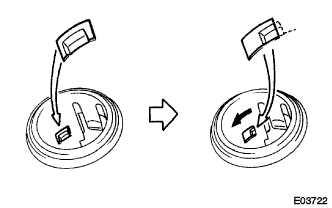
REMOVE NO. 1 POWER OUTLET SOCKET ASSEMBLY
-
Rotate the socket to disengage the power point socket cover's notch from the socket's hole.
-
Pull out the socket halfway.
-
Align the socket with the cover's grooves and remove the socket.
-
-
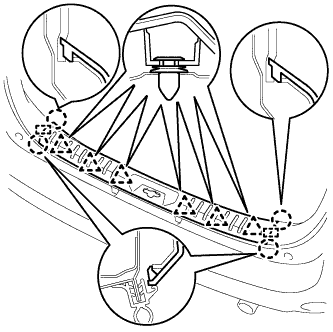
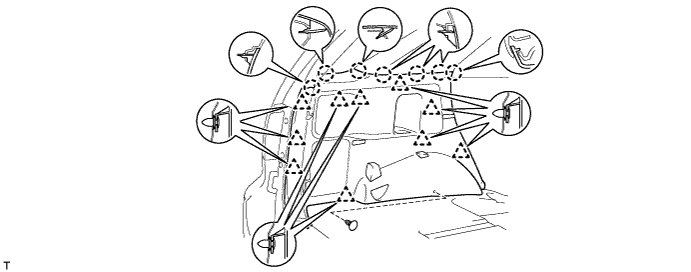
REMOVE BACK DOOR SCUFF PLATE
-
Detach the 4 claws, 2 guides and 6 clips and remove the back door scuff plate.
-
-
REMOVE REAR DOOR SCUFF PLATE LH
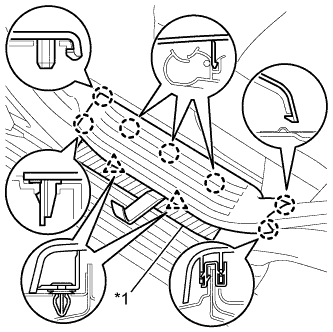
Text in Illustration *1 Protective Tape
-
Put protective tape around the rear door scuff plate.
-
Using a moulding remover, detach the 7 claws and 2 clips and remove the rear door scuff plate.
-
-
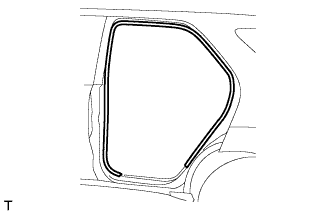
REMOVE REAR DOOR OPENING TRIM WEATHERSTRIP LH
-
Remove the rear door opening trim weatherstrip.
-
-
REMOVE QUARTER TRIM HOOK

Tech Tips
Use the same procedure for both quarter trim hooks.
-
Remove the screw and quarter trim hook.
-
-
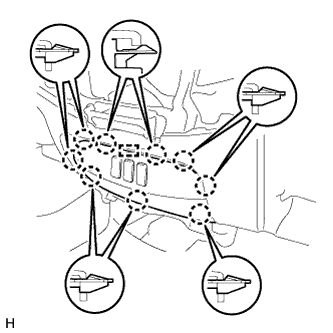
REMOVE QUARTER INSIDE TRIM BOARD LH
-
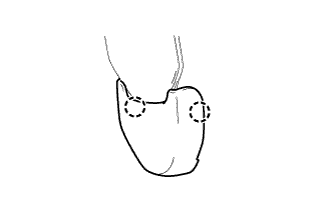
Detach the 2 claws and remove the outer lap belt anchor cover.
Tech Tips
Use the same procedure for both outer lap belt anchor covers.
-
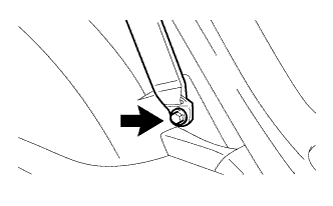
Remove the bolt and disconnect the rear No. 1 seat outer belt floor anchor.
-
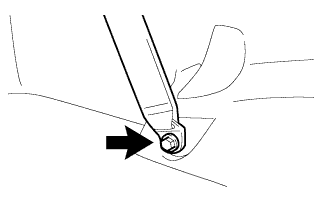
Remove the bolt and disconnect the rear No. 2 seat outer belt floor anchor.
-
Using a clip remover, remove the clip.
-
Detach the 7 claws and 10 clips.
-
Disconnect the power point socket connector and remove the quarter inside trim board.
-
-
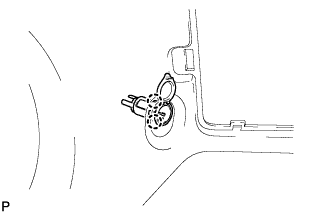
REMOVE REAR NO. 1 POWER OUTLET SOCKET ASSEMBLY
-
Detach the 2 claw fittings and remove the socket.
-