STEREO JACK ADAPTER ASSEMBLY INSTALLATION

-
INSTALL NO. 1 STEREO JACK ADAPTER ASSEMBLY
-
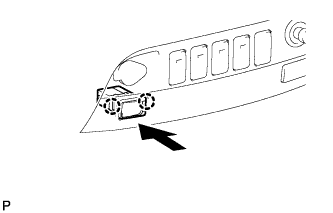
Attach the 2 claws to install the stereo jack adapter.
-
-
INSTALL SWITCH BASE
-
Connect the connectors.
-
Attach the 8 claws to install the switch base.
-
-
INSTALL LOWER INSTRUMENT PANEL FINISH PANEL SUB-ASSEMBLY
-
Attach the 3 guides, 2 claws and 3 clips to install the lower instrument panel finish panel.
-
-
INSTALL GLOVE COMPARTMENT DOOR ASSEMBLY
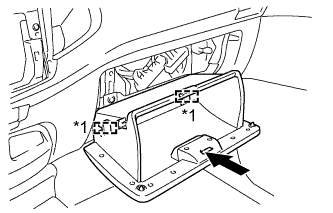
Text in Illustration *1 Hinge
-
Attach the 2 hinges to install the glove compartment door.
-
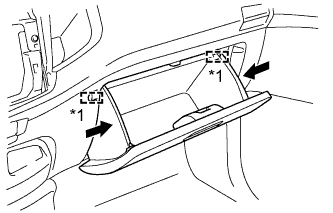
Text in Illustration *1 Stopper While pushing in the sides of the glove compartment door as indicated by the arrows in the illustration, close the door to engage it to the 2 stoppers.
-
-
CONNECT CABLE TO NEGATIVE BATTERY TERMINAL
Note
When disconnecting the cable, some systems need to be initialized after the cable is reconnected Click here.