FRONT DOOR SPEAKER INSTALLATION

Tech Tips
-
Use the same procedures for the RH side and LH side.
-
The procedures listed below are for the LH side.
-
INSTALL FRONT NO. 1 SPEAKER ASSEMBLY
-
Install a nose piece to an air riveter or hand riveter. Then insert the mandrel part of a new φ4 mm waterproof rivet into the nose piece.
-
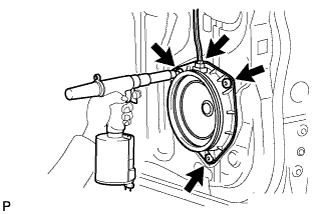
Using an air riveter or hand riveter, install the speaker with 3 new rivets.
Note
-
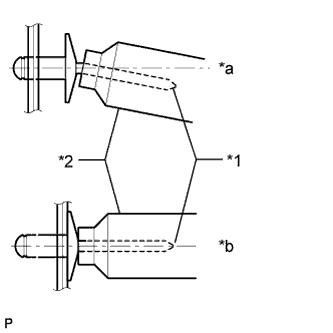
Do not pry the rivet with the riveter, as this will cause damage to the riveter and mandrel.
Text in Illustration *1 Mandrel *2 Riveter *a INCORRECT *b CORRECT -
Confirm that the rivets are seated properly against the speaker.
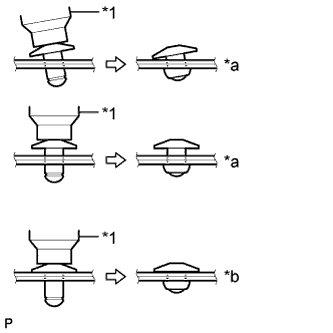
Text in Illustration *1 Riveter *a INCORRECT *b CORRECT -
Do not tilt the riveter when installing the rivet to the speaker.
-
Do not leave any space between the rivet head and speaker.
-
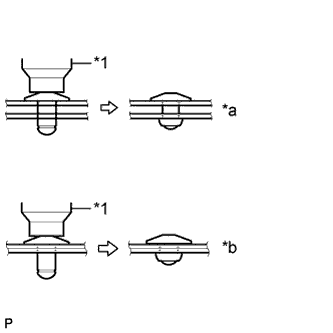
Do not leave any space between the speaker and door. Firmly hold together the 2 items while installing the rivet.
Text in Illustration *1 Riveter *a INCORRECT *b CORRECT
-
-
Connect the connector.
-
-
INSTALL FRONT DOOR TRIM BOARD SUB-ASSEMBLY LH
-
Attach the 8 clips to install the front door trim board.
-
Install the screw and clip.
-
-
INSTALL POWER WINDOW REGULATOR MASTER SWITCH ASSEMBLY WITH FRONT DOOR ARMREST BASE PANEL
-
Connect the connector.
-
Attach the 4 claws and 2 clips to install the power window regulator switch assembly with front door armrest base panel.
-
-
INSTALL DOOR PULL HANDLE
-
Install the door pull handle with the screw.
-
-
INSTALL FRONT NO. 2 SPEAKER ASSEMBLY
-
Install the front No. 2 speaker assembly with the screw.
-
Connect the connector.
-
-
INSTALL FRONT DOOR LOWER FRAME BRACKET GARNISH LH
-
Attach the 2 clips to install the front door lower frame bracket garnish.
-
-
CONNECT CABLE TO NEGATIVE BATTERY TERMINAL
Note
When disconnecting the cable, some systems need to be initialized after the cable is reconnected Click here.