FRONT WIPER MOTOR REMOVAL

-
DISCONNECT CABLE FROM NEGATIVE BATTERY TERMINAL
Note
When disconnecting the cable, some systems need to be initialized after the cable is reconnected Click here.
-
REMOVE FRONT WIPER ARM HEAD CAP
-
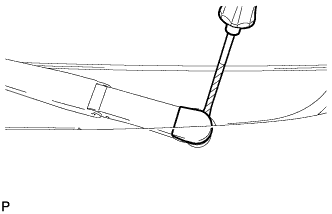
Using a screwdriver, remove the front wiper arm head cap.
Tech Tips
-
Tape the screwdriver tip before use.
-
Use the same procedure for both front wiper arm head caps.
-
-
-
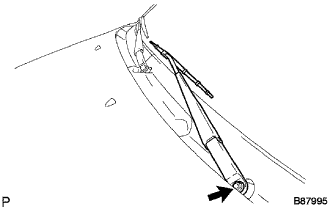
REMOVE FRONT WIPER ARM AND BLADE ASSEMBLY LH
-
Remove the nut and arm and blade.
-
-
REMOVE FRONT WIPER ARM AND BLADE ASSEMBLY RH
-
Remove the nut and arm and blade.
-
-
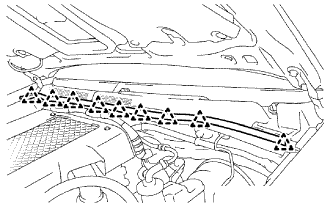
REMOVE HOOD TO COWL TOP SEAL
-
Detach the 9 clips and remove the seal.
-
-
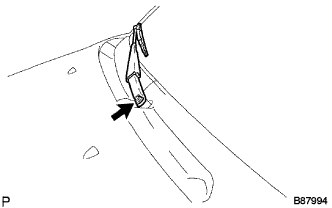
REMOVE COWL TOP VENTILATOR LOUVER RH
-
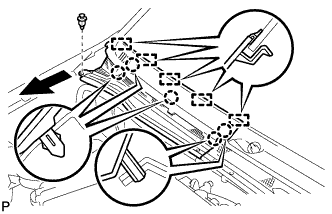
Remove the clip.
-
Detach the 5 claws and 5 guides, and remove the cowl top ventilator louver RH in the direction indicated by the arrow in the illustration.
-
-
REMOVE COWL TOP VENTILATOR LOUVER LH
-
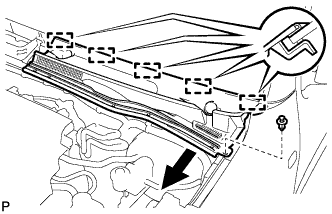
Remove the clip.
-
Detach the 5 guides, and remove the cowl top ventilator louver LH in the direction indicated by the arrow in the illustration.
-
-
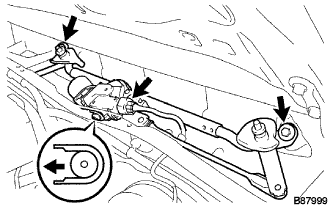
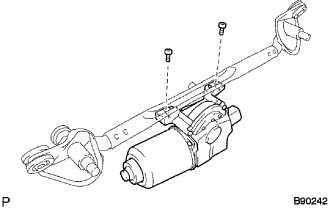
REMOVE WINDSHIELD WIPER MOTOR AND LINK ASSEMBLY
-
Disconnect the connector.
-
Remove the 2 bolts.
-
Move the wiper cushion in the direction shown by the arrow in the illustration to detach the wiper cushion from the body, and remove the wiper motor and link.
-
-
REMOVE WINDSHIELD WIPER MOTOR ASSEMBLY
-
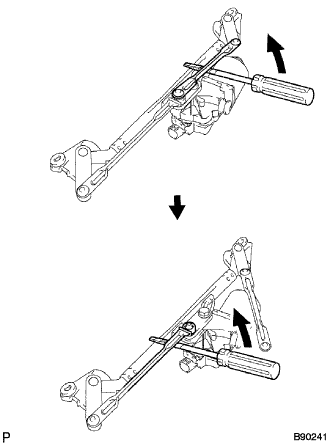
Using a screwdriver, disconnect the 2 rods of the wiper link from the wiper motor as shown in the illustration.
Tech Tips
Tape the screwdriver tip before use.
-
Using a T30 "TORX" socket, remove the 2 bolts and wiper motor.
-